My Kitchen Clatter

Real Food - Real Life

  • About Me
  • Classes
    • Upcoming Classes
    • Baking Classes
    • Pressure Cooking Classes
    • Fermentation Classes
    • Canning Classes
    • Kombucha Classes
  • Equipment
    • Nutrimill Plus Grain Mill
    • Nutrimill Classic Grain Mill
    • Nutrimill Harvest Grain Mill
    • Bosch Universal Mixer
    • Ankarsrum Original Assistant
    • Filter Pro Dehydrator
  • Grains & Supplies
  • Recipes
  • Clatter in the Kitchen

Müesli

April 4, 2022 by andrea Leave a Comment

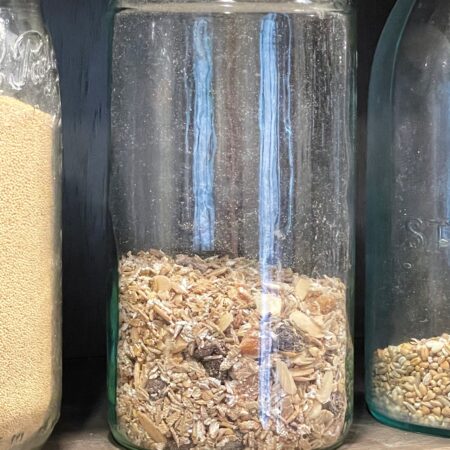
Müesli is a wonderful, healthy alternative to granola. And it’s even easier to make than granola, because no oven is involved. Unlike granola, müesli has no added fat or sugar to mess with the goodness of the whole grains, nuts and dried fruits.

For serving, I spoon about 1/2 a cup of müesli over homemade yogurt for my morning breakfast. Add a banana or some berries and you are really set to go for the morning.

And if you are into overnight oats, you can sub müesli for the rolled oats. Just place about 1/2 cup of müesli into a 2 cup mason jar, cover with milk or coconut water, add some yogurt and then top off with your favorite fruit (frozen blueberries are mine). Let sit in the fridge overnight (or two) and you’ve got breakfast ready for the morning.

This recipe really should be considered as a starting point. You can mix and match your grains, nuts, seeds and fruits as you wish. A good rule of thumb to start with is about 80% grains and 20% nuts and dried fruit, but feel free to play with that ratio. I’ve added some warm spices to the mix for a little extra depth of flavor, but they can be left out or played with as you like. Here are some ideas for the ingredients to get you started.

  • Grains: Rolled oats, wheat bran, whole rye, rye flakes, whole barley, sorghum flakes, quinoa flakes, millet puffs, millet flakes, buckwheat groats.
  • Nuts/seeds: Sliced almonds, walnuts, cashews, pecans, pistachios, hazelnuts, sunflower seeds, pepitas, chia seeds, poppy seeds, sesame seeds, unsweetened coconut flakes.
  • Dried fruit: Dried apricots, dried cherries, dried figs, raisins, golden raisins, currants, apple chips, dried blueberries.

Müesli

andrea
Müesli is a healthy, low-sugar alternative to granola. Use this recipe as a starting point to make your favorite combination of grains, nuts, and dried fruits. Serve with milk or yogurt.
Print Recipe Pin Recipe
Prep Time 5 mins
Cook Time 0 mins
Course Breakfast
Servings 12 1/2 cup

Ingredients
  

  • 1/4 cup buckwheat groats
  • 1 3/4 cups rye flakes or rolled oats 
  • 1/4 cup sliced almonds
  • 1/4 cup shelled pistachios, chopped
  • 2 tbsp shelled sunflower seeds
  • 1 tbsp flaxseed
  • 1/4 cup dried cherries
  • 1/4 cup dried apricots, small diced
  • 1/2 teaspoon ground cinnamon
  • 1/4 teaspoon ground cardamom
  • 1/8 teaspoon ground cloves
  • 1/8 teaspoon freshly grated nutmeg
  • 1/4 teaspoon kosher salt

Instructions
 

  • Combine all the ingredients in a large bowl and stir until well combined.  Store in an airtight container at room temperature for up to six months. 

To Serve

  • Serve 1/4 – 1/2 cup of muesli with an equal amount of yogurt or milk, a drizzle of honey, and fresh fruit like a sliced banana or berries. 
  • Müesli also works really well in overnight oats as a substitute for plain rolled oats. 
Keyword breakfast, easy, healthy, oats, whole grains

Filed Under: recipes Tagged With: easy, healthy, homemade, muesli, oatmeal, recipe, whole grain

Spaghetti & Meatballs – Instant Pot

February 3, 2022 by andrea Leave a Comment

Spaghetti and meatballs - five ingredients!

Let me introduce you to one of my absolute favorite go-to weeknight meals. I always have the ingredients for spaghetti in the pantry, but learning how to make spaghetti and meatballs in the pressure changer is so much simpler than the stovetop. I’ve had a recipe for Pasta and Meat Sauce on my site for a while, but I love incorporating the pasta into the cooking. This recipe is one that I pull out on nights where I really want to order carry-out, but I know it would be quicker to cook at home. If you’re looking for other ideas for quick week-night meals, we also love my recipes for Cheesy Chili Mac and Instant Pot Sloppy Joes.

A couple thoughts on this recipe. I save lots of time and energy by using frozen Italian meatballs from Costco. Find your favorite brand and just go with it. I usually dump in about a pound and a half of meatballs to feed the six of us. That’s thirty-six meatballs – yes, I count them – meatball fights are a real thing at our table. Feel free to adjust the meatball amount to what you need – the cooking time remains the same.

This really does seem to serve the six of us with a few leftovers. We typically add a salad and bread. If you want to use a whole package of spaghetti, you should add an extra cup of water and your sauce will be a bit thinner.

Instant Pot Spagetti & Meatballs

Serving Size:
serves 6
Time:
total time 30 minutes
Difficulty:
easy peasy

Ingredients

  • 1-2 lb frozen meatballs, homemade or frozen from a bag
  • 12 oz uncooked spaghetti noodles
  • 1 T olive oil
  • 32 oz pasta sauce
  • 3 cups water
  • parmesan cheese for serving

Directions

  1. Toss the meatballs into the bottom of your instant pot.
  2. Break the spaghetti noodles in half and scatter over top of the meatballs.
  3. Drizzle the olive oil on top of the spaghetti. Pour in the pasta sauce and water on top of the spaghetti. Add a little extra water if you need to make sure the spaghetti is covered with liquid. Don’t stir!
  4. Place the lid on the pressure cooker and set the time to 8 minutes. When the timer is up, release the pressure using a quick release method. Open the lid, stir, and serve.

Filed Under: recipes, Uncategorized Tagged With: dinner, easy, Instant Pot, pressure cooking

Barbecue Beef and Pasta in the Instant Pot

May 3, 2021 by andrea Leave a Comment

I will admit – this recipe for barbecue beef and pasta did not appeal to me the first time I came across it. However, I have come around to really like it. The recipe is easy, doesn’t require any fussy ingredients and it covers most of the food groups. If you really want to get crazy, you could add some green peas in at the end when you have the option of adding cheese. Personally, I serve the veggies on the side because peas would put it over the top for my kids!

Instant Pot Barbecue Beef & Pasta

Serving Size:
6
Time:
25 minutes
Difficulty:
easy

Ingredients

  • 2 T vegetable oil
  • 1 yellow onion, chopped (about 1 cup)
  • 1 medium bell pepper, stemmed, cored, and chopped
  • 1 pound lean ground beef
  • 2 cups beef or chicken broth
  • 1 1/4 cups barbecue sauce
  • 8 ounces dried rigatoni
  • 1 cup shredded cheddar cheese (optional)

Directions

  1. With the insert in the electric pressure cooker, turn the pot to saute on medium heat. Add the oil and allow to heat for a minute. Add the onion and bell pepper and cook, stirring often, until the onion has softened – about 4-5 minutes. The onion should not brown. Add ground beef and cook, stirring to break up any chunks. The meat should be lightly browned, but doesn’t need to cook through. Drain any fat from the pot, if necessary.
  2. Pour about 1/4 cup of the broth into the pot and scrape the bottom of the pot to loosen any browned bits off the bottom of the pot. Turn off the saute setting. Pour in the remaining broth, barbecue sauce and pasta. Stir.
  3. Lock the lid on the pot. Cook at high pressure for 7 minutes.
  4. Use the quick-release method to bring the pot’s pressure back to normal. 
  5. Unlatch the lid and open the pot. If you are adding cheese, stir cheese into the pot and set the lid askew on the pot for 5 minutes to allow the cheese to melt. Stir well before serving. 

Filed Under: recipes Tagged With: easy

Air Fried Potato Wedges

April 23, 2021 by andrea Leave a Comment

These air fried potatoes are so simple – they make for an easy beginner recipe using an air fryer. Added bonus – the kids like them. I have taught this recipe several times now as one of my library courses. The recipe lets me focus on the features of the air fryer, and sometimes, I think I forget about how great the actual fries are.

Russet potatoes are great for these fries. The outside gets nice and crisp while the inside gets kind of melty. If you don’t have russets around, try it with whatever potatoes you have. I’d love to hear your findings on different potato types.

If you do not have an air fryer, you can cook the potatoes in a 400 F oven (use the convection setting, if you have it). They don’t get as crispy in the oven, but it will still work.

Air Fried Potato Wedges

Serving Size:
2-3
Time:
20 min
Difficulty:
easy

Ingredients

  • 2 medium russet potatoes, scrubbed
  • 1 1/2 Tablespoons olive oil
  • 1/2 teaspoon paprika 
  • 1/4 teaspoon garlic powder
  • 1/8 teaspoon cayenne pepper (optional)
  • 1 teaspoon fine salt
  • 1/4 teaspoon ground black pepper

To Serve (optional)

  • 1/2 cup parmesan cheese
  • 1 Tablespoon chopped parsley (or 1 teaspoon dried)
  • ketchup or ranch for dipping

Directions

  1. Slice the potatoes in half lengthwise. Then put the cut side down and slice in half lengthwise again to make quarters. Place each potato quarter cut side up and create wedges along the long length. 
  2. In a large bowl, combine olive oil, paprika, garlic powder, cayenne pepper, salt and black pepper. Add the potato wedges and toss to coat the potatoes with oil & seasoning. 
  3. Place wedges in the basket of the air fryer in one layer. and cook for 12-15 minutes at 400F. No need to preheat the air fryer. Shake the basket and check for browning every 5 minutes.  Depending on the size of your air fryer, you may need to make two batches. 
  4. While potatoes are cooking, combine grated parmesan cheese and parsley. 
  5. When potatoes are golden brown and crispy, remove from air fryer and toss with the parmesan and parsley. 
  6. Serve with ketchup or whatever dipping sauce you prefer.

Filed Under: recipes Tagged With: air fryer, easy, potato, quick

Instant Pot – Cheesy Chili Mac

April 19, 2021 by andrea Leave a Comment

This recipe for cheesy chili mac is another great one for a quick weeknight meal. The pasta cooks perfectly and soaks up all the great flavors of the chili. Plus the cheese on top really adds a nice touch.

This recipe is one that I use to teach the beauty of pressure cooked beans. If you aren’t a bean person, then you can leave them out of the recipe. I give two ways to approach the beans in this recipe. The first is to just use a can of beans, and this is definitely a bit quicker and easier. The second approach gives directions to use dried beans instead of canned beans. For dried beans, you will need to clean and soak 1 cup of beans about 8-12 hours ahead of cooking. Your cooking time will be slightly longer using dried beans.

About cooking pasta in the instant pot – pasta tends to continue absorbing water as long as it is in liquid. If made as written, you may want to eat it pretty quickly after cooking. You can expect that the leftovers may have soggy pasta. I recommend trying the recipe once to see how you like the pasta. If you are averse to pasta cooked in this manner, you can cook the pasta separately from the rest of the meal and stir it into the chili before serving. 

Instant Pot – Cheesy Chili Mac

Serving Size:
6
Time:
7-14 minutes cook time
30 minutes total
Difficulty:
medium

Ingredients

  • 2 T olive oil
  • 1 medium yellow onion, chopped (about 1 cup)
  • 2 – 4 1/2 ounce cans mild or hot chopped green chiles (1 cup)
  • 1 medium garlic clove, peeled and minced (1 teaspoon)
  • 1 1/2 pounds lean ground beef
  • 1/2 cup chile powder (adjust to taste – if it is spicy powder, use less)
  • 2 t ground cumin
  • 1/2 t table salt
  • 2 cups beef or chicken broth
  • 28 ounces crushed tomatoes (canned is fine)
  • 15 ounce can of kidney beans, drained and rinsed (1 3/4 cups) or one cup of soaked, dried kidney beans
  • 8 ounce dried ziti
  • 4 ounce shredded cheddar (1 cup)

Directions

  1. With the insert in the electric pressure cooker, turn the cooker to medium heat on Saute setting and allow to warm up 1-2 minutes. Add the olive oil and onion and cook, stirring often, until the onion begins to soften, about 3-4 minutes. The onion should not brown. Add the chilis and garlic and continue cooking until the liquid has mostly evaporated, about 2 more minutes. 
  2. Add the ground beef to the the pot. Cook, stirring often to break up the meat. Cook 3-4 minutes until the meat is no longer pink. Add the chili powder, cumin and salt, stir, and allow to toast the spices for about 30 seconds.
  3. Add the broth to the pot and stir to scrape the bottom of the pan and loosed all of the browned bits off of the bottom of the pan. This step is important so that the pot does not default to the burn warning later in the cooking process. Once the pot bottom is cleaned, turn off the pot.
  4. Stir in the tomatoes and beans. If you are using canned kidney beans, add the pasta also at this point. Lock the lid on the pot.
  5. Cook at high pressure for 7 minutes.
  6. Use the quick-release method to bring the pot’s pressure back to normal.
  7. If you used dried, soaked kidney beans, unlatch the lid, open the pot and stir in the pasta. Replace the lid and cook for another 7 minutes. This approach allows your beans and pasta to cook perfectly.
  8. Unlatch the lid and open the pot, stir in the cheddar cheese. Set the lid back on the pot for 5 minutes to melt the cheese and mellow the flavors. Stir again before serving. 

Filed Under: recipes Tagged With: bean, easy, Instant Pot, pressure cooking

Instant Pot Chicken Tacos

April 13, 2021 by andrea Leave a Comment

This is a super quick way to get dinner on the table. Only four ingredients and you basically dump everything into your instant pot.

If you are like me and enjoy rice with your tacos, I’m also sharing a trick of cooking the rice at the same time as the taco meat. You will basically put the rice and its water into a separate bowl and set it on top of the chicken. Then the two will cook at the same time. If you have a rack that sits nicely over top of the chicken without hitting the bottom of the lid, use it. But if your rack doesn’t sit nicely (and it probably won’t), it can seem a little awkward to plop the bowl of uncooked rice on top of the chicken. Never fear. It will work. Just put the bowl of rice on the chicken, however you can make it work. Be forewarned, the rice will likely pick up a little of the color and flavor of the tacos. Not a problem in our house, but if you are looking for perfectly plain, white rice – don’t follow this method.

This cooks so quickly that you may find it takes you longer to prep your toppings. Hey. There are worse things in the world. Just let the pressure cooker go into the the warm setting and open it just before you are ready to eat.

Instant Pot Chicken Tacos

Serving Size:
4-6
Time:
25 minutes total
Difficulty:
easy

Ingredients

  • 1-2 pounds of chicken breasts
  • 1 cup of chicken broth (or water)
  • 1 cup of your favorite salsa (I like salsa verde)
  • 2-3 T of taco seasoning (adjust to taste)

Ingredients – Rice (Optional)

  • 1 cup of your favorite rice – white, brown, long or short, doesn’t matter
  • 1 1/4 cup of water (add 1/4 cup of water for brown rice)

Directions

  1. Add chicken, broth, salsa, and taco seasoning to the insert pot of your instant pot. Stir.
  2. If you are making rice, rinse the rice. Combine the rinsed rice and water in a 4 or 6-cup oven safe bowl (such as a pyrex dish). If you have a rack, place it on top of the chicken and set the rice dish on the rack. If your rack doesn’t fit, you can wiggle the chicken around to set the rack in the pot or you can set the rack on the chicken, or you can just set the rice bowl directly on top of the chicken.
  3. Lock the lid on the pressure cooker. Set the cooker to high pressure and cook for 12 minutes. Allow the pressure to release naturally for 10 minutes and then release the remaining pressure manually.
  4. Using oven mitts, remove the bowl of rice. Using tongs, place the chicken onto a cutting board and allow to cool for a couple minutes. You can use two forks to easily shred the chicken for tacos. If you made extra chicken, you can make short work of the shredding by placing the chicken breasts in your mixer bowl and use either the dough hook (Bosch mixer) or the cookie paddle (Kitchen Aid) give a few pulses and let the machine do the work for you.
  5. Serve shredded taco meat with your favorite shells, tortillas, and taco toppings.
  6. A quick note on the extra liquid in the pot. You can (and should) add some of it to the shredded chicken so you have nice moist taco meat. But, you may have some extra left over. Before you toss it, consider saving it for a second meal. If you have leftover chicken, add it back into the cooking liquid the next day for a chicken taco soup. Serve over tortilla chips with a little cheese and sour cream on the top.

Filed Under: recipes Tagged With: easy, homemade, Instant Pot, pressure cooking

Instant Pot Sloppy Joes

April 6, 2021 by andrea 2 Comments

This is such a quick and easy way to make sloppy Joes. The stovetop version of this recipe would require about 30 minutes of simmer time – in the pressure cooker, you set the cook time for 5 minutes on high pressure. Then you can sit back and let the pressure cooker do the rest of the work – no stirring necessary. And since this recipe uses the quick pressure release method, there is little added time at the end of cooking. Start to finish, this recipe will take about 30 minutes total.

After the mixture is cooked and the lid is removed, you may need to simmer it for a few minutes to help it thicken. If you have a little extra time, just put the lid back on and let it rest with no extra heat – it will thicken up on it’s own.

I’ve also given an option to substitute some of the meat with whole grains. I will admit, I love the addition of quinoa to the meat – however, it was not a hit with my kids. Back to the basics for our family.

I like to serve these on homemade burger buns. Brioche buns, pretzel buns, or a lovely whole grain burger buns would all be perfect for these.

Instant Pot Sloppy Joes

Serving Size:
6-8
Time:
30 min total
Difficulty:
Easy

Ingredients

  • 2 T Olive oil
  • 1 Medium yellow onion, chopped (about 1 cup)
  • 1 Large red or orange bell pepper, stemmed, cored, and chopped (about 1 cup)
  • 2 Celery ribs, thinly sliced (1/2 cup)
  • 2 Medium garlic cloves, peeled and minced (2 teaspoons)
  • 1 1/2 lbs Ground beef, lean*
  • 1 T Standard chili powder
  • 1 t  Smoked paprika, optional
  • 1 cup Beef or chicken broth
  • 1/2 cup Catsup
  • 1 T Yellow mustard
  • 1 T Brown sugar or molasses
  • 2 t  Apple cider vinegar
  • 1/2 t  Table salt

For Serving

  • 6-8 hamburger buns
  • Pickles or other toppings

* See notes for adding whole grains to the recipe. 

Directions

  1. With the insert in the electric pressure cooker, turn the cooker to medium heat on Saute setting and allow to warm up 1-2 minutes. Add the olive oil and let warm up about a minutes. Add onion, bell pepper, and celery and cook, stirring often, until the onion begins to soften, about 3-4 minutes. The onion should not brown. Add the garlic and continue cooking about 1 more minute. 
  2. Add the ground beef to the the pot. Cook, stirring often to break up the meat. Cook 3-4 minutes until the meat is no longer pink. The meat does not need to be fully cooked, but if it has a higher percentage of fat, it should be cooked enough for most of the fat to cook off. If the meat has fat cooking off, drain the fat off of the meat. Add the chili powder, stir, and allow to toast the spices for about 30 seconds.
  3. Add the broth to the pot and stir to scrape the bottom of the pan and loosen all of the browned bits off of the bottom of the pan. This step is important so that the pot does not default to the burn warning later in the cooking process. Once the pot bottom is cleaned, turn off the pot.
  4. Stir in the catsup, yellow mustard, brown sugar, apple cider vinegar, and salt. Lock the lid on the pot.
  5. Cook at high pressure for 5 minutes.
  6. Use the quick-release method to bring the pot’s pressure back to normal. Unlatch the lid and open the pot. Turn the sauté setting on bring the mixture to a low simmer. Cook, stirring often, until it has thickened and is not as soupy – about 7 minutes.


Recipe notes:

  1. If you’d like to add some whole grains to your recipe, you can reduce the meat to 1 pound and add add 1/2 cup of rolled oats, or 3/4 cup of rinsed quinoa (or a combination of the two) when you stir in the catsup. This may also allow you to to skip the simmering step at the end, as the grains will help to absorb the extra liquid at the end. 

Filed Under: recipes Tagged With: easy, pressure cooking

Double Chocolate Peanut Butter Banana Muffins

October 26, 2020 by andrea Leave a Comment

I’m excited about this recipe. This is a case where I had a pretty good recipe that I had no plans to improve upon, but a missing ingredient forced a substitution. After crossing my fingers and making a change, I’m pretty sure the change may end up being permenant.

My go-to double chocolate muffins are a take on the Chocolate Ricotta Muffin from Mollie Katzen’s Sunlight Cafe cookbook. Today I had a child requesting his favorite after-school snack of chocolate muffins, but I was out of ricotta but . Soooo… after unsuccessfully searching my freezer for that hidden ball of ricotta (it’s still in there somewhere, I know), I decided I’d better make do with things I have on hand. Two brown bananas were calling me to take them out of their misery. Add some peanut butter and I was ready to give a new recipe a try.

I keep the sugar pretty low on this recipe and I also use freshly ground, soft, white, whole wheat flour. The peanut butter also helps bump up the protein. I used natural peanut butter, but if your peanut butter has added sugar, you can reduce the granulated sugar by a couple teaspoons. And, as always, if you don’t have good whole flour around, just substitute it with white flour. You won’t get the fiber and flavor from the whole wheat flour, but it will taste better than most store bought whole wheat flours.

All in all, I think these are a pretty healthy snack for the kids. The recipe makes about 18 regular sized muffins. If you don’t eat them all right away, you can freeze any extras so the kids can grab them out whenever they want.

Enjoy!

Double Chocolate Peanut Butter Banana Muffins
Cuisine: snacks
Author: Andrea
Prep time: 10 mins
Cook time: 20 mins
Total time: 30 mins
Serves: 18
My kids love the chocolatey flavor and I love that these muffins are low in sugar and high in protein and fiber from the peanut butter and whole wheat flour.
Ingredients
  • 2 1/3 cups (10.4 oz) freshly ground, soft white wheat flour (or substitute with white flour)
  • 3/4 t salt
  • 2 t baking powder
  • 6 T unsweetened cocoa (I use Dutch process cocoa)
  • 1/2 c granulated sugar
  • 1 cup semisweet chocolate chips
  • 2 soft, brown bananas
  • 1/2 cup of natural peanut butter
  • 2 large eggs
  • 1 1/3 cups milk
  • 1 T vanilla extract
  • 4 T (1/2 stick) unsalted butter, melted
Instructions
  1. Preheat the oven to 350 degrees F. Lightly spray 18 standard (2 1/2-inch-diameter) muffin cups with non-stick spray.
  2. Combine the flour, salt, baking powder, cocoa, sugar, and chocolate chips in a medium-sized bowl.
  3. Place the bananas in a separate bowl and mash. I use a potato masher to mash them. Add the peanut butter and stir. Then add each egg, one at a time, and combine with a whisk after each addition. Add the milk and vanilla, and whisk until blended. Add the butter, and whisk again.
  4. Pour the banana – peanut butter mixture into the dry ingredients and fold with a rubber spatula until just combined and the dry ingredients are moistened. Don’t overtax – a few lumps are okay.
  5. Use a large spoon or a scoop and scoop the batter into the prepared muffin cups. I usually like smaller muffins, so I fill them up about 3/4 full. You can fill to the top for larger muffins.
  6. Bake in the middle of the oven for 20 to 25 minutes until they are pulling away from the edge of the tin and the tops don’t collapse if you lightly press the top with a finger. You can also use the toothpick test to check doneness, but this is sometimes a tough check because of the chocolate chips. (A toothpick inserted in the center should come out clean).
  7. When the muffins are done, remove the pan from the oven and allow to cool 3-5 minutes. Use a knife of spatula to remove the muffins from the pan and place on a rack to cool.
3.5.3251

Filed Under: recipes Tagged With: chocolate, easy, healthy, peanut butter, snack, soft whole wheat, whole grain

Pumpkin Butter Recipe

September 14, 2020 by andrea Leave a Comment

Pumpkin butter is one of my favorite things to do with pumpkin during “the pumpkin season”. I love it on my waffles in the morning with pecans and maple syrup. I was searching for my recipe this year and realized that I haven’t shared it with the world. So here we are.

If you’d like to make this a little more challenging, you can make this with homemade puree. Here’s how to make your own, but really you can do this with canned pumpkin and it will turn out lovely. No one will know the difference and they will still be amazed that you pulled off making your own pumpkin butter. You don’t have to tell them how easy it was to make.

One more note, this recipe should not be canned. The butter gets too thick for water bath canning to heat it through safely. I just jar mine up and freeze the jars with lids on them. The toughest part is remembering to pull it out of the fridge to thaw before you want to use it – but a couple seconds in the microwave does the trick also.

Pumpkin Butter Recipe
Recipe Type: preserving
Author: Andrea
Prep time: 10 mins
Cook time: 20 mins
Total time: 30 mins
This is a classic fall preserve. It is great on oatmeal or on waffles.
Ingredients
  • 2 cups of pumpkin puree (canned or homemade)
  • 1/4 cup of brown sugar
  • 1/4 cup of maple syrup
  • 1 t molasses
  • 1 t cinnamon
  • 1/2 t ginger
  • 1/4 t cloves
  • 1/4 t nutmeg, ground
  • 3/4 cup of apple cider
Instructions
  1. Combine all ingredients in a saucepan.
  2. Bring to boil, reduce heat to a simmer.
  3. Stir often and let simmer for about 20 minutes until the butter is thick and shiny. It should mound up on a spoon.
  4. Transfer into clean jars.
  5. The jars can be refrigerated for a couple of weeks or frozen for a few months. If freezing, leave a little extra space at the top for expansion
3.5.3251

Filed Under: recipes Tagged With: easy, fall, preserving, pumpkin butter, waffles

Flatbread Crackers

April 6, 2020 by andrea Leave a Comment

Crackers for Lent and Other Times

We are heading into lent while under coronavirus lockdown. My church (yes, Raechel – you represent the ENTIRE church) has asked me to teach the congregation how to make their own bread for our virtual Maundy Thursday service. Somewhere there is a very strange video of me making these crackers – I hope everyone who sees it gets a good laugh. It seemed like crackers would be a natural fit – they are quick, relatively easy, and taste great.

Homemade crackers are a special sort of thing in our house – they honestly don’t happen very often. Under normal circumstances, we totally support whoever makes Triskets and Wheat Things.  But we aren’t under normal circumstances, and these crackers are kind of nice to make when you have a little extra time and want something special. If you are making them for this Thursday’s service, I hope you find some extra love in your heart knowing that a few other people may be doing the same thing.

Some Cracker Tips

  • Make them your own – these crackers are not meant to be perfect. If you don’t have an ingredient – substitute and use whatever you have around the kitchen. No olive oil? Melted butter or canola oil will be fine. No rolling pin? Use a wine bottle, you get the idea.
  • You can use any kind of flour you have around. Whole wheat flour works great. Throw a couple tablespoons of rye in there if you have it.
    • I’ll even attempt to give a gluten free alternative: substitute the white flour with a gluten free flour mix – if you have xanthin gum around, add 1/2 t if it isn’t already in your flour mix. Instead of kneading the dough, you’ll add just enough water to pat the dough into a ball with your hands. You probably won’t be able to knead your dough. And you may need to roll your dough between parchment paper.
  • Don’t be intimidated by kneading the bread dough. If you have never kneaded dough before, all you have to do is gather the dough into a ball, take the end of the ball that is farther from you, pull it over the dough, and gently push with the heel of your hand, then give the ball a quarter of a turn and repeat. In this recipe, the point of the kneading is simply to give the dough a better elasticity and cohesiveness.  If you are still nervous about kneading, check out this video.
  • I wrote this recipe based on doing the mixing and kneading by hand. This works well for this dough, but if you have a mixer or food processor, you can adapt the recipe to your tools.
  • You may find that your dough shrinks back when you roll it out. In this case, the gluten needs to relax a bit – so let the dough rest a few minutes longer.
  • If you wonder if your dough is rolled thin enough, then it probably isn’t thin enough. If you have a few holes from being rolled too thin, that’s okay. Think of these crackers as rustic.
  • I like to cut the dough into long strips before I bake it. The strips can be as thin or thick as you like. The strips allow the centers to get crispy without the edges getting too brown. I also like how the crackers break from the strips, they have a little consistency of width, but still have some rough edges. However, if you don’t want to cut the dough, you can cook the rolled dough in one big piece and see what you think. On the other end of the spectrum, if you want more consistently shaped and browned crackers, you can cut them all into even squares – just be aware that moving the crackers from the cutting board to the baking sheet can be time consuming. The easiest way to do this is by rolling and cutting the crackers on parchment and then moving the parchment and crackers to the baking tray in one big motion.
  • Finally, for the sourdough lovers out there, use 200 grams of sourdough starter (unfed is fine), and reduce your flour down to about 1 cup plus 2 T (132 grams). I’m assuming your starter is at 100% hydration, meaning for every gram of flour you feed it one gram of water. I suppose that making these with sourdough starter technically no longer makes these flatbread crackers. You can keep this in mind, if you are really looking for unleavened bread for lent.


Flatbread Crackers
Author: Andrea
Prep time: 15 mins
Cook time: 9 mins
Total time: 24 mins
Ingredients
  • 1 1/2 cup flour (use your favorite – I like 1 cup of white, 1/2 cup of whole wheat, but add in 2 T of rye for fun)
  • 2 t fresh herbs or 1/2 t dried herbs (rosemary, thyme, herbs de Provence)
  • 1/2 – 1 t coarsely ground black pepper
  • 1-3 t seeds (optional – sesame seeds, poppy seeds, sunflower seeds)
  • 1/2 c, finely shredded Parmesan (optional)
  • 3/4 t fine salt
  • 1 t sugar
  • 2 T olive oil
  • 1/2 c cold water
  • Optional Toppings
  • sesame seeds
  • poppy seeds
  • garlic flakes
  • course sea salt
  • seed mix (such as Everything Bagel seasoning)
Instructions
  1. Preheat the oven to 450 degrees
  2. Combine the flour, herbs, black pepper, seeds, cheese (if using) salt, and sugar in a large bowl. Stir with a spoon to combine.
  3. Add oil to bowl and stir.
  4. Add all but 2 T of water to bowl to combine. Add remaining water 1 T at a time until the dough just forms a shaggy ball.
  5. Turn the dough out onto a floured surface and knead for 2-4 minutes until it is smooth. Add flour just so the dough doesn’t stick to your hands.
  6. Let the dough rest, covered with a towel, on the counter or in the bowl for 10 minutes.
  7. Divide the dough into 4 smaller balls.
  8. One at a time, roll each ball as thin as possible. If the dough shrinks back as you roll it, then allow to rest a few more minutes before continuing to roll it out.
  9. If you are adding a topping, sprinkle the topping on the dough and use the rolling pin to lightly roll the topping in place.
  10. Using a fork, poke the dough all over to prevent large air bubbles from forming.
  11. Cut the dough into 3-4 strips, place strips onto a baking sheet, and bake for 4 minutes. At four minutes, check the crackers, you can turn the strips over at this point to help them crisp or just leave them to cook on the first side. Either way, check every 2 minutes until they are crispy and lightly browned.
  12. When the cracker strips are crisp and slightly golden on the edges, remove from oven and allow to cool on a rack.
  13. Repeat rolling and baking process with remaining dough.
  14. Snap into smaller pieces.
3.5.3251


Filed Under: recipes Tagged With: crackers, easy, flatbread, lent, rustic, sourdough, whole wheat

  • 1
  • 2
  • Next Page »

Posts

  • Clatter in the Kitchen
  • recipes
  • Uncategorized

Recent Comments

  • Pam on (Sourdough Optional) Carrot Muffins
  • andrea on Cinnamon Rolls – Tangzhong method
  • Helen Lazzaro on Cinnamon Rolls – Tangzhong method
  • andrea on Hot Cross Buns
  • Susan Toth on Hot Cross Buns
  • Facebook

Copyright © 2023 · Foodie Child Theme by Shay Bocks · Built on the Genesis Framework · Powered by WordPress