My Kitchen Clatter

Real Food - Real Life

  • About Me
  • Classes
    • Upcoming Classes
    • Baking Classes
    • Pressure Cooking Classes
    • Fermentation Classes
    • Canning Classes
    • Kombucha Classes
  • Equipment
    • Nutrimill Plus Grain Mill
    • Nutrimill Classic Grain Mill
    • Nutrimill Harvest Grain Mill
    • Bosch Universal Mixer
    • Ankarsrum Original Assistant
    • Filter Pro Dehydrator
  • Grains & Supplies
  • Recipes
  • Clatter in the Kitchen

Hot Chocolate

December 30, 2017 by andrea Leave a Comment

Hot Chocolate
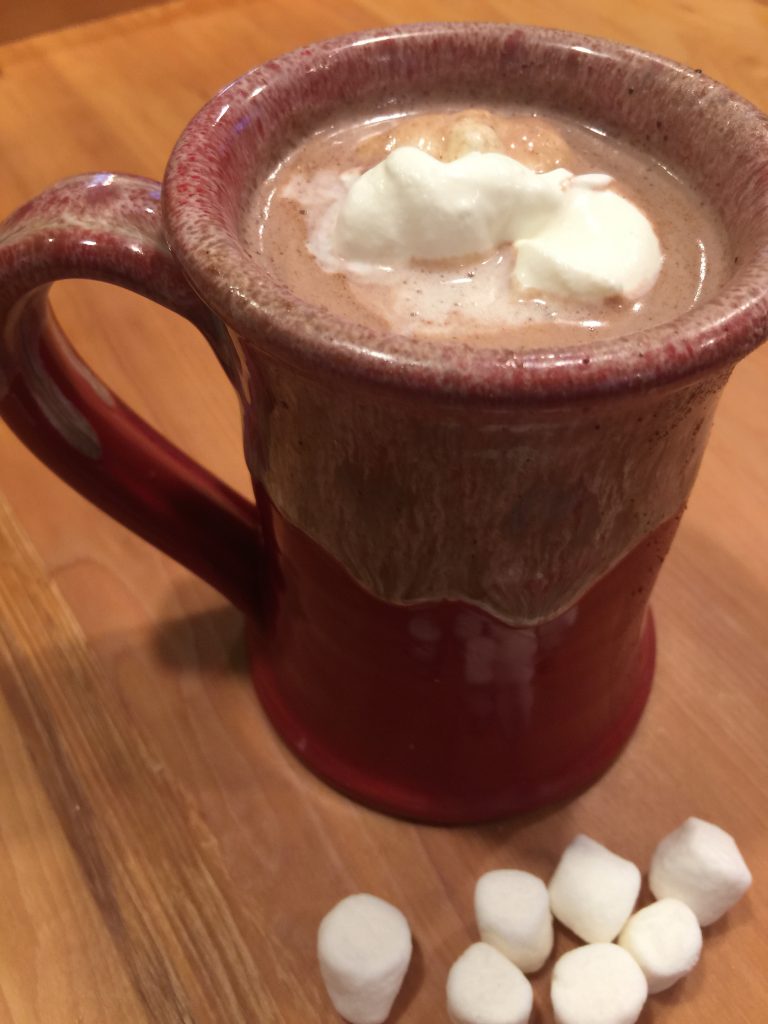
I have been trying to make a good cup of homemade hot chocolate for a while now. Most of the premade hot cocoa mixes have ingredients that I don’t recognize (even some of the really expensive mixes). And when I find a mix that has ingredients I recognize, I keep finding myself thinking that I should be able to make it at home and with less sugar. So after many iterations, my family and I have finally settled on this recipe. The kids and I did a lot of tastetesting to get to this point – it’s a rough job, but in this case, the kids were champs in helping out.

Hot Chocolate
Author: Andrea
Cook time: 10 mins
Total time: 10 mins
Serves: 5 cups
This makes about 5 cups of cocoa. You decide how many that serves! I also use a pretty minimum amount of sugar – I recommend starting there and adding a little more as you need. I’ve seen recipes that use up to four times as much as this, but it seems unnecessary to me.
Ingredients
  • 1/3 cup of half and half, heavy cream, or whole milk
  • 1/4 cup of brown sugar
  • 1/3 cup of cocoa powder
  • 4 cups of milk (use whole, if you have it)
  • 1/2 -1 t of cinnamon (optional)
  • 1/4 t of nutmeg (freshly grated, if you have it) (optional)
  • 1 t of vanilla
  • mini marshmallows, for serving (optional)
  • whipped cream, for serving (optional)
Instructions
  1. Heat the 1/3 cup of half and half with brown sugar in a small sauce pan set over low heat. Heat and stir just until the sugar disolves
  2. Add cocoa powder and 4 cups of milk. Heat and stir with a whisk until just warm enough for drinking.
  3. Stir in cinnamon, nutmeg and vanilla just before serving.
  4. Add marshmallows and whipped cream at serving time.
3.5.3208


Filed Under: recipes Tagged With: drink, hot chocolate, recipe

Peanut Butter & Pumpkin Dog Treats

February 1, 2017 by andrea Leave a Comment

peanut butter pumpkin dog treats
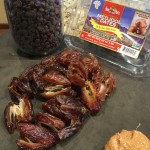
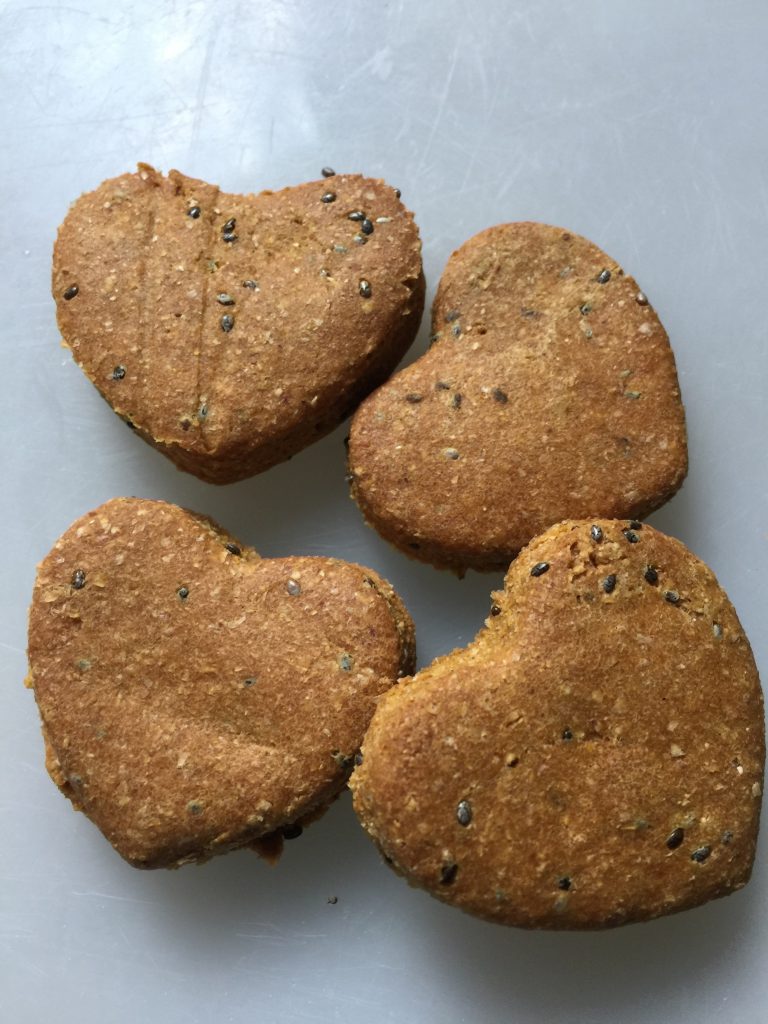
Why shouldn’t the furry members of our family eat as well as the rest of us? We recently added a new dog to our family and we did the standard purchasing of new toys and treats for him. But as I was looking at the fancy, locally made dog treats, I realized that I could make these myself and for a lot cheaper. Plus, no preservatives or anything funny going on here. The pumpkin and peanut butter are healthy for your dog and he’s going to love them.

These are actually pretty easy to make. Don’t be intimidated by rolling them out and using cookie cutters to make cute shapes. They roll out lots easier than people cookies, because they don’t have any fat in them. BUT, if you just can’t do the rolling out, you can roll the dough into a log and slice them to make round cookies. You can also make balls and smoosh them with the palm of your hand. There are lots of options here.

Because of the lack of preservatives, these will only keep on the counter for about 3-5 days. I store mine in a baggie in the freezer and pull them out as we need them.

The recipe is also pretty flexible – only 5 ingredients. You can eliminate the chia seeds or sub them out for flax seeds. You can also sub out the wheat flour, depending on your dog’s needs. My fancy grain-free treats from the store use chickpea and oat flours.

Peanut Butter & Pumpkin Dog Treats
Author: Andrea
Prep time: 10 mins
Cook time: 30 mins
Total time: 40 mins
Your dog will love this super easy recipe for doggie treats.
Ingredients
  • 1/4 cup of creamy peanut butter
  • 1 cup of pumpkin puree
  • 2 eggs
  • 2 T chia seeds
  • 3 cups of whole wheat flour
Instructions
  1. In a stand mixer, combine the peanut butter and pumpkin puree. Scrape down bowl sides.
  2. Add eggs and beat.
  3. Add chia seeds and 2 1/2 cups of flour. Mix until combined. Add remaining flour by 1/4 cups until the mixture is good for rolling out (forms a nice ball that is not too sticky and doesn’t crumble apart).
  4. Roll dough out to 1/4 inch thick, cut with cookie cutter of choice.
  5. Bake in 350 degree oven for 20-30 minutes until slightly browned and as crispy as you (or fido) like.
3.5.3208


Filed Under: Clatter in the Kitchen, Uncategorized Tagged With: dog, peanut butter, pumpkin, treats

Applesauce Cake

July 2, 2016 by andrea Leave a Comment

This is a quick, simple cake that is great for using up the bottom of a jar of applesauce. My grandma used to make applesauce cake and while this isn’t her exact recipe, it does stir up fond memories. My favorite part of this cake is how the top turns into a crunchy layer while the cake is soft.

Applesauce Cake
Recipe Type: Dessert
Author: Andrea
Prep time: 15 mins
Cook time: 60 mins
Total time: 1 hour 15 mins
Serves: 16
Ingredients
  • 1/2 cup of softened butter
  • 1 cup of brown sugar
  • 2 eggs
  • 1 t vanilla
  • 2 1/4 cups of flour – freshly milled whole wheat flour is the best!
  • 2 t baking soda
  • 1/2 t salt
  • 2 t cinnamon
  • 1/2 t nutmeg
  • 2 cups of applesauce, unsweetened
  • 1 cup of chopped walnuts
  • 2 T sugar, for topping
  • 1/2 t cinnamon, for topping
Instructions
  1. Preheat oven to 350 degrees. Butter or oil bottom and sides of 8×8 cake pan.
  2. Beat butter in the bowl of your stand mixer using cake whisks. Add sugar and beat until combined. Add eggs one at a time. Add vanilla and beat until light and fluffy. About 3 minutes.
  3. Combine dry ingredients (flour through nutmeg) in a small bowl and whisk to combine.
  4. Add dry ingredients alternately with applesauce to the butter mixture. Scrape bowl between additions.
  5. Stir in chopped walnuts.
  6. Pour batter into prepared pan.
  7. Combine 2 T sugar and 1/2 t cinnamon and sprinkle over top of cake.
  8. Bake 50-60 minutes at 350 degrees or until a toothpick in the center comes clean.
  9. Let cool in pan before serving. We like to eat it a little warm.
3.5.3208


Filed Under: recipes Tagged With: apple, apple sauce, cake, dessert, flour, whole wheat

Peanut Butter Banana Bread with a Chocolate Swirl

May 18, 2016 by andrea Leave a Comment

Check out that chocolate swirl!

Check out that chocolate swirl!

Banana bread is almost a staple in our household. When I married my husband, he came with a banana bread recipe. For years, I’d worry that he’d notice if I’d messed with her recipe. But I have slowly managed the transition to my own recipe. Some of the changes have included switching up to whole wheat flour, reducing the sugar, and adding a little yogurt. But none of those changes compare to the most recent upgrade – adding peanut butter. I was messing around making homemade peanut butter (more about that later) and happened to look over at the brown bananas in the bowl. Suddenly banana bread and peanut butter had merged in my brain. The rest is history.

First, a bit on the bananas. You probably already know you want the brown ones. They are sweeter, have more flavor and mash better. But did you know you can peel and freeze the brown ones and then your banana bread making never needs to be controlled by the bananas again! Just pull out the bananas and give them 5 or 10 minutes to thaw before mashing. And I just use a potato masher to squash the bananas.

As a matter of fact, I usually make this recipe in a bowl and combine it with a wooden spoon, dough hook or rubber spatula – honestly, whatever is closer. The trick being not to over mix once you add the dry ingredients to the wet.

OLYMPUS DIGITAL CAMERA

Making the swirls

The chocolate swirl often seems like a lot of extra work to me. While it does put this bread up a notch, you can skip it and just fold the chocolate chips into the finished batter. Not as dramatic, but it does save time and a couple dirty dishes. And it still tastes great. Along that line, you can also leave the chocolate out completely. I’m not recommending it – but it is theoretically possible.

To make the swirls, spoon the two batters into the bowl in layers. Try to distribute the chocolate batter around the pan and once the batter is all in, use a knife to cut a wave pattern into the batter from one end of the pan to the other. Don’t make it too complicated – it will turn out great no matter how you do it.

And while we are talking about pans – use a larger 9×5 pan for this recipe. And remember to oil the pan. Even in my super non-stick awesome pan, the chocolate parts seemed to stick differently than the non-chocolate and it can make for a messy looking bread.

I hope you enjoy! Let me know how it turns out!

Peanut Butter Banana Bread with a Chocolate Swirl
Author: Andrea
Prep time: 15 mins
Cook time: 75 mins
Total time: 1 hour 30 mins
Serves: 16 slices
A fun take on a classic banana bread!
Ingredients
  • 2 cups of flour – I use freshly ground whole wheat flour for the best taste and nutrition
  • 3/4 t baking soda
  • 1/2 t fine sea salt (if using salted butter, reduce to 1/4 t)
  • 3 ripe bananas
  • 1/4 cup (2 oz) of coconut oil or butter, softened
  • 1/2 cup of sugar
  • 1/2 cup of peanut butter
  • 2 eggs
  • 1/2 cup of plain yogurt
  • 1/2 cup of chocolate chips
Instructions
  1. Preheat oven to 350 and grease a 9×5 bread pan.
  2. Combine flour, baking soda and salt in a small bowl. Whisk to combine.
  3. Peel bananas and mash in a large bowl – I use a potato masher for this!
  4. Add oil, sugar, peanut butter, eggs, and yogurt to the bananas and whisk to combine. You may still have banana lumps in the batter – that’s fine.
  5. Add the dry ingredients to the wet and stir until flour is moistened. Don’t over mix.
  6. Melt the chocolate chips in a small bowl. I heat at high in the microwave for 30 seconds and stir. Add another 30 seconds in microwave and stir until the chips are melted. Let the chips cool for a couple minutes.
  7. Add one cup of the bread batter to the chocolate chips and stir until combined.
  8. Alternately spoon the batters into the prepared bread pan. Swirl with a knife.
  9. Bake for 75 minutes in preheated 350 degree oven, until a toothpick inserted in the center comes out clean. Depending on your oven, you may need to add 10 minutes (or even subtract 10 minutes). If your bread starts getting too brown towards the end of baking, cover with tin foil for the last part of the baking time.
  10. Let bread cool in pan for 10 minutes before turning out onto wire rack to cool completely.
  11. We wrap our uneaten bread in tin foil and store in the fridge. I hear it will keep days like this, but ours never lasts that long!
3.5.3208


Filed Under: recipes Tagged With: banana, bread, chocolate, whole grain, whole wheat

Fudge Babies

April 26, 2016 by andrea 1 Comment

The perfect snack!

The perfect snack!

Fudge babies are our family’s homemade version of Lara bars. They are simply chopped up dates, nuts, chocolate chips and a little bit of peanut butter to help hold everything together. IMG_1660

These fudge babies are super easy to make and they are great for the kids to grab on the go. They are not too messy and they are a healthy, high energy snack. Really, these fudge babies are pretty much the perfect snack for a busy household.

I usually keep a bunch of these fudge babies in the freezer. The kids know where to find them and they just help themselves. I grab them to go in the car and I throw them at the kids when they tell me they are hungry.

If you buy the big box of dates from the refrigerator section at Costco, this is a great use for them. You can also make this recipe with dried fruit – such as prunes or dates. I’ve also done them with dried cherries and cashews – which is an fabulous variation on the recipe.

The easiest way to make these is in a food processor. I get out my old Cusinart for this one, but if you have the food processor attachment for your Bosch, this is the time to pull it out. You can also do these in a blender, but you’ll be scraping down the sides a lot. The easiest way to make them is to start by pulsing the nuts in the processor until they are pretty finely ground. Then add the rest of the ingredients and chop everything up until it sticks together in a ball. If your mixture is still dry, then add another glop of peanut butter to help stick it together.

Fudge Babies
Recipe Type: snack
Author: Andrea
Prep time: 10 mins
Total time: 10 mins
Serves: 30
This is our family’s favorite grab and go snack.
Ingredients
  • 2 cups of nuts, I usually use almonds
  • 2 1/2 cups of dates, pitted
  • 1 cup of chocolate chips
  • 2 T peanut butter
Instructions
  1. In the bowl of a food processor, pulse the nuts until they are a fine grind.
  2. Add the remaining ingredients and pulse until the mixture is uniform and sticky.
  3. Add extra peanut butter as needed to allow the mixture to stick together.
  4. Shape into balls, or whatever shape you desire, and store in the freezer or fridge. Will keep for several weeks in the freezer, if you don’t eat them first!
3.5.3208


Filed Under: recipes Tagged With: almonds, chocolate, dates, healthy, snack

Butternut Squash Risotto with Balsamic Vinegar

April 19, 2016 by andrea Leave a Comment

If you haven’t made risotto in the pressure cooker, then you are missing out. Risotto is fairly labor intensive if you do it on the stovetop – involves a lot of time and stirring. I’m not opposed to labor in the kitchen, but recipes that tie me down to a spot are the ones that I’m most likely to blow. But risotto is a whole different world in the pressure cooker. You basically add everything to the cooker, bring to high pressure for six minutes and it’s done. If you have an electric pressure cooker with a risotto setting, then it’s even easier – push a button and all the work is done for you. I love this recipe for butternut squash risotto – it is very simple, traditional, and delicious.

This recipe for butternut squash risotto with balsamic vinegar is one of my very favorite risottos. It is great on it’s own, but it also makes a great base recipe to take in different directions. If I want to add protein to the risotto, I prepare my chicken, sausage or pancetta (my favorite) ahead of time and add in to the finished risotto at the end. This is a great way to use up leftovers.

In spring when the asparagus is tender, I love to add some thin spears at the end with the cheese and butter. Close the lid for three minutes after the pressure is off and the asparagus will be crisp tender when you open up to serve.

You can also mess around with the cheese – parmesan and asiago are always safe bets, but you can play around with blue cheese or even swiss.

This recipe is even easier if you have pureed squash or pumpkin in your freezer. But, if you don’t have a freezer full of squash like I do, I include directions for pressure cooking your butternut squash. Still pretty darn easy. And it’s always a good trick to be able to cook a squash in minutes.

Butternut Squash Risotto with Balsamic
Author: Andrea
Prep time: 20 mins
Cook time: 6 mins
Total time: 26 mins
Serves: 4
I’m keeping the garnish really simple for this risotto. Use a high quality balsamic vinegar and you won’t go wrong. You want one that is thick to the point that it pours like a syrup. It makes all the difference when you aren’t hiding it behind other ingredients.
Ingredients
  • 1 small butternut squash – or 1 cup of butternut squash puree
  • 4 cups of chicken stock, low sodium
  • 2 T extra virgin olive oil – garlic flavored is awesome, if you have it
  • 3 shallots, chopped
  • 2 cloves of garlic (not necessary if using garlic flavored EVOO)
  • 1 T chopped fresh sage
  • 2 cups Arborio rice
  • 1/4 c dry white wine
  • 1 T unsalted butter
  • salt and black pepper, to taste
  • 1/2 cup grated Asiago cheese, divided
  • For garnish:
  • high quality balsamic vinegar
Instructions
  1. If using a whole butternut squash, cut the squash in half and clean out the seeds. Place in pressure cooker (on a rack, if you have one) with 1 1/2 cups of water (or the minimum amount of water necessary to bring your cooker to pressure) and bring to high pressure for 6 minutes. Release pressure naturally and poke the squash with a fork through the skin – if the fork pushes through with no resistance, the squash is done. Scoop squash out of skin and puree in a blender or using a stick blender until it is smooth. Reserve 1 cup of puree for this recipe and freeze remaining puree for future use – it will also keep in the fridge about 5 days.
  2. Heat olive oil in the bottom of a stovetop pressure cooker over medium heat – or in an electric cooker set to brown or sauté. Add shallots and sautée until soft, about 3 minutes. Add garlic cloves (if using) and chopped sage and sauté another 30 seconds until fragrant. Add Arborio rice and stir until rice grains are coated in oil and the tips start to turn transparent – about 3 minutes.
  3. Add the wine and stir until the wine has been absorbed. Add chicken broth and squash and stir. Close and lock lid of pressure cooker. Set pressure cooker to high and cook for 6 minutes on high. If your electric pressure cooker has a risotto setting – use it. Release pressure using a quick release method. Open lid, add butter salt and pepper to taste and 1/4 cup of cheese, stir and replace lid for 3 minutes. The risotto will seem a bit wet – don’t worry. Remove lid after 3 minutes, stir again and check your consistency. The rice should be creamy and al dente.
  4. Serve in bowls and drizzle with balsamic vinegar and top with remaining cheese.
3.5.3208


Filed Under: recipes Tagged With: balsamic vinegar, butternut squash, pressure cooker, pumpkin, rice, risotto, squash

Homemade Play Dough

April 16, 2016 by andrea Leave a Comment

Finish product!

Finish product!

Homemade play dough is one of the few places that I still use white flour. No whole wheat play dough around here!

Anyway, we love this recipe. I can whip up a batch in a few minutes and my kids will sit at the counter and play happily for a few minutes while I work on dinner. I used to keep the play dough in the We keep it in a bag with the play dough toys and it

And don’t let the cream of tartar stop you from making this recipe. The cream of tarter helps give a nice smooth consistency and also helps a bit with shelf life. But if you don’t have any cream of tartar around, you can skip the cream of tartar.

Homemade Play Dough
Author: Andrea
Prep time: 5 mins
Cook time: 5 mins
Total time: 10 mins
Ingredients
  • 1 cup flour
  • 1 cup of warm water
  • 1/3 cup of salt
  • 1 T oil
  • 2 t cream of tarter
  • food coloring
Instructions
  1. Combine all ingredients in a medium sized saucepan over medium low heat.
  2. Stir constantly with a wooden spoon until it forms a ball around the spoon.
  3. Take off of heat and place dough on the counter.
  4. When dough is cool enough to handle knead the dough a few times until it is smooth.
3.5.3208


Filed Under: Clatter in the Kitchen Tagged With: DIY, play dough

Sourdough English Muffins

April 12, 2016 by andrea Leave a Comment

Sourdough English Muffins

A fresh batch of sourdough English muffins

I believe that these Sourdough English Muffins are reason enough to maintain a jar of sourdough starter in your fridge. They are not super difficult to make, but they do take a little bit of time and love. But they are so delicious and so much healthier for you than the store bought version. Once you get spoiled with homemade breads, it really gets hard to go back to the mass produced stuff.

Sourdough English Muffins

Sourdough Starter

Like most sourdough recipes, you’ll need to do a little planning for these muffins. You’ll make your dough the night before and it should rest in the fridge overnight (8-12 hours). Make sure you put the dough in the fridge during the rest period. If you leave it on the counter, they won’t have any rise left in them for baking and you’ll end up with hockey pucks. And along that line, be sure to use instant yeast in your recipe. I use SAF red instant yeast – it has a different lifespan that the normal quick rise yeast that you typically find in the grocery store. the quick rise will die off by the time your long rise is over and you’ll end up with the hockey puck problem again.

In the morning, you pull the dough out of the fridge, shape your muffins, and “bake” them off. You could also start the process in the morning and finish off that evening – but you’d loose the beauty of fresh English muffins for breakfast. And, really, what’s the point of that?

Once you pull the muffins out of the fridge, I divide the dough into muffin sized portion. The engineer in me always weighs each portion to make sure they are all about the same size. Normal people probably don’t do this. But, I find that 1.7 ounces of dough makes a nice, small muffin that is still big enough to hold an egg sandwich. 2 ounces is a medium sized muffin and 2.3 ounces would be a monster size around our house. When I do 1.7 ounce portions, I usually end up with about 2 and half dozen muffins. Once I have the dough portioned out, I shape them into flat rounds. This is one of the best parts of the recipe. There is just something about handling a nice bread dough. Place the rounds onto a parchment lined baking sheet. You can sprinkle course ground corn meal or semolina on the parchment so you have a little crunch to your final muffin. It is a nice touch, but my corn meal usually ends up burning on the cast iron skillet. I guess its a little give and take that way.

Sourdough English Muffins

Muffins cooking on stovetop

And speaking of baking, English muffins aren’t really baked. They are cooked on the stovetop – kind of like tortillas. I cook mine on a cast iron skillet. They will puff up as they hit the heat and it’s a pretty fun thing for the kids (and grownups) to watch. Sometimes mine brown too quickly and aren’t quite done in the centers. If that happens you, can finish them off in  a 350 degree oven for about 10 minutes until the centers reach 190 degrees. I don’t really ever stress about the centers being done. I usually end up splitting most of the muffins and freezing them. When I’m ready to eat the muffins, I toast them – so the centers get finished that way.

As written, this recipe for English Muffins does not rely entirely on the sourdough to give the rise to the muffins. It is kind of a cheater recipe for sourdough. Which makes it a great recipe for anyone who is just starting out with sourdough and is working at gaining confidence in their skills. If you want to convert it to 100% sourdough, then you should 1) make sure your starter is fed and active and 2) eliminate the instant yeast and optional citric acid.

I hope you enjoy these sourdough English muffins!

Sourdough English Muffins
Author: Andrea
Prep time: 12 hours
Cook time: 30 mins
Total time: 12 hours 30 mins
Serves: 30 muffins
As with all things whole wheat, if you aren’t using freshly milled whole wheat flour, you can substitute a high quality store a combination of 1/2 store bought white whole wheat flour and white flour, but your final product will be slightly different than mine in taste, texture, and nutrition.
Ingredients
  • 2 T sugar
  • 1 cup warm water (110-115 degree F)
  • 1 cup warm milk
  • 1 T instant yeast (optional if you are using active, fed sourdough starter)
  • 1 c sourdough starter, fed or unfed; fed will give you a more vigorous rise
  • 7-8 cups white whole wheat flour – freshly milled flour strongly recommended!
  • 1/4 c (4 T) butter, at room temperature
  • 1 T salt
  • 1/4 t citric acid (optional, for added sour flavor)
  • semolina or course corn meal, for coating
Instructions
  1. Combine all ingredients, except, flour and semolina, in the bowl of a stand mixer.
  2. Add flour until dough is soft and at the right consistency for kneading. If using a Bosch universal, you should add flour until the dough just cleans the sides of the bowl. If using an Ankarsrum the dough should pull from the sides of the bowl and form a donut around the kneading arm. The dough can be a little sticky – it will continue to absorb moisture as it rises.
  3. Knead using the mixer for 6-12 minutes (Bosch or Ankarsrum mixers will need 6 minutes while other mixers may need 12 or more minutes) until the dough is smooth and slightly tacky.
  4. Oil dough, place in bowl and cover with plastic wrap or lid. Refrigerate over night or 8-12 hours.
  5. About 1-2 hours before you are ready to make muffins, take dough out of fridge and let come to room temperature. This step can be skipped, if you don’t have time.
  6. Portion dough out for muffins (1.7-2.3 ounces, depending on size preference) and shape into flat rounds.
  7. Warm cast iron skillet on stovetop to a low or medium low setting.
  8. Rest muffins on a cookie pan coated with course ground semolina.
  9. Cook muffins in pan about 5 minutes each side until dark brown. Internal temperature should be 190 degrees. If the muffins brown before being done, they can be finished in a 350 degree oven for 10 minutes on a baking sheet.
  10. Split using a fork. Extra muffins freeze perfectly and are perfect for toasting for breakfast.
3.5.3251


Filed Under: recipes Tagged With: english muffins, muffins, sourdough, whole wheat

Homemade Laundry Soap

April 3, 2016 by andrea 5 Comments

Posting about soap and cleaning is not my normal sort of recipe. But I do love my homemade laundry soap. I’m sure that many of you think I’m nuts for all of the things that I make instead of buy. With regards to homemade laundry soap, my main motivation is that I don’t like to waste money or resources. With four boys in our house, I do a lot of laundry. And the store bought detergent for a family of six, adds up quickly – even when you buy the cheap stuff. Then consider all of the plastic containers that liquid detergent comes in.

Our friends, Kevin and Lori, introduced me to this recipe years ago, and I’ve never looked back. I think it cleans just as well as the liquid stuff that I used to use. If you research homemade laundry soap recipes, you’ll find that recipes fall into two categories – powder and liquid. I use a powdered version, mainly because it is easier to make and store. I have also read that the Borax is activated by water, so it loses some of its potency when you make a liquid laundry soap.

I grate my soap pretty fine and then run it through the food processor using the sharp blade. Add a bit of the Borax and/or washing soda with the soap in the food processor and you’ll produce a fine powder. I’ve found that if I don’t get it very fine, some of the soap may not dissolve in cold water. Not a huge issue, just annoying to find little white specks of soap on your black shirt. The food processor fixes that issue.

When making this recipe, you can use pretty much any bar of soap. I am currently using Ivory soap, but have used Fels Naptha and Kirks Castile in the past. Kirks Castile has an unscented version, but it is pricey and difficult to find. Thus, Ivory. I find my Borax and washing soda at Farm & Fleet. Borax is pretty easy to find in most big box stores. Washing soda is not as easy to locate. But Farm & Fleet has it. Ah! Farm & Fleet. Anyway, I digress. Wherever you go, both will be in the laundry isle. Both are sold in large boxes. And washing soda is not the same as baking soda. Same sort of orange packaging – different product.

And finally, because someone will ask – I do not have a HE washing machine. I understand that you can use this recipe in your HE machine, because it produces very low suds.

Homemade Laundry Soap
Author: Andrea
Make sure to grate the soap into a fine powder. I use the grater attachment on my food processor to grate the soap and then the sharp blade to mix the Borax and washing soda with the soap into a fine powder
Ingredients
  • 1 bar of soap – Ivory, Fels Naptha, or Kirks Castile are good starting points
  • 1 cup of washing soda (not baking soda)
  • 1 cup of Borax
Instructions
  1. Fine grate the soap. I use my food processor’s grate attachment.
  2. Combine all the ingredients. I combine in my food processor with the sharp blade and pulse until the soap is a fine powder.
  3. Wash your food processor!
  4. This recipe can be multiplied. Four bars of soap and four cups of washing soda and Borax will last our family of six about 6 weeks.
  5. Store in containers. I used 1 T to a large load of laundry. 2 T for extra dirty laundry.
3.5.3208


Filed Under: Clatter in the Kitchen Tagged With: detergent, homemade, laundry, powder, soap

Oatmeal Waffles

March 3, 2016 by andrea Leave a Comment

Oatmeal WafflesThis waffle is our family favorite and I’m not quite sure what has taken me so long to post it here. It’s probably that I don’t have any good photos of the waffles. But I’m trying to move beyond my meager photographic skills and still share this recipe.

This is what happens when you let your seven year old make the waffles.

This is what happens when you let your seven year old make the waffles.

We’ve been making these waffles since Jim and I got married. The recipe originally came from my mom and dad, but I’ve made very few tweaks to it over the years. We got our first waffle maker as a wedding present from Jim’s Aunt Terry and Uncle George. That first one lasted us about 10 years and I loved the deep wells that it made in the waffles. We’ve since moved on to a waffle iron that we found at Williams Sonoma, but our requirement for a nice big Belgium waffle is still met. We will never have any of those wimpy, soggy little waffles around here!

These waffles are hearty – definitely not light and fluffy. They are chewy and yummy. One will fill most people up and give enough energy to run until noon. My kids top them with syrup, but I like mine with some apple butter, toasted pecans and whipped cream. Enjoy them as you wish.

Oatmeal Waffles
Recipe Type: Breakfast
Author: Andrea
Prep time: 10 mins
Cook time: 10 mins
Total time: 20 mins
Serves: 8 waffles
This is a chewy, filling waffle. Whole grain goodness at it’s best.
Ingredients
  • 1 1/2 cups of whole wheat flour, freshly milled is best
  • 1 cup of oatmeal, I used thick rolled
  • 2 T brown sugar
  • 1 T baking powder
  • 1 t cinnamon
  • 1/2 t salt
  • 1 1/2 cups of whole milk, sour milk, milk kiefer, or whey
  • 2 eggs
  • 2 T coconut oil or butter, melted
Instructions
  1. Preheat your waffle iron.
  2. Combine dry ingredients in a medium bowl – flour through salt.
  3. Combine milk and eggs in a small bowl.
  4. Add milk and egg mixture and oil to the dry ingredients and stir just until combined.
  5. When iron is hot, spoon batter into the iron and cook until desired doneness.
  6. Top with maple syrup, butter, pumpkin butter, nuts, whipped cream or strawberries as your heart desires.
3.5.3208


Filed Under: recipes Tagged With: breakfast, oat, waffle, whole grain

  • « Previous Page
  • 1
  • …
  • 4
  • 5
  • 6
  • 7
  • 8
  • 9
  • Next Page »

Posts

  • Clatter in the Kitchen
  • recipes
  • Uncategorized

Recent Comments

  • Pam on (Sourdough Optional) Carrot Muffins
  • andrea on Cinnamon Rolls – Tangzhong method
  • Helen Lazzaro on Cinnamon Rolls – Tangzhong method
  • andrea on Hot Cross Buns
  • Susan Toth on Hot Cross Buns
  • Facebook

Copyright © 2023 · Foodie Child Theme by Shay Bocks · Built on the Genesis Framework · Powered by WordPress