My Kitchen Clatter

Real Food - Real Life

  • About Me
  • Classes
    • Upcoming Classes
    • Baking Classes
    • Pressure Cooking Classes
    • Fermentation Classes
    • Canning Classes
    • Kombucha Classes
  • Equipment
    • Nutrimill Plus Grain Mill
    • Nutrimill Classic Grain Mill
    • Nutrimill Harvest Grain Mill
    • Bosch Universal Mixer
    • Ankarsrum Original Assistant
    • Filter Pro Dehydrator
  • Grains & Supplies
  • Recipes
  • Clatter in the Kitchen

Pumpkin Sourdough Yeast Bread

October 19, 2020 by andrea Leave a Comment

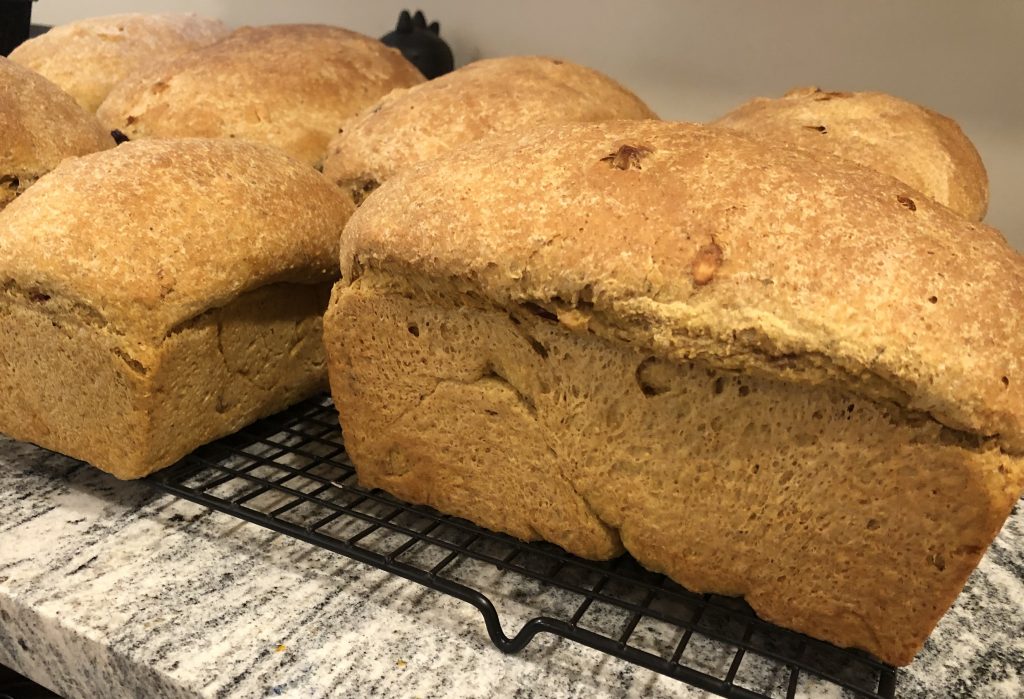
This bread is one I came across in an old cookbook years ago. Over the years, I’ve adjusted it to my preferences. The bread seems a little unique because it combines pumpkin into a yeast bread, but the combination works really well. It’s one of my favorite breads to make in the fall. You can think of it like a fancy sort of cinnamon raisin bread.

I usually make a big batch of this bread in my Bosch Universal and I share extra loaves with my favorite neighbors. But in the interest of normality, I’ve broken the recipe down here so it will make one large loaf or two smaller loaves. The final batch size may be dependent on your hydration of your sourdough starter and on the moisture content of your pumpkin puree. To adjust for this, you may need to flexible with the amount of flour added at the end – which is just a good practice with bread making anyway. If you end up with extra dough – and I hope you do – shape it into a tiny loaf of bread or make a couple quick cinnamon rolls with it.

And a quick note on the sourdough. IF you don’t have sourdough starter on hand, then you can skip that ingredient and move on with baking this bread. BUT, you should consider getting yourself going with sourdough. It may be Covid trendy, but it is still a wonderfully pleasant kitchen activity. If you need more info on sourdough, reach out to me and I’ll see what I can do to get you started.

This bread is excellent toasted with butter, cream cheese, or apple or pumpkin butter.

I hope you enjoy it!

Pumpkin Sourdough Yeast Bread
Recipe Type: bread
Author: Andrea
Prep time: 20 mins
Cook time: 35 mins
Total time: 55 mins
Serves: 2
This a great bread for those fall days. It is wonderful toasted with butter or cream cheese.
Ingredients
  • 1/2 c sourdough starter
  • 1/2 c pumpkin puree
  • 1 cup of hot water (110 degrees, or baby bath temperature)
  • 1/4 c oil (I like sunflower or something with a light flavor)
  • 1/4 c brown sugar
  • 1/2 t cloves, ground
  • 1 t ginger
  • 2 t cinnamon
  • 1 T dough enhancer (optional, if you have it – otherwise substitute apple cider vinegar)
  • 1 cup white flour (King Arthur all purpose in the red bag is great)
  • 4-5 cups of freshly ground hard white wheat flour (if you don’t have freshly ground, substitute white flour)
  • 1 T SAF or other instant yeast
  • 1 t salt
  • 1/2 cup dried cranberries
  • 1/3 cup pepitas
Instructions
  1. Combine sourdough starter, pumpkin puree, hot water, oil, sugar, clovers, ginger, cinnamon, dough enhancer, white flour, and 1/2 of the whole wheat flour into the bowl of your mixer. Add the yeast on top of the flour. Stir until it is just combined. It should be the thickness of pancake batter.
  2. Allow the batter to rest 10-30 minutes. This lets the gluten in the flour relax and creates a better dough structure.
  3. Add another cup of flour and the salt to the dough and mixer.
  4. With the mixer running, add remaining flour 1/2 a cup at a time until the dough has formed. If you are using a Bosch mixer, this will be when the dough cleans the sides of the bowl. If you are using an Ankersrum mixer, the dough will quickly form around the kneading arm when you move the arm to the center of the mixer. It’s okay if the dough is a little soft at this stage.
  5. Add the cranberries and pepitas to the dough.
  6. Knead for 6-10 minutes until the dough has formed a good gluten structure. Knead at the number 2 on a Bosch and at about 2:00 or 3:00 with an Ank. The dough should be soft and smooth. If you are using a machine other than a Bosch or Ank, you will probably need to knead several extra minutes to obtain a good dough structure, possibly up to 20 minutes. At this point, my dough is usually very soft to the point that it makes me nervous, but it always seems to turn out fine.
  7. Turn the dough into an oiled bowl. Cover and let rise in a draft free, warm location until almost double – about 30 minutes.
  8. Turn the dough out onto an oiled board, shape into loaves and place in oiled pans. You can also free form loaves or use this dough for cinnamon rolls. I like to use about 1 pound 8 ounce of dough per 4.5 x 8 inch loaf.
  9. Let rise until the dough is about an inch over the edge of your pans. Meanwhile preheat oven to 350 degrees.
  10. Bake for 30-35 minutes until the loaves are golden and brown.
3.5.3251


Filed Under: recipes Tagged With: Ankersrum, bosch mixer, bread, breakfast, neighbors, pumpkin, sourdough, yeast

Marmalade French Toast for the Instant Pot

January 27, 2019 by andrea Leave a Comment

Once again, I got carried away with my preserving. This time it was with lemon and pink grapefruit marmalade. And while it is delicious, the recipe is HUGE and I ended up with 14 half pints of marmalade.

Just a quick note on this marmalade recipe, it is from a book called The Blue Chair Jam Cookbook by Rachel Saunders. This book has some great tips on making jams and jellies without added pectin, and I have really enjoyed reading through it for inspiration.

Some Recipe Notes

This recipe is based on a recipe for croissants a l’orange that my husband and I had on our 
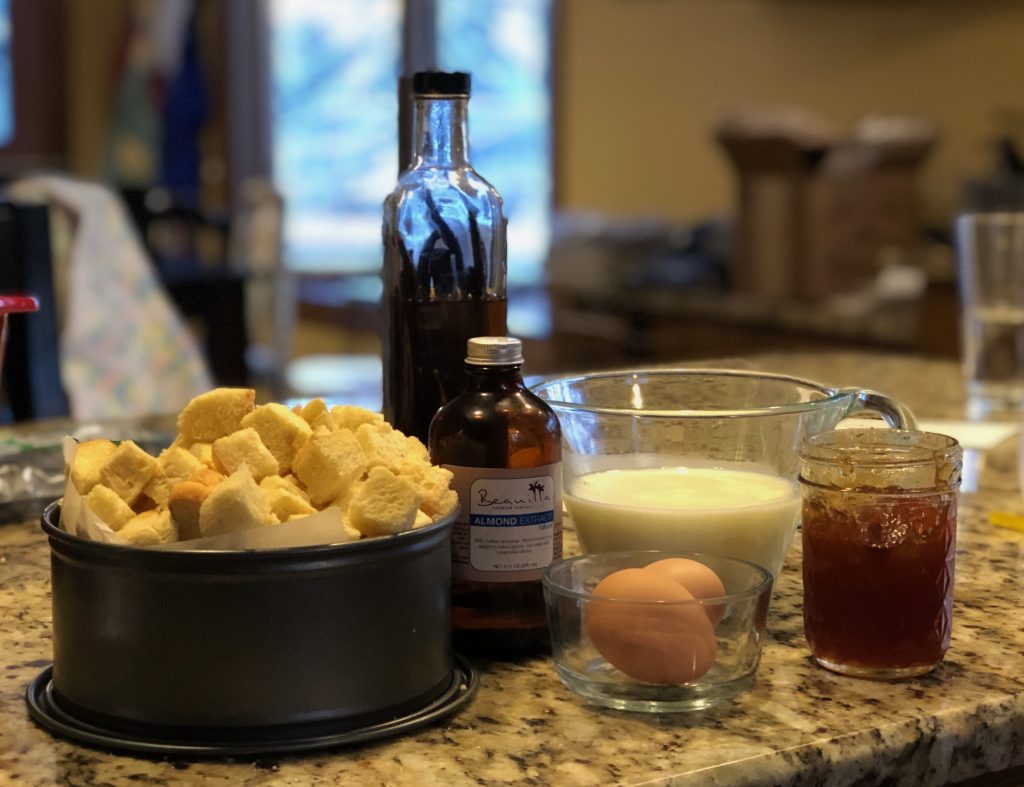
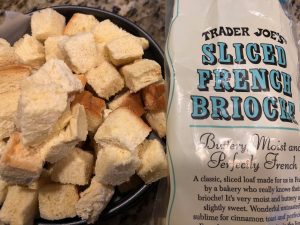
honeymoon. It’s been twenty years, and I still make that recipe and remember the bed and breakfast we stayed at in New England. I don’t make the recipe too often, however, because croissants aren’t a standard on my shopping list. This version of the recipe uses brioche bread, which I’ve found at Trader Joe’s. I cut the slices into cubes and then freeze whatever I don’t use in the bread bag for the next time. One loaf makes about three of this recipe.

Sometimes, it is fun to step a recipe up a notch. In this case, I’d recommend adding chocolate chips or chopped dark chocolate to the bread and egg mixture.

If you’d like additional tips on making bread puddings or French toast in the pressure cooker, see my recipe for Cinnamon French Toast for the Instant Pot.

Marmalade French Toast for the Instant Pot
Author: Andrea
Prep time: 15 mins
Cook time: 15 mins
Total time: 30 mins
Serves: 6
Ingredients
  • 4-5 cups of cubed brioche bread
  • 1 cup of milk
  • 2 eggs, lightly beaten
  • 1 t vanilla
  • 1/2 t almond flavoring
  • 1/4 cup of marmalade
  • 2 T brown sugar
  • 1/2 cup of chocolate chips or dark chocolate chunks (optional)
  • 2 T butter, melted (optional)
Instructions
  1. Add 1 cup of water to the pressure cooker and place a trivet in the pot.
  2. Make a tin foil sling if your trivet does not have a handle to remove your dish.
  3. Line a 7-inch cheesecake pan with parchment paper to prevent the milk mixture from leaking out. If you don’t have a cheesecake pan, you can use a pyrex dish that fits into your pressure cooker.
  4. Spray the cheesecake pan or dish with cooking spray.
  5. Fill your baking dish with the cubed bread and mound the cubes over the top of the dish. This is how much bread you need for the recipe. Any extra can be frozen for another time.
  6. In a large bowl, combine the milk, eggs, vanilla, almond flavoring, marmalade, brown sugar, and chocolate chips (if using). Whisk lightly to combine and break up the marmalade.
  7. Toss the bread cubes into the egg and milk mixture.
  8. Pour the bread cubes into your prepared pan.
  9. Cover the pan with a paper towel and a piece of tin foil to keep out the moisture.
  10. Make sure the cooker is set to seal and cook on high pressure for 15 minutes. Turn the keep warm setting off.
  11. After the cooking time is completed, allow the pressure to naturally release for 5 minutes and then manually release the remaining pressure.
  12. The French toast is ready to eat at this point, but if you’d like to crisp up the top, pour the melted butter on top and place under the broiler of your oven for a few minutes until the top is lightly browned.
3.5.3251


Filed Under: recipes Tagged With: breakfast, orange, preserves, pressure cooker

Instant Pot Egg Casserole with Mushrooms and Peppers

November 29, 2018 by andrea Leave a Comment

This is a great way to serve eggs and whatever leftover veggies you have in the fridge. Feel free to substitute the veggies out for anything you have sitting around. You can do the same for the cheese. Have fun with it!

Because of the moisture in the pressure cooker, the top may look underdone when the casserole is actually cooked, so be sure to check the center for doneness with a sharp knife. If it is very runny, put it back in the pressure cooker to cook 5 more minutes. If it is just a little wet in the center, it will finish cooking while it rests. If it is somewhere in between very runny and a little wet, leave the casserole in the cooker with the lid on for five more minutes.


Instant Pot Egg Casserole
Recipe Type: Breakfast
Author: Andrea
Prep time: 15 mins
Cook time: 25 mins
Total time: 40 mins
Serves: 4-6
This is a lovely take on an egg casserole. Can creamy describe eggs?
Ingredients
  • 9 eggs
  • 6 T whole milk, 2% milk, half-and-half, or heavy cream
  • 1/2 t salt
  • 1/2 t black pepper
  • 2 T butter or olive oil
  • 1/2 cup onion
  • 1/2 cup sliced mushrooms
  • 1/2 cup finely chopped bell pepper
  • 1/2 cup shredded cheddar or Swiss cheese
Instructions
  1. Butter the inside of a 2-quart high-sided, road souffle dish. Make an aluminum foil sling and set the baking dish in the middle of it.
  2. Whisk the eggs, milk, salt and pepper in a large bowl until smooth and uniform, about 2 minutes.
  3. Turn the pressure cooker to sauté function. Add the 2 T butter. When the butter is melted, add the onion, mushrooms, and pepper and sauté for 3-5 minutes until the vegetables are soft.
  4. Scrape the vegetables out of the pressure cooker insert into the eggs and milk mixture. Add the cheese and scrape the entire mixture into the prepared souffle dish.
  5. Cover the souffle dish tightly with tin foil.
  6. Add 1 1/2 cups of water to the pressure cooker. Set a trivet in the bottom of the pot. Use the sling to lower the souffle dish into the pressure cooker. Fold down the sling’s ends to fit into the pot. Lock the lid onto the pot.
  7. Cook on high pressure for 25 minutes with the keep warm setting off.
  8. Use the quick release method to bring the pot’s pressure back to normal. Unlatch the lid and open the cooker. Use the sling to remove the dish to a wire rack. Remove the tin foil and cool the casserole for 5 minutes.
  9. Run a flat edge knife along the edge of the casserole. Set a plate on top of the casserole and invert the dish onto the plate so the casserole is released. Cut to serve.
3.5.3251


Filed Under: recipes Tagged With: breakfast, brunch, eggs, Instant Pot, pressure cooker, vegetarian

Cinnamon French Toast for the InstantPot

November 8, 2018 by andrea Leave a Comment

Instant Pot French Toast

I’m teaching a pressure cooking class in a few weeks and we are doing a brunch theme on a Saturday morning. Life doesn’t get much better, does it? I am now facing the challenge of fine tuning my recipes and having them ready to share with the class. So here we are, talking about French toast in the pressure cooker.

This French toast is a cross with bread pudding, since in order to make it work in the pressure cooker, you will cube your bread instead of leaving it in slices. The quantity of this recipe leaves me wanting, it serves four nicely. If you have a larger group to serve, you may need to plan to make two or use a larger pressure cooker that can fit a larger cake pan – your cooking time should not change. I will note that it cooked pretty quickly, very little warm up time, and the 5-minute quick release is helpful, also. So, if you cook two in a row, I can see it working out okay for serving them together.

But on to the recipe. In order to make a great French toast, you need to know a couple of things:

  • Use brioche or a lighter, sweet bread. I found a nice loaf of fluffy, slightly crusty French bread at Costco and it worked well. This is not the time to break out the multigrain, sourdough breads. They will just end up being so heavy and dense that you won’t be happy with the end results.
  • Since I bought my bread at Costco, I had a lot of it. I sliced it all up and then froze it cubed. It is ready to go when I want to make the next batch of French toast. Alternatively, it can be made into croutons sometime down the line.
  • There is no long soak needed of the bread in the egg and milk mixture, like you would with traditional French toast or bread pudding. The pressure cooker magically does the work of getting the liquid into the bread.
  • My little cheesecake pan that fits the Instant Pot manages to leak. I put tin foil around the outside, but it only helped to collect the liquid that escaped the pan. Next time, I plan to line the inside of the pan with a bit of parchment paper to keep that eggy goodness where it belongs.
  • Speaking of cheesecake pans, if you don’t have one for your pressure cooker, don’t stress. Find a Pyrex or other oven safe pan that fits and go for it. Some people find they need a few extra minutes when they use a Pyrex, but I have never found that to be the case.
  • When I pulled my French toast out of the InstantPot, the top looked like it needed a little crisping, so I poured a little melted butter over the top and toasted it under the broiler in the oven. This is an optional extra step. Totally optional, but worth it, if you have the time. You can add a little cinnamon and sugar to the top also, but be sure to watch it carefully under the broiler.
  • You can also add fruit to the French toast while it cooks. I’m planning to try adding frozen blueberries in my next batch. Of course, fruit as a final topping is an excellent option, also.

With no further ado, here is the recipe. I hope you enjoy!

Cinnamon French Toast for the Instant Pot
Recipe Type: pressure cooker, breakfast
Cuisine: breakfast
Author: Andrea
Prep time: 10 mins
Cook time: 15 mins
Total time: 25 mins
Serves: 4 servings
This is a quick, delicious breakfast for when you need something a little sweet and special without a lot of work! Think of it as a breakfast bread pudding.
Ingredients
  • 4 – 5 cups of cubed bread, use a brioche or other sweet, sturdy bread, see recipe for instruction on amount of bread
  • 1 cup of milk, use whole if you have it but anything will work
  • 2 eggs
  • 2 T brown sugar
  • 2 t vanilla
  • 1 t cinnamon
  • 1/2 cup of raisins, blueberries or chocolate chips (optional)
  • 1 T butter melted (optional)
  • Toppings – syrup, fruit, whipped cream, powdered sugar (optional)
Instructions
  1. Pour bread cubes into the cake pan that you’ll be using for this recipe. Fill the pan slightly over the top – the bread will shrink slightly during cooking. I use a 7-inch cheesecake pan, but a Pyrex bowl works also.
  2. Prepare your pressure cooker by adding 1 cup of water and placing a steamer rack in the insert. Prepare a tin foil sling for your cake pan, if you can’t easily remove the pan from the pressure cooker. To prepare a foil sling, roll two long pieces of tin foil into 1 inch wide strips, cross the strips in an x on the bottom of the cake pan to lift it easily.
  3. Combine milk, eggs, brown sugar, vanilla, cinnamon, and any optional ingredients into a large bowl.
  4. Toss bread cubes with the milk and egg mixture.
  5. Oil or butter the cake pan. Line the cake pan if you think it will leak or wrap it in tin foil.
  6. Pour the bread and egg mixture into the oiled cake pan.
  7. Cover the top of the cake pan with tin foil or a couple paper towels to keep the top of the French toast dry.
  8. Cook on high pressure for 15 minutes. Turn off the keep warm setting.
  9. Once the cooking time is complete, allow to rest 5 minutes before manually releasing the remaining pressure.
  10. If you’d like a crispier top, drizzle the melted butter over the top and put under the broiler for 3-4 minutes until you see it bubbling.
  11. Serve with syrup, fruit, whipped cream, or powdered sugar and enjoy!
3.5.3208


Filed Under: recipes Tagged With: breakfast, French toast, Instant Pot, pressure cooker

Classic Sourdough Waffles (or Pancakes)

June 20, 2018 by andrea Leave a Comment

There’s nothing like a pile of waffles early in the morning. And it’s even better when most of the work is done the night before.

This is a recipe that I usually teach in my Sourdough Baking Class – it is super easy and is also a great way to use up the unfed starter instead of discarding it.

Also – if you forget to make the overnight sponge the night before, don’t sweat it. I’ve done the overnight sponge a couple hours before finishing the batter and still had great waffles.

And while I’m technically one of those people who believe that pancakes and waffles deserve separate recipes, this recipe can bridge that gap in a pinch. You know… for those mornings when you want waffles but the kids are screaming for pancakes.

Classic Sourdough Waffles (or Pancakes)
Cuisine: Breakfast
Author: Andrea
Prep time: 10 mins
Cook time: 10 mins
Total time: 20 mins
Serves: 16 large crispy waffles
This is a make ahead recipe – spend 5 minutes the night before and make your morning a little easier. Half the recipe if you want fewer waffles, or freeze the extra to cover breakfast for the rest of the week.
Ingredients
  • Overnight Sponge:
  • 2 cups white whole wheat flour (freshly ground, if you have it)
  • 2 T sugar
  • 2 cups buttermile, whey, or sour milk
  • 1 cup sourdough starter, unfed
  • Waffle or pancake Batter
  • all of the overnight sponge
  • 2 large eggs
  • 1/4/ cup vegetable oil or melted butter
  • 3/4 t salt
  • 1 t baking soda
  • 1 t cinnamon
Instructions
  1. Day 1 – combine all ingredients of overnight sponge (flour through sourdough starter) in a large bowl. Cover with plastic and let rest at room temperature (or 8-12 hours). Yes, the milk overnight will be fine.
  2. Day 2 – Combine the overnight sponge with remaining ingredients. Stir just until combined. Cook as pancakes on a hot griddle or use batter to make waffles in a hot waffle iron.
3.5.3208


Filed Under: recipes Tagged With: breakfast, pancake, waffle, whole grain

Oatmeal Waffles

March 3, 2016 by andrea Leave a Comment

Oatmeal Waffles
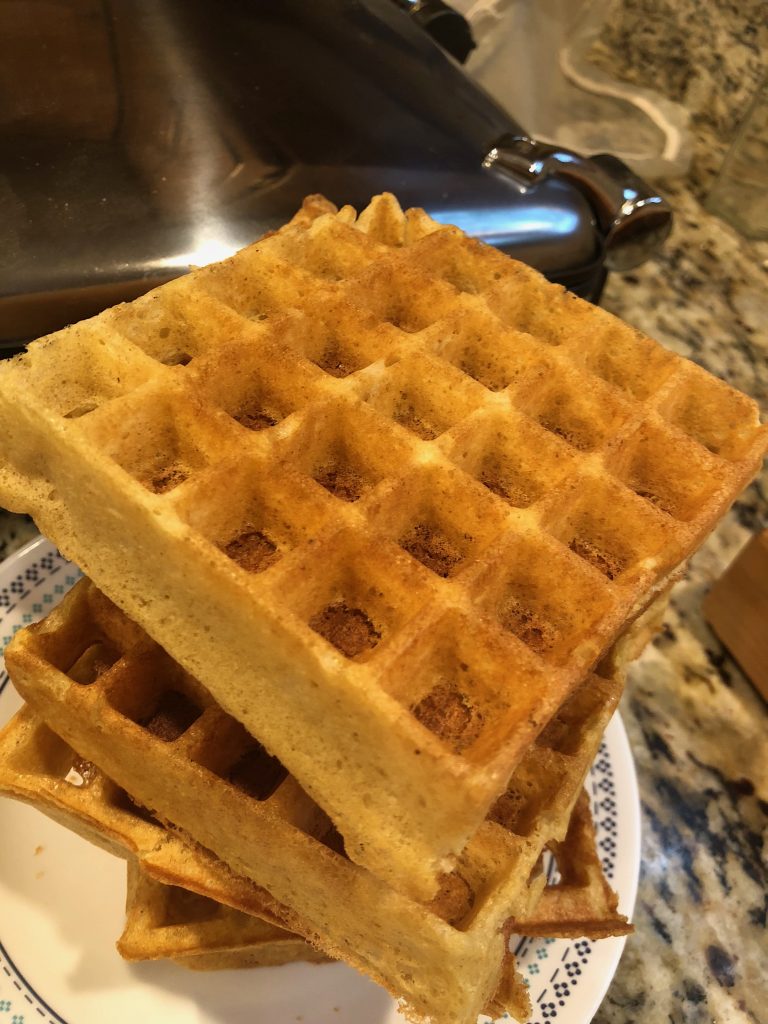
This waffle is our family favorite and I’m not quite sure what has taken me so long to post it here. It’s probably that I don’t have any good photos of the waffles. But I’m trying to move beyond my meager photographic skills and still share this recipe.

This is what happens when you let your seven year old make the waffles.

This is what happens when you let your seven year old make the waffles.

We’ve been making these waffles since Jim and I got married. The recipe originally came from my mom and dad, but I’ve made very few tweaks to it over the years. We got our first waffle maker as a wedding present from Jim’s Aunt Terry and Uncle George. That first one lasted us about 10 years and I loved the deep wells that it made in the waffles. We’ve since moved on to a waffle iron that we found at Williams Sonoma, but our requirement for a nice big Belgium waffle is still met. We will never have any of those wimpy, soggy little waffles around here!

These waffles are hearty – definitely not light and fluffy. They are chewy and yummy. One will fill most people up and give enough energy to run until noon. My kids top them with syrup, but I like mine with some apple butter, toasted pecans and whipped cream. Enjoy them as you wish.

Oatmeal Waffles
Recipe Type: Breakfast
Author: Andrea
Prep time: 10 mins
Cook time: 10 mins
Total time: 20 mins
Serves: 8 waffles
This is a chewy, filling waffle. Whole grain goodness at it’s best.
Ingredients
  • 1 1/2 cups of whole wheat flour, freshly milled is best
  • 1 cup of oatmeal, I used thick rolled
  • 2 T brown sugar
  • 1 T baking powder
  • 1 t cinnamon
  • 1/2 t salt
  • 1 1/2 cups of whole milk, sour milk, milk kiefer, or whey
  • 2 eggs
  • 2 T coconut oil or butter, melted
Instructions
  1. Preheat your waffle iron.
  2. Combine dry ingredients in a medium bowl – flour through salt.
  3. Combine milk and eggs in a small bowl.
  4. Add milk and egg mixture and oil to the dry ingredients and stir just until combined.
  5. When iron is hot, spoon batter into the iron and cook until desired doneness.
  6. Top with maple syrup, butter, pumpkin butter, nuts, whipped cream or strawberries as your heart desires.
3.5.3208


Filed Under: recipes Tagged With: breakfast, oat, waffle, whole grain

The Best Granola

October 24, 2015 by andrea Leave a Comment

The name really says it all, but I’m just going to say it again – this is the BEST granola. But seriously, it has taken me a long time to find a granola recipe that is perfect for our family’s taste buds.

This makes a big batch, so use a big bowl!

This makes a big batch, so use a big bowl!

This recipe makes a huge batch of granola – so if you have a smaller family, you may want to half the recipe. You can also just eat it all. Or use some of it instead of oatmeal when you make cookies next. And of course, you can always bag it up and give it to neighbors and friends.

I’ve also listed all of the ingredients by both volume and weight. Honestly, who wants to measure out 10 cups of oatmeal? So, if you have a scale, this is the time to use it. Just plop your empty bowl on the scale, zero it out, and then start adding and weighing ingredients as you go.

Careful of little hands when you are stirring

This recipe is pretty low on the sugar as far as granolas go. That is probably reason enough to make your own. The granolas you find at the grocery store or farmer’s markets all have tons of sugar in them. It’s why they are so darn good. But that sugar is definitely not good. So, while we need some sugar in the recipe, I’ve tried to keep it as low as possible while still ending up with something that people want to eat.

When you get ready to put the granola in the oven, spread it out on two pans. I like to use parchment paper on the pans – it helps with clean up and you can use the parchment to move the cooled granola into it’s final storage container. After you bake the granola, try to leave it on the trays to cool in the oven – turn the oven off and leave the door shut. The granola will crisp up and form little chunks as it cools. If you bake the granola in the afternoon, you can go ahead and let it cool in the oven overnight.

OLYMPUS DIGITAL CAMERA

Spread the granola out on trays to bake.

The Best Granola
Author: Andrea
Prep time: 10 mins
Cook time: 90 mins
Total time: 1 hour 40 mins
Serves: 14 cups
Ingredients
  • 10 cups (2 lbs) old fashioned rolled oats
  • 3/4 cup (3.75 oz) sesame seeds
  • 1/2 cup (2.5 oz) sunflower seeds
  • 1/2 cup (2.5 oz) hemp seeds, optional
  • 3 cups (9 oz) any combination of chopped almonds, hazelnuts, and pecans
  • 1 cup (2.5 oz) shredded, unsweetened coconut
  • 1/2 t salt
  • 2 T cinnamon
  • 3/4 cup (6 oz) coconut oil, melted
  • 1 cup (12 oz) honey
  • 1 1/2 T Vanilla extract
  • 1 1/2 t almond extract
Instructions
  1. Heat oven to 250 degrees. Line two jellyroll pans with parchment paper.
  2. Combine oats through cinnamon in a large bowl.
  3. Combine remaining ingredients in a small bowl.
  4. Pour wet ingredients over dry ingredients and stir to combine.
  5. Divide granola onto prepared pans.
  6. Bake in preheated oven for a total of 80-90 minutes. Every 30 minutes, stir granola and rotate pans in the oven.
  7. Once the granola is nice and toasty brown, turn off the oven and let cool in the oven, 6-8 hours. As it cools it will get crispy and form small chunks.
3.3.3077


Filed Under: recipes Tagged With: breakfast, granola, oats, whole grains

Apple Pancake

September 26, 2015 by andrea Leave a Comment

I usually just throw the apples in the pan - none of this fancy arranging!

I usually just throw the apples in the pan – none of this fancy arranging!

This apple pancake is one of our favorite fall breakfasts. My boys and six and eight enjoy making the pancake themselves. Get one of those fancy apple peelers and let them at it. I do the work with the hot cast iron skillet, but they like this pancake so much that they are willing (and able) to most of the work themselves. It’s fun to have the little ones happy in the kitchen.

Apple Pancake
Author: Andrea
Prep time: 20 mins
Cook time: 30 mins
Total time: 50 mins
Serves: 6
Ingredients
  • 4 eggs
  • 1/2 cup whole wheat flour
  • 1/2 t baking powder
  • 1 T sugar
  • 1 pinch salt
  • 1 cup milk
  • 2 T butter, melted
  • 1/2 t ground nutmeg
  • 1/4 cup white sugar
  • 1 t ground cinnamon
  • 1/4 t ground nutmeg
  • 1/4 cup unsalted butter
  • 3 large tart apples, peeled, cored and sliced
Instructions
  1. Place 12-inch cast iron skillet in oven and pre-heat oven to 400 degrees
  2. While oven is preheating, combine eggs through 1/2 t nutmeg in a medium bowl. This mixture can be made the night before and kept in fridge, ready to go for the morning.
  3. Combine 1/4 cup sugar, cinnamon, and 1/4 t nutmeg in a small bowl.
  4. When oven and skillet are hot, put 1/4 cup butter in skillet and put skillet back in oven until butter is melted, about 3 minutes. Remove skillet.
  5. Sprinkle about half of the sugar cinnamon mixture over the bottom of the skillet. Remember skillet is HOT! Layer apples on top of the sugar and then sprinkle with remaining sugar cinnamon mixture. Put pan back in oven to bake apples for 10 minutes.
  6. Pour batter over the top of the apples and finish cooking until top is golden brown and apples are cooked, about 20-25 minutes.
3.5.3208


Filed Under: recipes Tagged With: apple, breakfast, pancake

Posts

  • Clatter in the Kitchen
  • recipes
  • Uncategorized

Recent Comments

  • andrea on Whole Wheat Bread (small batch)
  • andrea on Sourdough Beer Pizza Crust
  • andrea on Recipe for Holiday Jam
  • andrea on (Sourdough Optional) Carrot Muffins
  • andrea on Lentil and Ham Bone Soup

Recent Comments

  • andrea on Whole Wheat Bread (small batch)
  • andrea on Sourdough Beer Pizza Crust
  • andrea on Recipe for Holiday Jam
  • andrea on (Sourdough Optional) Carrot Muffins
  • andrea on Lentil and Ham Bone Soup

Posts

  • Clatter in the Kitchen
  • recipes
  • Uncategorized
  • Facebook

Copyright © 2025 · Foodie Child Theme by Shay Bocks · Built on the Genesis Framework · Powered by WordPress