My Kitchen Clatter

Real Food - Real Life

  • About Me
  • Classes
    • Upcoming Classes
    • Baking Classes
    • Pressure Cooking Classes
    • Fermentation Classes
    • Canning Classes
    • Kombucha Classes
  • Equipment
    • Nutrimill Plus Grain Mill
    • Nutrimill Classic Grain Mill
    • Nutrimill Harvest Grain Mill
    • Bosch Universal Mixer
    • Ankarsrum Original Assistant
    • Filter Pro Dehydrator
  • Grains & Supplies
  • Recipes
  • Clatter in the Kitchen

Homemade Yogurt

April 6, 2022 by andrea Leave a Comment

After many years of making our yogurt, I feel like I’m finally ready to put down all my tips into writing. To start with, we are going to focus on dairy based yogurt. If you want to make non-dairy yogurt, you’ll need to go elsewhere.

Once you’ve got a good batch of yogurt, you’ll want to top it with granola or müesli. I also love using it in smoothies and overnight oats. You can also add yogurt into your favorite waffle or pancake recipe. And if you get a nice tangy batch of yogurt, it makes a great substitute for sour cream.

Why make your own yogurt?

As with many things, I started making our yogurt because it saves money. Basically, your only cost is the milk. It does take some time to make yogurt, but it is really mostly a matter of timing and planning. Most of the process is hands off and waiting.

I also love that I know the ingredients in my yogurt. My yogurt has lots of good bacteria and probiotics in it, which is not always the case with store yogurt – but more about that later.

The basic process of yogurt making

My basic process of making yogurt involves the following steps:

  • Start with milk and a bit of yogurt as starter.
  • Slowly heat the milk up to 180 F and maintain for 2 minutes.
  • Cool the milk back down to 110 F.
  • Add the yogurt starter into the warm milk and allow the whole pot to rest in a warm spot for 12-24 hours.
  • Chill the yogurt for at least 4 hours before eating.

That’s it in a nutshell.

You may find recipes that don’t call for the heating process, but I find that my final yogurt is thicker and creamier with the heating method. Heating the milk is a method of pasteurizing the milk to kill any bacteria that may compete with the yogurt bacteria. It will allow the whey proteins to denature and coagulate to enhance the viscosity and texture of the final yogurt. Some recipes will also tell you to maintain the 180 F temp for 10-20 minutes for a thicker yogurt. I don’t personally find that extra heating time is necessary.

The 110 F temperature is important because it’s the ideal temp for the yogurt fermentation to take place. If you accidentally cool down the milk lower than 110 F, just allow it to ferment a bit longer to account for the time it takes for the mixture to come back up to 110 F once it’s in your yogurt maker (or other warm spot)

How long you ferment the yogurt is your decision. Some people do as short as 8 hours, but I find yogurt at a longer fermentation is a bit thicker and has a nicer tanginess to it.

Do I need a yogurt maker?

In short – no. A yogurt maker or a yogurt setting on your electric pressure cooker is just a way to control the temperature to set at 110 F. I had a $20 yogurt maker that worked for me for over 10 years. But if you are just getting into this, or if you don’t want to go out and buy a new one-use appliance (I don’t blame you), try the following first:

  • Check your electric pressure cooker and see if it has a yogurt setting. Most do now and they are wonderful. Use this if you have it.

No yogurt setting or maker? Then wrap your warm pot of milk and yogurt starter in a towel and set it into a larger cooler or the oven with a light on for the fermentation period. You can use an instant read thermometer to track the air temperature in the oven or cooler, if you really want to be accurate, but this works without that extra work. Alternatively, you can set the towel wrapped pot in a warm spot – such as on the top of your refrigerator – and go from there. You can even set the pot on a heating pad to help it keep warm. Once you’ve picked your spot, check the yogurt at about 8-12 hours to make sure it is thickened and doing its thing.

Do I need an instant read thermometer?

No, you don’t. Just like the yogurt setting on your instant pot, a good thermometer can make the difference between good and great yogurt, but it is not entirely necessary. I currently use an instant read thermometer with a clip that stays in my milk while it heats and cools. It has the added feature of an alarm that goes off at 180 F so I don’t scorch my milk.

Before I got my current thermometer, I used a candy thermometer for many years. So anything you have handy should work. No thermometer at all? Follow the temperature descriptions in the recipe and you should end up fine.

What type of milk is best?

Use the best milk you can afford. We are working with a two ingredient recipe here, so if you have access to high quality milk, this is a good place to use it.

Whole milk makes the thickest yogurt and that is what I generally use for my yogurt. If you are using a lower fat yogurt, you can thicken the yogurt by adding 1/4 cup of dry powdered milk when you stir in the yogurt starter.

What if my yogurt is too thin?

If you end up with thinner yogurt than you’d like, you can drain the whey from the yogurt and make a greek yogurt. You can drain as much or as little whey off the yogurt as you like to adjust the thickness. Just line a colander with a couple coffee filters and set over a bowl. Add the yogurt to the calendar and give it a couple hours to drain until it is as thick as you like.

What about yogurt starter?

When you are starting with your own homemade yogurt, I recommend using a plain, unflavored whole milk yogurt from your favorite grocery store as a starter. You will use about 2-4 tablespoons of that yogurt to make two quarts of homemade yogurt.

Don’t eat the rest of that container of yogurt! You just made your own homemade yogurt, right? So, save that extra yogurt to make future batches of homemade yogurt. Just fill up an ice cube tray with that yogurt and freeze. When the cubes are frozen, pop them into a ziplock bag and keep frozen until you want to make yogurt again. Use one or two cubes per new batch – pop them out into a bowl when you start to heat the milk up and they will be thawed by the time the milk cools down to 110 F.

You can also save some of your homemade yogurt in the freezer to use to make future batches. But… (now this gets interesting), this won’t work forever. Store yogurt has active cultures in it, usually about 4-5 cultures. Those are the cultures that create good flavor or make the yogurt easy to culture for mass production. But over time, those cultures get contaminated and weaken and won’t produce as tasty of a yogurt. After somewhere between 5-10 batches of yogurt where you are using the yogurt from the last batch to make the next batch, your yogurt will start tasting slightly off. At that point, the yogurt culture has become “weak” and you need to restart with a new container of yogurt from the store.

If you really get into yogurt making – or you really just love good yogurt, then you’ll want to look up heritage yogurt cultures. These are the European and Middle Eastern yogurts that people talk about when they travel. I use a Bulgarian yogurt culture that is just amazing in flavor. Heritage yogurts have a wider range of flavors and textures and can be a lot of fun to experiment with.

Homemade Yogurt – With or Without the Instant Pot

Here is my tried and true method of making homemade yogurt. I love this recipe because it saves money and contains only milk and yogurt cultures.
Print Recipe Pin Recipe
Prep Time 40 mins
Cook Time 12 hrs
Chilling Time 4 hrs
Course Breakfast, Snack
Servings 8 1 cup

Equipment

  • 1 yogurt maker or pressure cooker with a yogurt setting if you don't have a yogurt maker, see the notes below
  • 1 medium to large saucepan
  • 1 instant read thermometer a thermometer makes this easier, but if you don't have one, follow the temperature notes in the recipe.
  • 1 whisk
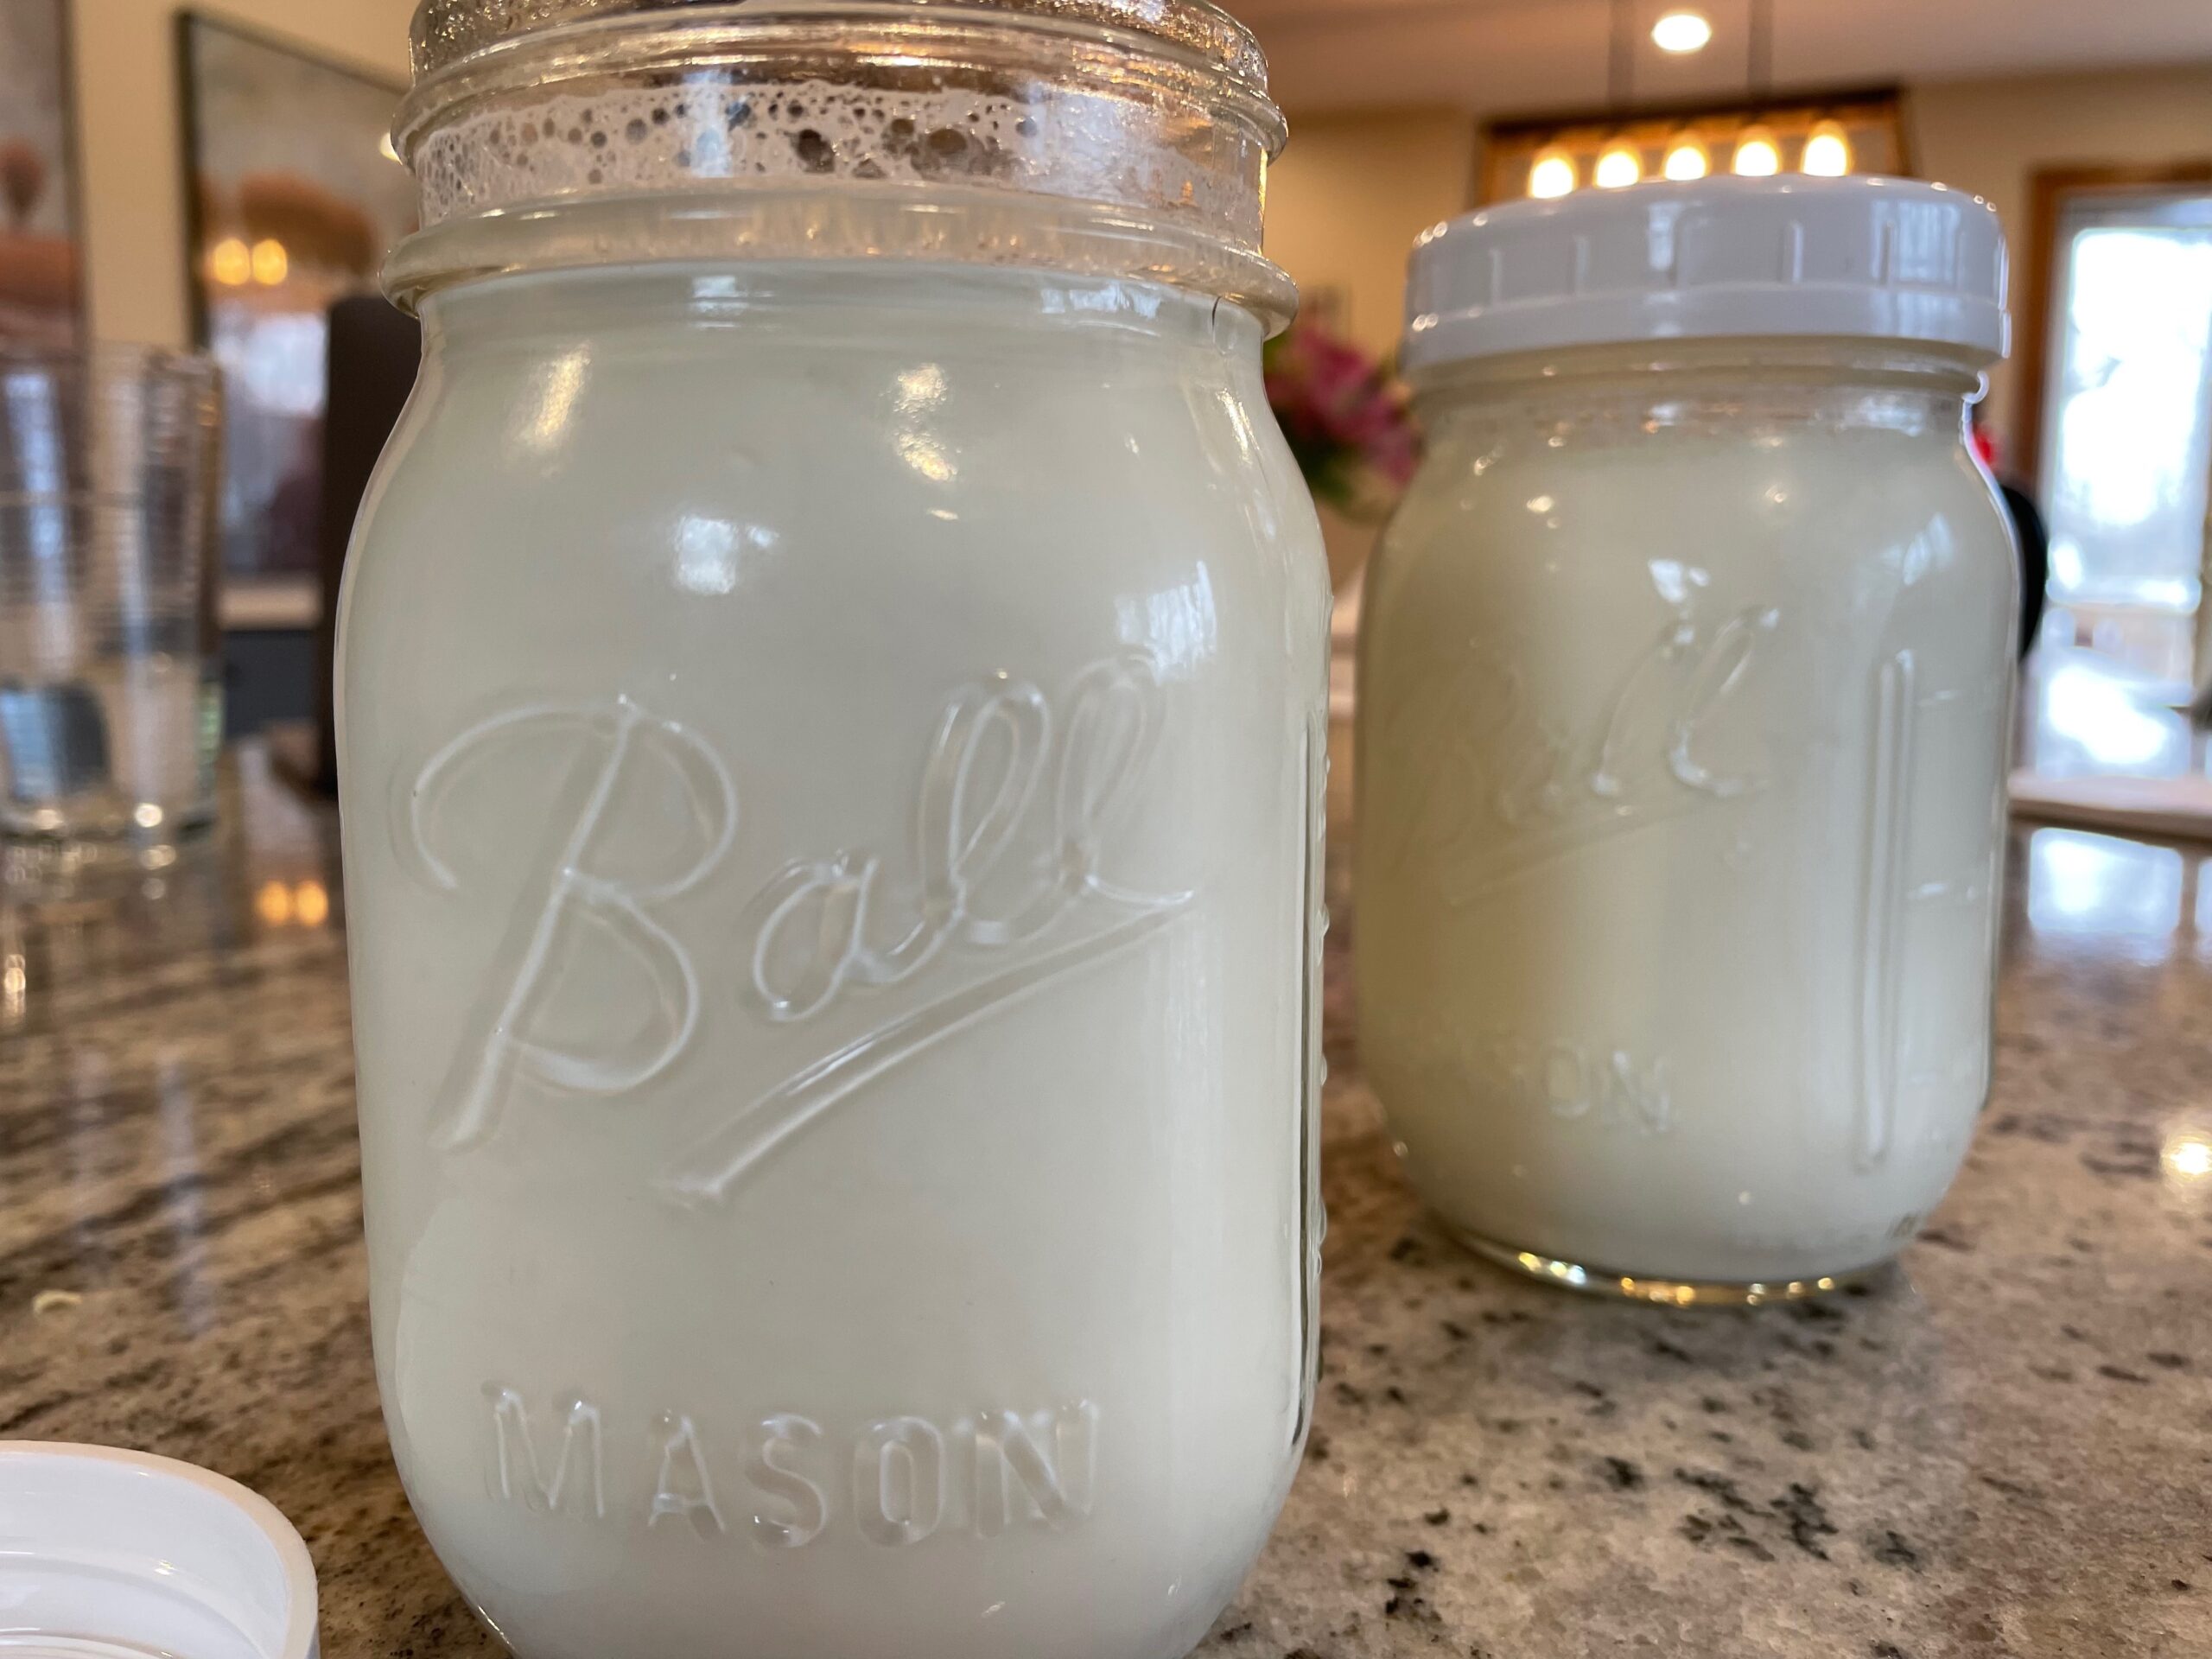
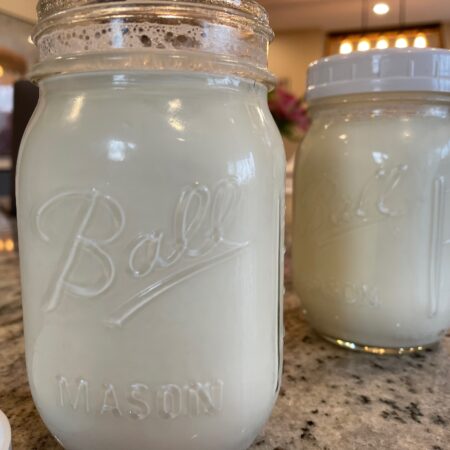
  • 4 2 cup mason jars optional

Ingredients
  

  • 8 cups whole dairy milk You can use lower fat milk, but whole milk gives the creamiest results. See the recipe notes for more tips on using lower fat milks.
  • 3-4 tbsp plain, whole milk yogurt 

Instructions
 

  • In a large saucepan, heat milk slowly over low heat to 180 F, or until it is steaming and at a bare simmer with bubbles around the edges, but not boiling. Stir the milk occasionally as it heats. Remove milk from heat and cool milk down to 110 F or lower. It should be warm, but not hot. If you stick your finger in the milk for 10 seconds, it should feel pleasantly warm, but not hot. 
  • Transfer 1/2 cup of the warm milk into a small bowl and whisk in yogurt until it is well combined. Add this yogurt milk mixture back to the rest of the milk and whisk to make sure it is well combined. 
  • Place milk and yogurt mixture into a yogurt maker (see notes below) and set the time for 8-24 hours, until it is thick and tangy.
  • Transfer the pot to the refrigerator and chill for at least another 4 hours. It will continue to thicken as it chills.

Notes

  • You can substitute low-fat milk – the higher milk-fat, the creamier and thicker the final yogurt. 
  • If you use skim milk, you can whisk in 1/2 cup of dry milk powder or 1 teaspoon of gelatin in step 3 to make a thicker yogurt.
  • You should heat the milk slowly – don’t rush step 1. 
  • You can cool the milk quickly in step 2, if you are in a hurry. Ways to do this include: use an ice bath, transfer the milk into into a cool bowl, stir the milk frequently.
  • The longer the yogurt sits, the tangier it will become. 
  • If you’d like to make Greek yogurt, set a calendar or sieve over a bowl and line the colander with cheesecloth or coffee filters. Take your finished yogurt (either chilled or not) and pour it into the colander. Allow to drain in the fridge for 4-6 hours until it is as thick as you like. If it gets too thick, you can whisk some of the whey back into the yogurt. Transfer the yogurt to containers. The whey can be used for smoothies, soups, lemonade, or bread baking. 
  • Your final yogurt will taste like the yogurt that you used to start this batch with, so be sure to use a yogurt you like. 
  • You can save a few tablespoons to your finished yogurt for future yogurt making. I do this by freezing some of the chilled yogurt in ice cube trays and storing in a ziplock bag in the freezer. 
  • If you find you enjoy yogurt making, you can also find heirloom starter cultures on line or at some health food stores. These starter cultures typically have a wider range of cultures in them vs. the 3-4 that you find in store-bought yogurt, so they can have a better flavor and may be considered healthier as a pro-biotic food. Follow the directions on the package to active the powdered cultures and once you have a good batch of yogurt going, you can freeze small amounts for future batches of yogurt – it’s a continuous loop of yogurt! 
Keyword breakfast, healthy, homemade, instant pot

Filed Under: recipes Tagged With: dairy, gut health, homemade, pressure cooker, probiotic, recipe, whole milk, yogurt

Sweet Potatoes with Black Eyed Peas – Electric Pressure Cooker

May 24, 2019 by andrea Leave a Comment

In this recipe, we will be cooking two separate dishes at once in the pressure cooker. The black eyed peas cook on the bottom of the pot while the the sweet potatoes cook above the peas in a steamer basket. The liquid from the peas is enough to cook the sweet potatoes and everything is done cooking at the same time. Brilliant!

Serve the peas on top of the sweet potatoes and top with a bit of greek yogurt. If you want to make this vegan, swap the yogurt out with balsamic vinegar.

A couple notes on the ingredients –

  • The black eyed peas are high in fiber making them heart healthy. They are also low calorie and low fat. Use dried black eyed peas in this recipe – you can find them in the supermarket with the rice and other dried beans. You’ll soak them 8 hours or overnight for this recipe. Soak some extra black eyed peas and freeze them for future recipes – 1 cup of dried beans will equal 2 cups of soaked beans and is equal to one 14-16 ounce can of black eyed peas.
  • Harissa is a fiery and garlicky North African hot chili pepper paste. I found a small jar of it at Trader Joe’s, so it’s becoming pretty easy to find in regular supermarkets. It pairs well with the coriander, caraway, and cumin seeds called for in the recipe.
  • If you don’t have harissa, coriander, caraway, or cumin seeds in your pantry, feel free to eliminate any that you are missing. You can substitute in a chopped jalapeño pepper for the harissa. Powdered versions of the spices will work in a pinch, also – just skip step 2 and add the powdered spices at the end of step 3 with the garlic.
Sweet Potatoes with Black Eyed Peas – Electric Pressure Cooker
Recipe Type: Pressure Cooker
Author: Andrea
Prep time: 35 mins
Cook time: 12 mins
Total time: 47 mins
Serves: 4
Ingredients
  • 3-4 medium sweet potatoes, sliced in half length-wise
  • 6-8 T plain whole milk yogurt, or more to taste
  • 1/2 t coriander seeds
  • 1/2 t caraway seeds
  • 1 t cumin seeds
  • 1 T extra virgin olive oil
  • 1 medium onion, chopped
  • 4 large garlic cloves, chopped
  • 1 cup dried black eyed peas, rinsed and sorted
  • 1 T tomato paste
  • 1 1/2 cups water
  • 1 T harissa, or more to taste
  • 1/2 t sea salt
  • 2 cups of baby spinach
Instructions
  1. Place the sweet potatoes in a steamer basket with cut side up, side to side. If you need to layer the potatoes, do the second layer at an angle to the first layer. Set aside.
  2. Pre-heat the pressure cooker using the brown or sauté setting.
  3. Add the spices and toast for about 30 seconds in the pressure cooker until you can smell the spice.
  4. Add olive oil to the pan and let heat up a few seconds. Add the onion and sauté until soft. Add the garlic gloves and sauté another 30-60 seconds.
  5. Add the black-eyed peas, tomato paste, and water. This is the point of no return for spicy food eaters – if everyone likes spicy food, you can add the harissa now. If you have someone who doesn’t like spicy, wait and add the harissa with the salt.
  6. Stir the black eyed peas. Lower the steamer basket on top of the pea mixture.
  7. Close and lock the lid of the pressure cooker. Make sure the valve is set to sealing. Cook at high pressure for 12 minutes. Turn off the keep-warm setting.
  8. When the cooking time is over, do a natural release for 10 minutes and then release the remaining pressure with a quick release.
  9. Remove the steamer basket and sweet potatoes.
  10. Stir the spinach and salt (and harissa, if not added yet) into the black eyed peas.
  11. Serve the black eyed peas on top of the sweet potatoes with yogurt on the top.
3.5.3251


Filed Under: recipes Tagged With: black eyed pea, fiber, healthy, one pot meal, pressure cooker, recipe, sweet potato

Marmalade French Toast for the Instant Pot

January 27, 2019 by andrea Leave a Comment

Once again, I got carried away with my preserving. This time it was with lemon and pink grapefruit marmalade. And while it is delicious, the recipe is HUGE and I ended up with 14 half pints of marmalade.

Just a quick note on this marmalade recipe, it is from a book called The Blue Chair Jam Cookbook by Rachel Saunders. This book has some great tips on making jams and jellies without added pectin, and I have really enjoyed reading through it for inspiration.

Some Recipe Notes

This recipe is based on a recipe for croissants a l’orange that my husband and I had on our 
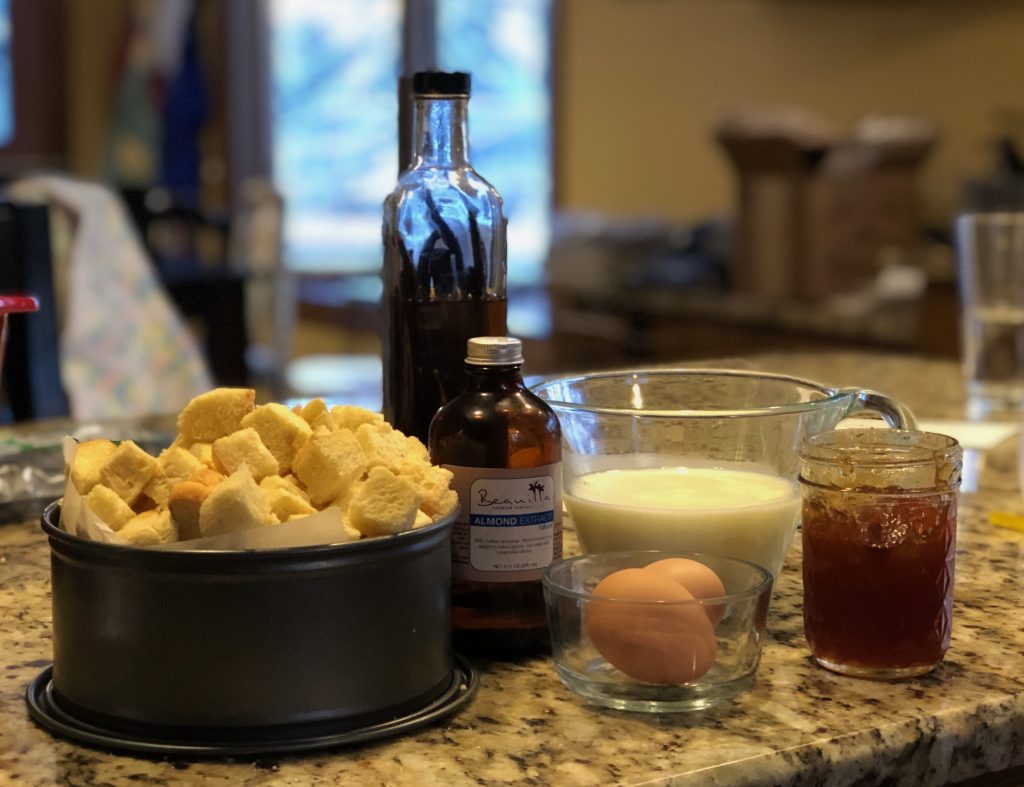
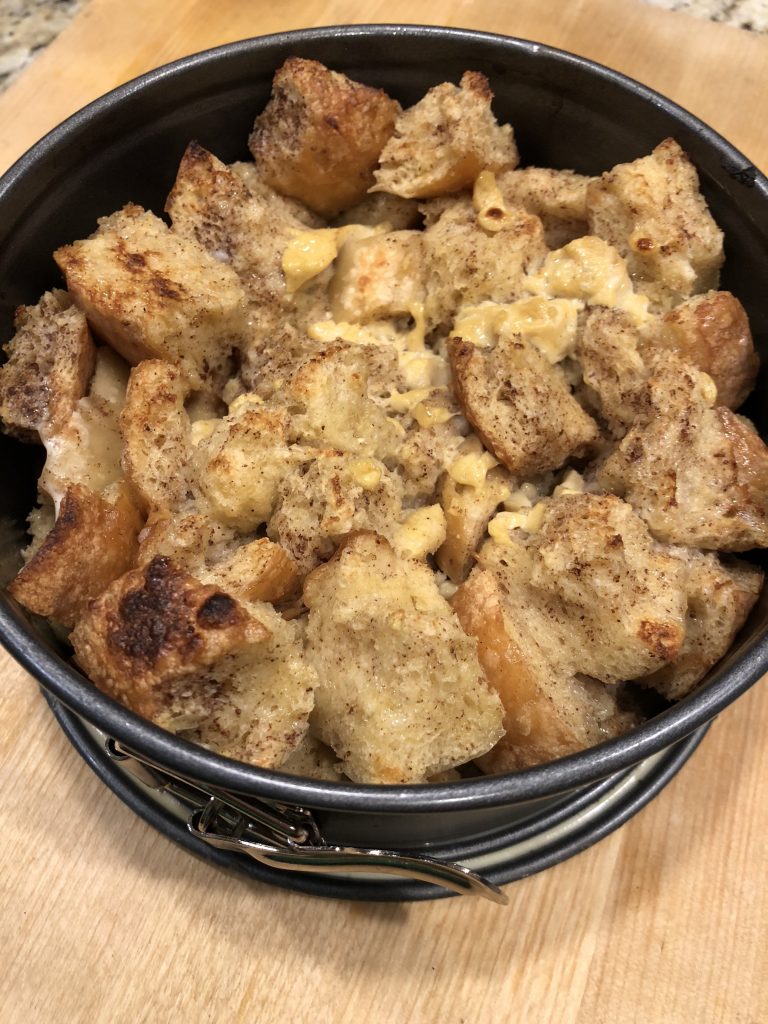
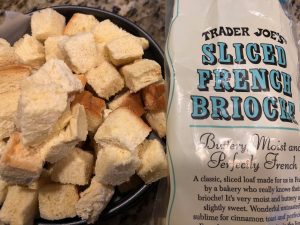
honeymoon. It’s been twenty years, and I still make that recipe and remember the bed and breakfast we stayed at in New England. I don’t make the recipe too often, however, because croissants aren’t a standard on my shopping list. This version of the recipe uses brioche bread, which I’ve found at Trader Joe’s. I cut the slices into cubes and then freeze whatever I don’t use in the bread bag for the next time. One loaf makes about three of this recipe.

Sometimes, it is fun to step a recipe up a notch. In this case, I’d recommend adding chocolate chips or chopped dark chocolate to the bread and egg mixture.

If you’d like additional tips on making bread puddings or French toast in the pressure cooker, see my recipe for Cinnamon French Toast for the Instant Pot.

Marmalade French Toast for the Instant Pot
Author: Andrea
Prep time: 15 mins
Cook time: 15 mins
Total time: 30 mins
Serves: 6
Ingredients
  • 4-5 cups of cubed brioche bread
  • 1 cup of milk
  • 2 eggs, lightly beaten
  • 1 t vanilla
  • 1/2 t almond flavoring
  • 1/4 cup of marmalade
  • 2 T brown sugar
  • 1/2 cup of chocolate chips or dark chocolate chunks (optional)
  • 2 T butter, melted (optional)
Instructions
  1. Add 1 cup of water to the pressure cooker and place a trivet in the pot.
  2. Make a tin foil sling if your trivet does not have a handle to remove your dish.
  3. Line a 7-inch cheesecake pan with parchment paper to prevent the milk mixture from leaking out. If you don’t have a cheesecake pan, you can use a pyrex dish that fits into your pressure cooker.
  4. Spray the cheesecake pan or dish with cooking spray.
  5. Fill your baking dish with the cubed bread and mound the cubes over the top of the dish. This is how much bread you need for the recipe. Any extra can be frozen for another time.
  6. In a large bowl, combine the milk, eggs, vanilla, almond flavoring, marmalade, brown sugar, and chocolate chips (if using). Whisk lightly to combine and break up the marmalade.
  7. Toss the bread cubes into the egg and milk mixture.
  8. Pour the bread cubes into your prepared pan.
  9. Cover the pan with a paper towel and a piece of tin foil to keep out the moisture.
  10. Make sure the cooker is set to seal and cook on high pressure for 15 minutes. Turn the keep warm setting off.
  11. After the cooking time is completed, allow the pressure to naturally release for 5 minutes and then manually release the remaining pressure.
  12. The French toast is ready to eat at this point, but if you’d like to crisp up the top, pour the melted butter on top and place under the broiler of your oven for a few minutes until the top is lightly browned.
3.5.3251


Filed Under: recipes Tagged With: breakfast, orange, preserves, pressure cooker

Cauliflower & Quinoa Pilaf for the Instant Pot

January 16, 2019 by andrea Leave a Comment

For starters, today I want to give a shout out to all those bloggers who are able to take Instagram worthy food photos. It is all I can do to grab the cell phone and snap a photo of my creations while my kids are screaming for dinner in the background. I’m trying to keep it real here – with quinoa on the lip of the pressure cooker, no fancy backdrops, and whatever.

Anyway… on to the recipe. I started with a pilaf recipe from The Instant Pot Bible by Bruce Weinstein, and then adapted it to what I had on hand in the house. The final recipe is much simpler than the original. And isn’t that what cooking is all about?

The original recipe caught my eye because it contained quinoa, which is super healthy and super quick to cook, especially under pressure. One of the things my family does during dinner is talk about the nutritional benefits of the foods we are eating. I find quinoa especially interesting since it is one of the few plant based proteins that contains all nine of the essential amino acids that are commonly found in meats. It is also a great source of manganese, phosphorus and fiber.

A couple quick recipe notes:

  • Be sure to rinse your quinoa before cooking it. You may be able to save yourself this step if your quinoa is pre-rinsed – check the bag to find out.
  • I used homemade vegetable broth. It is so much tastier than the stuff I find at the store and worth the extra trouble, in my opinion. One of these days, I will try to post a recipe for vegetable broth on this site, but in the meantime, a good pressure cooker book should get you started. Or try this recipe over at Hip Pressure Cooking for Vegetable Broth.
  • To make this recipe super easy and quick, I used frozen, riced cauliflower. If you have fresh cauliflower, break it into small pieces, and increase the cooking time to 6 minutes.


Cauliflower & Quinoa Pilaf
Recipe Type: side dish, pressure cooker, vegetable
Author: Andrea
Prep time: 10 mins
Cook time: 1 min
Total time: 11 mins
Serves: 4-6
Ingredients
  • 2 T butter
  • 1 cup of chopped onion (can substitute with shallots or leeks)
  • 1 t chopped garlic
  • 1 t cumin seeds
  • 1/2 t dried ginger powder
  • 1 cup of rinsed quinoa
  • 1, 16 oz package of fresh or frozen cauliflower rice
  • 2 cups of vegetable stock
Instructions
  1. Preheat the base of your pressure cooker using the sauté setting.
  2. Sauté the onion in the butter for 2-3 minutes until it is soft, but not browned.
  3. Add the garlic, cumin seeds and ginger powder and sauté briefly (about 10-30 seconds) until you can smell the spices.
  4. Turn off the heat on the pressure cooker.
  5. Add the quinoa, cauliflower and stock. Stir to combine.
  6. Lock on the lid of the pressure cooker and set the cook time for 1 minute on high pressure. Double check that the pressure valve is closed. Turn off the “keep warm” setting, if your machine has one.
  7. Once the cooking has completed, release the pressure using a quick release method.
  8. Fluff the pilaf and serve.
3.5.3251


Filed Under: recipes Tagged With: cauliflower, easy, grains, Instant Pot, pressure cooker, quick, side dish, vegetarian

Instant Pot Egg Casserole with Mushrooms and Peppers

November 29, 2018 by andrea Leave a Comment

This is a great way to serve eggs and whatever leftover veggies you have in the fridge. Feel free to substitute the veggies out for anything you have sitting around. You can do the same for the cheese. Have fun with it!

Because of the moisture in the pressure cooker, the top may look underdone when the casserole is actually cooked, so be sure to check the center for doneness with a sharp knife. If it is very runny, put it back in the pressure cooker to cook 5 more minutes. If it is just a little wet in the center, it will finish cooking while it rests. If it is somewhere in between very runny and a little wet, leave the casserole in the cooker with the lid on for five more minutes.


Instant Pot Egg Casserole
Recipe Type: Breakfast
Author: Andrea
Prep time: 15 mins
Cook time: 25 mins
Total time: 40 mins
Serves: 4-6
This is a lovely take on an egg casserole. Can creamy describe eggs?
Ingredients
  • 9 eggs
  • 6 T whole milk, 2% milk, half-and-half, or heavy cream
  • 1/2 t salt
  • 1/2 t black pepper
  • 2 T butter or olive oil
  • 1/2 cup onion
  • 1/2 cup sliced mushrooms
  • 1/2 cup finely chopped bell pepper
  • 1/2 cup shredded cheddar or Swiss cheese
Instructions
  1. Butter the inside of a 2-quart high-sided, road souffle dish. Make an aluminum foil sling and set the baking dish in the middle of it.
  2. Whisk the eggs, milk, salt and pepper in a large bowl until smooth and uniform, about 2 minutes.
  3. Turn the pressure cooker to sauté function. Add the 2 T butter. When the butter is melted, add the onion, mushrooms, and pepper and sauté for 3-5 minutes until the vegetables are soft.
  4. Scrape the vegetables out of the pressure cooker insert into the eggs and milk mixture. Add the cheese and scrape the entire mixture into the prepared souffle dish.
  5. Cover the souffle dish tightly with tin foil.
  6. Add 1 1/2 cups of water to the pressure cooker. Set a trivet in the bottom of the pot. Use the sling to lower the souffle dish into the pressure cooker. Fold down the sling’s ends to fit into the pot. Lock the lid onto the pot.
  7. Cook on high pressure for 25 minutes with the keep warm setting off.
  8. Use the quick release method to bring the pot’s pressure back to normal. Unlatch the lid and open the cooker. Use the sling to remove the dish to a wire rack. Remove the tin foil and cool the casserole for 5 minutes.
  9. Run a flat edge knife along the edge of the casserole. Set a plate on top of the casserole and invert the dish onto the plate so the casserole is released. Cut to serve.
3.5.3251


Filed Under: recipes Tagged With: breakfast, brunch, eggs, Instant Pot, pressure cooker, vegetarian

Cinnamon French Toast for the InstantPot

November 8, 2018 by andrea Leave a Comment

Instant Pot French Toast

I’m teaching a pressure cooking class in a few weeks and we are doing a brunch theme on a Saturday morning. Life doesn’t get much better, does it? I am now facing the challenge of fine tuning my recipes and having them ready to share with the class. So here we are, talking about French toast in the pressure cooker.

This French toast is a cross with bread pudding, since in order to make it work in the pressure cooker, you will cube your bread instead of leaving it in slices. The quantity of this recipe leaves me wanting, it serves four nicely. If you have a larger group to serve, you may need to plan to make two or use a larger pressure cooker that can fit a larger cake pan – your cooking time should not change. I will note that it cooked pretty quickly, very little warm up time, and the 5-minute quick release is helpful, also. So, if you cook two in a row, I can see it working out okay for serving them together.

But on to the recipe. In order to make a great French toast, you need to know a couple of things:

  • Use brioche or a lighter, sweet bread. I found a nice loaf of fluffy, slightly crusty French bread at Costco and it worked well. This is not the time to break out the multigrain, sourdough breads. They will just end up being so heavy and dense that you won’t be happy with the end results.
  • Since I bought my bread at Costco, I had a lot of it. I sliced it all up and then froze it cubed. It is ready to go when I want to make the next batch of French toast. Alternatively, it can be made into croutons sometime down the line.
  • There is no long soak needed of the bread in the egg and milk mixture, like you would with traditional French toast or bread pudding. The pressure cooker magically does the work of getting the liquid into the bread.
  • My little cheesecake pan that fits the Instant Pot manages to leak. I put tin foil around the outside, but it only helped to collect the liquid that escaped the pan. Next time, I plan to line the inside of the pan with a bit of parchment paper to keep that eggy goodness where it belongs.
  • Speaking of cheesecake pans, if you don’t have one for your pressure cooker, don’t stress. Find a Pyrex or other oven safe pan that fits and go for it. Some people find they need a few extra minutes when they use a Pyrex, but I have never found that to be the case.
  • When I pulled my French toast out of the InstantPot, the top looked like it needed a little crisping, so I poured a little melted butter over the top and toasted it under the broiler in the oven. This is an optional extra step. Totally optional, but worth it, if you have the time. You can add a little cinnamon and sugar to the top also, but be sure to watch it carefully under the broiler.
  • You can also add fruit to the French toast while it cooks. I’m planning to try adding frozen blueberries in my next batch. Of course, fruit as a final topping is an excellent option, also.

With no further ado, here is the recipe. I hope you enjoy!

Cinnamon French Toast for the Instant Pot
Recipe Type: pressure cooker, breakfast
Cuisine: breakfast
Author: Andrea
Prep time: 10 mins
Cook time: 15 mins
Total time: 25 mins
Serves: 4 servings
This is a quick, delicious breakfast for when you need something a little sweet and special without a lot of work! Think of it as a breakfast bread pudding.
Ingredients
  • 4 – 5 cups of cubed bread, use a brioche or other sweet, sturdy bread, see recipe for instruction on amount of bread
  • 1 cup of milk, use whole if you have it but anything will work
  • 2 eggs
  • 2 T brown sugar
  • 2 t vanilla
  • 1 t cinnamon
  • 1/2 cup of raisins, blueberries or chocolate chips (optional)
  • 1 T butter melted (optional)
  • Toppings – syrup, fruit, whipped cream, powdered sugar (optional)
Instructions
  1. Pour bread cubes into the cake pan that you’ll be using for this recipe. Fill the pan slightly over the top – the bread will shrink slightly during cooking. I use a 7-inch cheesecake pan, but a Pyrex bowl works also.
  2. Prepare your pressure cooker by adding 1 cup of water and placing a steamer rack in the insert. Prepare a tin foil sling for your cake pan, if you can’t easily remove the pan from the pressure cooker. To prepare a foil sling, roll two long pieces of tin foil into 1 inch wide strips, cross the strips in an x on the bottom of the cake pan to lift it easily.
  3. Combine milk, eggs, brown sugar, vanilla, cinnamon, and any optional ingredients into a large bowl.
  4. Toss bread cubes with the milk and egg mixture.
  5. Oil or butter the cake pan. Line the cake pan if you think it will leak or wrap it in tin foil.
  6. Pour the bread and egg mixture into the oiled cake pan.
  7. Cover the top of the cake pan with tin foil or a couple paper towels to keep the top of the French toast dry.
  8. Cook on high pressure for 15 minutes. Turn off the keep warm setting.
  9. Once the cooking time is complete, allow to rest 5 minutes before manually releasing the remaining pressure.
  10. If you’d like a crispier top, drizzle the melted butter over the top and put under the broiler for 3-4 minutes until you see it bubbling.
  11. Serve with syrup, fruit, whipped cream, or powdered sugar and enjoy!
3.5.3208


Filed Under: recipes Tagged With: breakfast, French toast, Instant Pot, pressure cooker

Pressure Cooker “Baked” Beans

July 20, 2018 by andrea Leave a Comment

My mom has a great baked bean recipe for the crock pot. It takes anywhere from 3- 6 hours to cook in the crock pot and uses canned beans. I have tried and tried to convert her recipe to use soaked, dried beans in the crock pot, but I’ve finally decided I don’t have the patience for them to cook that long. Plus the sauce never got thick enough with the soaked beans. Enter the pressure cooker. After trying several different baked bean recipes for the pressure cooker, I finally found one that came close to what I wanted. A little tweaking and used the seasoning in my mom’s recipe, and I think we have a winner!

Pressure Cooker “Baked” Beans
Author: Andrea
Prep time: 12 hours
Cook time: 35 mins
Total time: 12 hours 35 mins
This is an update of my moms crock baked beans. Plan ahead and soak your beans the night before. Soak extra and freeze them and save time the next time you make this recipe.
Ingredients
  • 2 cups of dried beans – navy is traditional, but I use a combination of pinto, black, butter and kidney.
  • 6-8 thick cut slices of bacon, cut into 1 inch pieces
  • 1 small onion, roughly chopped
  • 2 1/2 cup of water
  • 1 cup brown sugar
  • 1 T molasses
  • 1/4 c catsup
  • 1 t mustard
  • 1/4 t salt
Instructions
  1. The night before or morning of, rinse and soak beans in clean water. Cover by at least three inches of water. After 8-12 hours, drain. You should have about 4 cups of soaked beans, or about 2 pounds.
  2. Heat pressure cooker to sauté and brown bacon. When bacon is almost done, add onion and sauté another 3 or 4 minutes until onion is translucent.
  3. Add drained beans, 2 1/2 cup of water, brown sugar, molasses, catsup, mustard and salt. Stir.
  4. Lock lid on pressure cooker and cook at high pressure for 35 minutes. When timer beeps, turn pressure cooker off and wait 10 minutes. After 10 minutes use a quick pressure release to release any remaining pressure. Discard any beans that are floating. Check several beans to see if they’re tender. If not, pressure cook 5 minutes longer and check again.
  5. Leave lid off. Turn pressure cooker to simmer and simmer beans uncovered, stirring occasionally so the bottom doesn’t burn, until the sauce is the desired consistency.
  6. * If you don’t have time for an overnight soak, use the browning setting to bring 6 cups of water to a boil. Boil beans for two minutes. Turn pressure cooker off and let beans soak one hour. Proceed with the recipe as directed.
3.5.3208


Filed Under: recipes Tagged With: beans, pressure cook, pressure cooker, recipe

Sweet and Sour Cabbage

April 30, 2018 by andrea Leave a Comment

This dish may sound strange to the non-Germans out there. Give it a chance – it may surprise you. I like to make this dish with red cabbage, but if you have a green cabbage handy, just use it. You can also mix up the cumin and swap it out with fennel or caraway seeds.

Finally, just to throw in a little pressure cooker love – if you were to make this without the pressure cooker, you’ll be cooking it for about an hour.  Here it cooks for 3 minutes under pressure. Can’t beat that.

Have fun and enjoy.

Sweet and Sour Cabbage
Recipe Type: side dish
Author: Andrea
Prep time: 20 mins
Cook time: 3 mins
Total time: 23 mins
Serves: 4-6
This cabbage dish is a great side to roasted meats. Use red cabbage for a colorful addition to your plate.
Ingredients
  • 1 T vegetable oil
  • 1 medium onion,sliced
  • 1 t cumin seeds
  • 1 small head cabbage (about 1 1/2 pounds)
  • 2 t raw sugar
  • 1 t salt
  • 1/2 cup apple cider vinegar
  • 1/2 cup water
Instructions
  1. Heat the pressure cooker base on medium heat, add the oil, and heat briefly. Stir in the onion and cumin and saute until the onion has softened (about 3 minutes).
  2. Add the cabbage and stir to distribute the onions.
  3. Sprinkle with the sugar and salt and then pour the vinegar and waterover the top.
  4. Close and lock the lid of the pressure cooker. Cook at high pressure for 3 minutes. If using an electric pressure cooker, turn the “keep warm” setting off.
  5. When the time is up, open the cooker using the Normal Release method.
  6. Give the cabbage a final stir, transfer to a serving dish, and serve immediately.
3.5.3208


Filed Under: recipes Tagged With: cabbage, pressure cooker, side dish

Butternut Squash Risotto with Balsamic Vinegar

April 19, 2016 by andrea Leave a Comment

If you haven’t made risotto in the pressure cooker, then you are missing out. Risotto is fairly labor intensive if you do it on the stovetop – involves a lot of time and stirring. I’m not opposed to labor in the kitchen, but recipes that tie me down to a spot are the ones that I’m most likely to blow. But risotto is a whole different world in the pressure cooker. You basically add everything to the cooker, bring to high pressure for six minutes and it’s done. If you have an electric pressure cooker with a risotto setting, then it’s even easier – push a button and all the work is done for you. I love this recipe for butternut squash risotto – it is very simple, traditional, and delicious.

This recipe for butternut squash risotto with balsamic vinegar is one of my very favorite risottos. It is great on it’s own, but it also makes a great base recipe to take in different directions. If I want to add protein to the risotto, I prepare my chicken, sausage or pancetta (my favorite) ahead of time and add in to the finished risotto at the end. This is a great way to use up leftovers.

In spring when the asparagus is tender, I love to add some thin spears at the end with the cheese and butter. Close the lid for three minutes after the pressure is off and the asparagus will be crisp tender when you open up to serve.

You can also mess around with the cheese – parmesan and asiago are always safe bets, but you can play around with blue cheese or even swiss.

This recipe is even easier if you have pureed squash or pumpkin in your freezer. But, if you don’t have a freezer full of squash like I do, I include directions for pressure cooking your butternut squash. Still pretty darn easy. And it’s always a good trick to be able to cook a squash in minutes.

Butternut Squash Risotto with Balsamic
Author: Andrea
Prep time: 20 mins
Cook time: 6 mins
Total time: 26 mins
Serves: 4
I’m keeping the garnish really simple for this risotto. Use a high quality balsamic vinegar and you won’t go wrong. You want one that is thick to the point that it pours like a syrup. It makes all the difference when you aren’t hiding it behind other ingredients.
Ingredients
  • 1 small butternut squash – or 1 cup of butternut squash puree
  • 4 cups of chicken stock, low sodium
  • 2 T extra virgin olive oil – garlic flavored is awesome, if you have it
  • 3 shallots, chopped
  • 2 cloves of garlic (not necessary if using garlic flavored EVOO)
  • 1 T chopped fresh sage
  • 2 cups Arborio rice
  • 1/4 c dry white wine
  • 1 T unsalted butter
  • salt and black pepper, to taste
  • 1/2 cup grated Asiago cheese, divided
  • For garnish:
  • high quality balsamic vinegar
Instructions
  1. If using a whole butternut squash, cut the squash in half and clean out the seeds. Place in pressure cooker (on a rack, if you have one) with 1 1/2 cups of water (or the minimum amount of water necessary to bring your cooker to pressure) and bring to high pressure for 6 minutes. Release pressure naturally and poke the squash with a fork through the skin – if the fork pushes through with no resistance, the squash is done. Scoop squash out of skin and puree in a blender or using a stick blender until it is smooth. Reserve 1 cup of puree for this recipe and freeze remaining puree for future use – it will also keep in the fridge about 5 days.
  2. Heat olive oil in the bottom of a stovetop pressure cooker over medium heat – or in an electric cooker set to brown or sauté. Add shallots and sautée until soft, about 3 minutes. Add garlic cloves (if using) and chopped sage and sauté another 30 seconds until fragrant. Add Arborio rice and stir until rice grains are coated in oil and the tips start to turn transparent – about 3 minutes.
  3. Add the wine and stir until the wine has been absorbed. Add chicken broth and squash and stir. Close and lock lid of pressure cooker. Set pressure cooker to high and cook for 6 minutes on high. If your electric pressure cooker has a risotto setting – use it. Release pressure using a quick release method. Open lid, add butter salt and pepper to taste and 1/4 cup of cheese, stir and replace lid for 3 minutes. The risotto will seem a bit wet – don’t worry. Remove lid after 3 minutes, stir again and check your consistency. The rice should be creamy and al dente.
  4. Serve in bowls and drizzle with balsamic vinegar and top with remaining cheese.
3.5.3208


Filed Under: recipes Tagged With: balsamic vinegar, butternut squash, pressure cooker, pumpkin, rice, risotto, squash

Ham Bone and Bean Soup

December 29, 2015 by andrea 2 Comments

If you were to ask me, I would tell you that the best part about a ham is the bone. Our local meat market stopped carrying bone-in hams a couple of years ago, so I was forced to find a new meat market. I can’t even comprehend how they “make” hams without the bones. Seems a little funny to me.

But anyway, that ham bone is great because it make an awesome soup. I sometimes think of it as free food – take something that you might have thrown away, add a couple cheap veggies, and you end up with a  very healthy and easy soup.

To make traditional ham bone soup, you simmer it the ham bone in a pot of water all day long and eventually you end up with a great stock for a bean soup. The little bits of meat loosen up while it’s simmering and it makes the perfect soup for a cold winter day.

This year, I decided there was no need to simmer all day long. Save energy, save time, all that good stuff. So, I modified my ham bone and bean soup recipe for the pressure cooker. Perfect!

The only trick to this recipe is a little thinking ahead on the beans. The night (or morning) before you make the soup, take a couple cups of beans and cover them with 2-3 inches of cold water in a big pot. 8-12 hours later, drain the beans and you are ready for the soup. I usually soak extra beans, drain them and freeze them in two cup portions – ready to go in a recipe that calls for soaked beans and no planning required. If you are in a time crunch, you can also do a quick soak of your beans.

You can make this recipe with any bean you like. I love it with cannellini, but a bag of mixed beans (sometimes called a 15-bean soup mix) is great also. Have fun with it!

Here’s the recipe. Hope you enjoy.

Ham Bone & Bean Soup
Recipe Type: Soup
Author: Andrea
Prep time: 20 mins
Cook time: 30 mins
Total time: 50 mins
Serves: 8-10
Don’t throw away that ham bone! Here’s my favorite recipe for a leftover ham bone. Remember to pre-soak your beans. This is made in a pressure cooker, but could be easily modified for stovetop. Also, there should be no need to add salt to this recipe because of the ham bone.
Ingredients
  • 1 cooked ham bone, with meat left on
  • 1 large onion, chopped
  • 1 T olive oil
  • 1 bay leaf
  • 16 ounces of beans, soaked – any kind will do, but cannellini or mixed soup beans are a good start
  • 2 cups of chopped carrots
  • 2 cups of chopped celery
  • 1 teaspoon dried thyme
  • 1 teaspoon freshly ground pepper
Instructions
  1. Heat the olive oil in a 6 quart or larger pressure cooker, sauté the onion until translucent – not brown. Add the ham bone, bay leaf and 8 cups of water. Lock lid and bring cooker to high pressure for 25 minutes.
  2. Quick release pressure and add remaining ingredients. This is a big soup – do not fill cooker past the 2/3 line. Lock lid and return cooker to high pressure for 6-12 minutes, depending on your bean. Smaller beans like black beans will be 6 minutes, larger beans like cannellini will be 10-12 minutes.
  3. Release pressure naturally and remove lid.
  4. Remove ham bone. While ham bone is cooling, keep soup at a simmer. If you like a creamier soup, you can use a spoon to mush some of the beans up in it.
  5. When the bone is cool enough to handle, tear off the bits of ham still attached and return the ham to the soup.
  6. Serve with a crusty bread and enjoy!
3.5.3208


Filed Under: recipes Tagged With: beans, ham, pressure cooker, soup

  • 1
  • 2
  • Next Page »

Posts

  • Clatter in the Kitchen
  • recipes
  • Uncategorized

Recent Comments

  • Pam on (Sourdough Optional) Carrot Muffins
  • andrea on Cinnamon Rolls – Tangzhong method
  • Helen Lazzaro on Cinnamon Rolls – Tangzhong method
  • andrea on Hot Cross Buns
  • Susan Toth on Hot Cross Buns
  • Facebook

Copyright © 2023 · Foodie Child Theme by Shay Bocks · Built on the Genesis Framework · Powered by WordPress