My Kitchen Clatter

Real Food - Real Life

  • About Me
  • Classes
    • Upcoming Classes
    • Baking Classes
    • Pressure Cooking Classes
    • Fermentation Classes
    • Canning Classes
    • Kombucha Classes
  • Equipment
    • Nutrimill Plus Grain Mill
    • Nutrimill Classic Grain Mill
    • Nutrimill Harvest Grain Mill
    • Bosch Universal Mixer
    • Ankarsrum Original Assistant
    • Filter Pro Dehydrator
  • Grains & Supplies
  • Recipes
  • Clatter in the Kitchen

Cauliflower & Quinoa Pilaf for the Instant Pot

January 16, 2019 by andrea Leave a Comment

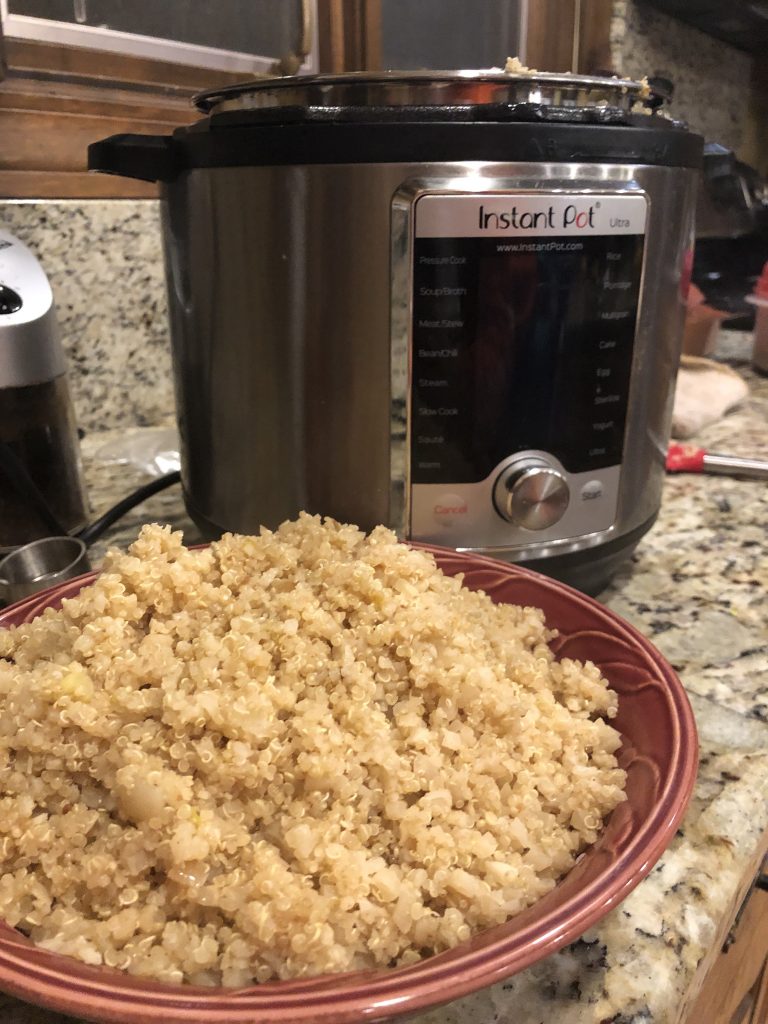
For starters, today I want to give a shout out to all those bloggers who are able to take Instagram worthy food photos. It is all I can do to grab the cell phone and snap a photo of my creations while my kids are screaming for dinner in the background. I’m trying to keep it real here – with quinoa on the lip of the pressure cooker, no fancy backdrops, and whatever.

Anyway… on to the recipe. I started with a pilaf recipe from The Instant Pot Bible by Bruce Weinstein, and then adapted it to what I had on hand in the house. The final recipe is much simpler than the original. And isn’t that what cooking is all about?

The original recipe caught my eye because it contained quinoa, which is super healthy and super quick to cook, especially under pressure. One of the things my family does during dinner is talk about the nutritional benefits of the foods we are eating. I find quinoa especially interesting since it is one of the few plant based proteins that contains all nine of the essential amino acids that are commonly found in meats. It is also a great source of manganese, phosphorus and fiber.

A couple quick recipe notes:

  • Be sure to rinse your quinoa before cooking it. You may be able to save yourself this step if your quinoa is pre-rinsed – check the bag to find out.
  • I used homemade vegetable broth. It is so much tastier than the stuff I find at the store and worth the extra trouble, in my opinion. One of these days, I will try to post a recipe for vegetable broth on this site, but in the meantime, a good pressure cooker book should get you started. Or try this recipe over at Hip Pressure Cooking for Vegetable Broth.
  • To make this recipe super easy and quick, I used frozen, riced cauliflower. If you have fresh cauliflower, break it into small pieces, and increase the cooking time to 6 minutes.


Cauliflower & Quinoa Pilaf
Recipe Type: side dish, pressure cooker, vegetable
Author: Andrea
Prep time: 10 mins
Cook time: 1 min
Total time: 11 mins
Serves: 4-6
Ingredients
  • 2 T butter
  • 1 cup of chopped onion (can substitute with shallots or leeks)
  • 1 t chopped garlic
  • 1 t cumin seeds
  • 1/2 t dried ginger powder
  • 1 cup of rinsed quinoa
  • 1, 16 oz package of fresh or frozen cauliflower rice
  • 2 cups of vegetable stock
Instructions
  1. Preheat the base of your pressure cooker using the sauté setting.
  2. Sauté the onion in the butter for 2-3 minutes until it is soft, but not browned.
  3. Add the garlic, cumin seeds and ginger powder and sauté briefly (about 10-30 seconds) until you can smell the spices.
  4. Turn off the heat on the pressure cooker.
  5. Add the quinoa, cauliflower and stock. Stir to combine.
  6. Lock on the lid of the pressure cooker and set the cook time for 1 minute on high pressure. Double check that the pressure valve is closed. Turn off the “keep warm” setting, if your machine has one.
  7. Once the cooking has completed, release the pressure using a quick release method.
  8. Fluff the pilaf and serve.
3.5.3251


Filed Under: recipes Tagged With: cauliflower, easy, grains, Instant Pot, pressure cooker, quick, side dish, vegetarian

Instant Pot Egg Casserole with Mushrooms and Peppers

November 29, 2018 by andrea Leave a Comment

This is a great way to serve eggs and whatever leftover veggies you have in the fridge. Feel free to substitute the veggies out for anything you have sitting around. You can do the same for the cheese. Have fun with it!

Because of the moisture in the pressure cooker, the top may look underdone when the casserole is actually cooked, so be sure to check the center for doneness with a sharp knife. If it is very runny, put it back in the pressure cooker to cook 5 more minutes. If it is just a little wet in the center, it will finish cooking while it rests. If it is somewhere in between very runny and a little wet, leave the casserole in the cooker with the lid on for five more minutes.


Instant Pot Egg Casserole
Recipe Type: Breakfast
Author: Andrea
Prep time: 15 mins
Cook time: 25 mins
Total time: 40 mins
Serves: 4-6
This is a lovely take on an egg casserole. Can creamy describe eggs?
Ingredients
  • 9 eggs
  • 6 T whole milk, 2% milk, half-and-half, or heavy cream
  • 1/2 t salt
  • 1/2 t black pepper
  • 2 T butter or olive oil
  • 1/2 cup onion
  • 1/2 cup sliced mushrooms
  • 1/2 cup finely chopped bell pepper
  • 1/2 cup shredded cheddar or Swiss cheese
Instructions
  1. Butter the inside of a 2-quart high-sided, road souffle dish. Make an aluminum foil sling and set the baking dish in the middle of it.
  2. Whisk the eggs, milk, salt and pepper in a large bowl until smooth and uniform, about 2 minutes.
  3. Turn the pressure cooker to sauté function. Add the 2 T butter. When the butter is melted, add the onion, mushrooms, and pepper and sauté for 3-5 minutes until the vegetables are soft.
  4. Scrape the vegetables out of the pressure cooker insert into the eggs and milk mixture. Add the cheese and scrape the entire mixture into the prepared souffle dish.
  5. Cover the souffle dish tightly with tin foil.
  6. Add 1 1/2 cups of water to the pressure cooker. Set a trivet in the bottom of the pot. Use the sling to lower the souffle dish into the pressure cooker. Fold down the sling’s ends to fit into the pot. Lock the lid onto the pot.
  7. Cook on high pressure for 25 minutes with the keep warm setting off.
  8. Use the quick release method to bring the pot’s pressure back to normal. Unlatch the lid and open the cooker. Use the sling to remove the dish to a wire rack. Remove the tin foil and cool the casserole for 5 minutes.
  9. Run a flat edge knife along the edge of the casserole. Set a plate on top of the casserole and invert the dish onto the plate so the casserole is released. Cut to serve.
3.5.3251


Filed Under: recipes Tagged With: breakfast, brunch, eggs, Instant Pot, pressure cooker, vegetarian

Pumpkin Chili

October 21, 2015 by andrea Leave a Comment

Sugar Pumpkin

I originally found this recipe for pumpkin chili when I was looking for recipes to share for a pumpkin class. The original recipe came from Thug Kitchen and was pretty fabulous. I’ve upped the tomatoes and vegetables and adjusted it a little to make it my own, which is what you should do with any good chili recipe.

To make your own pumpkin puree, find yourself a sugar pumpkin. Don’t use a regular carving pumpkin – they won’t taste as sweet and you’ll be wasting your time. Wash the pumpkin, cut it in half, and remove the seeds and strings. To cook the pumpkin, you can either roast the halves, cut side down, in a roasting pan with a cup of water. It’ll take about 30-40 minutes at 400 degrees. Alternatively, you can pressure cook the halves for about 6 minutes on high pressure – remember to 1/2 a cup of water or your cooker’s minimum liquid amount. The pumpkin is done with you can easily stick a fork in through the skin. Once the pumpkin is cooked, let it cool, scrape out the flesh and puree it in your blender or food processor until smooth.

These dried beans were harvested from our garden

These dried beans were harvested from our garden

You can use any type of beans in this recipe. The recipe is written for using canned beans or soaked dried beans. If you use dried beans, you have the option for cooking them before adding them to the soup or pressure cooking them as part of the soup. Cooking them before adding, let’s you mix and match your beans in the soup. Save the cooking liquid for the beans and use it in the soup instead of broth or water. I’ve used combinations of black, cannellini, and kidney beans.

If you choose to pressure cook the beans with the soup, either use one type of bean, or pick beans that are about the same size so they cook the at the same rate. Black beans can cook as quickly as 3 minutes under pressure, but cannellini or kidney can take 6 minutes. Adjust the pressure cooking time to the beans that you are using.

Pumpkin Chili
Author: Andrea
Prep time: 30 mins
Cook time: 40 mins
Total time: 1 hour 10 mins
Serves: 8
This is a great fall recipe. It uses pureed pumpkin, tomatoes, beans, and comes together quickly.
Ingredients
  • 2 T olive oil
  • 1 medium onion, chopped finely – about a cup
  • 1 cup of chopped carrots, about 2-3 carrots
  • 1 cup of chopped sweet pepper
  • 1 1/2 T chili powder
  • 1 t ground cumin
  • 4 cloves of garlic, chopped
  • 1 jalapeno, chopped
  • 2 T Braggs Amino Acids or soy sauce
  • 1, 28 oz jars of crushed tomatoes
  • 2 cups of pumpkin puree
  • 4 cups (or 2, 15 ounce cans of beans) – black, cannellini, or whatever you like (if you are dried beans, instead of canned), see special note in instructions for pressure cooked method
  • 4 cups of bean broth, vegetable stock or water
Instructions
  1. Heat the olive oil in a large stockpot over medium heat. Sauté the onion, carrots, and peppers until soft – it’s okay if they brown a little – about 5 minutes.
  2. Add chili powder, cumin, garlic, jalapeno, and amino acids. Sauté for 30 seconds.
  3. Add tomatoes, pumpkin, broth and beans and bring to a simmer. Allow to simmer on the stove for about 30 minutes before serving.
  4. * pressure cooker method – use soaked, dried beans. In step three, add remaining ingredients and pressure cook on high for 6 minutes for a medium size bean (see above notes for more info on cooking times). Done.
3.3.3077


Filed Under: recipes Tagged With: beans, pressure cooking, pumpkin, soup, vegetarian

Posts

  • Clatter in the Kitchen
  • recipes
  • Uncategorized

Recent Comments

  • Pam on (Sourdough Optional) Carrot Muffins
  • andrea on Cinnamon Rolls – Tangzhong method
  • Helen Lazzaro on Cinnamon Rolls – Tangzhong method
  • andrea on Hot Cross Buns
  • Susan Toth on Hot Cross Buns
  • Facebook

Copyright © 2023 · Foodie Child Theme by Shay Bocks · Built on the Genesis Framework · Powered by WordPress