My Kitchen Clatter

Real Food - Real Life

  • About Me
  • Classes
    • Upcoming Classes
    • Baking Classes
    • Pressure Cooking Classes
    • Fermentation Classes
    • Canning Classes
    • Kombucha Classes
  • Equipment
    • Nutrimill Plus Grain Mill
    • Nutrimill Classic Grain Mill
    • Nutrimill Harvest Grain Mill
    • Bosch Universal Mixer
    • Ankarsrum Original Assistant
    • Filter Pro Dehydrator
  • Grains & Supplies
  • Recipes
  • Clatter in the Kitchen

(Sourdough Optional) Carrot Muffins

April 3, 2021 by andrea 4 Comments

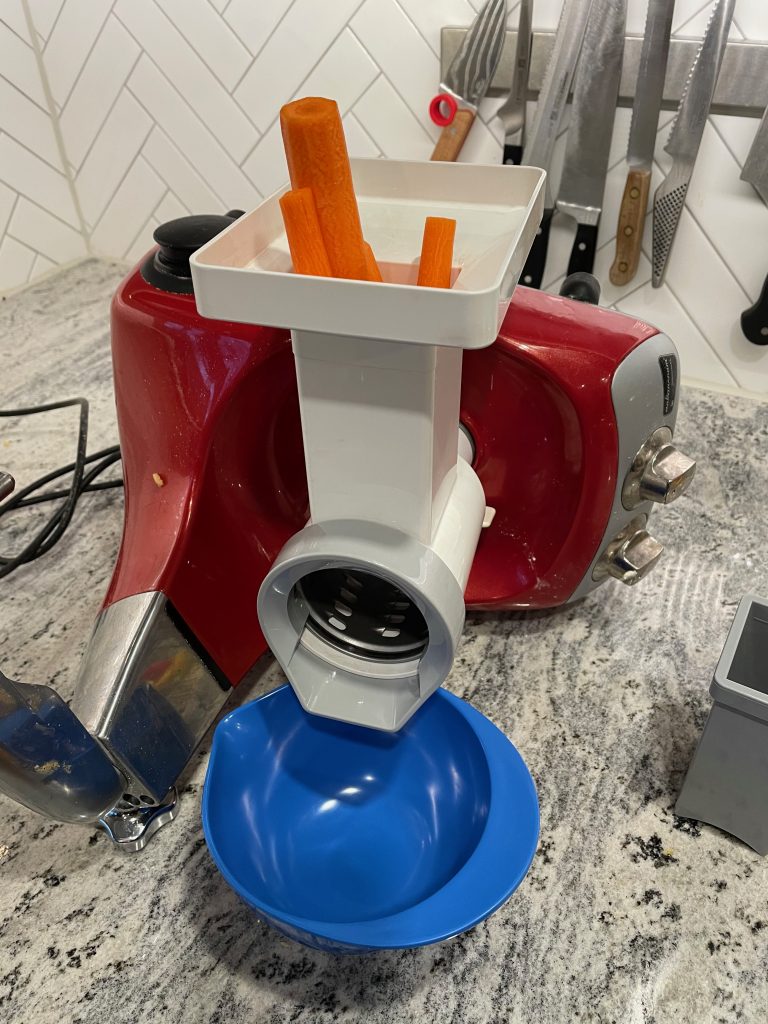
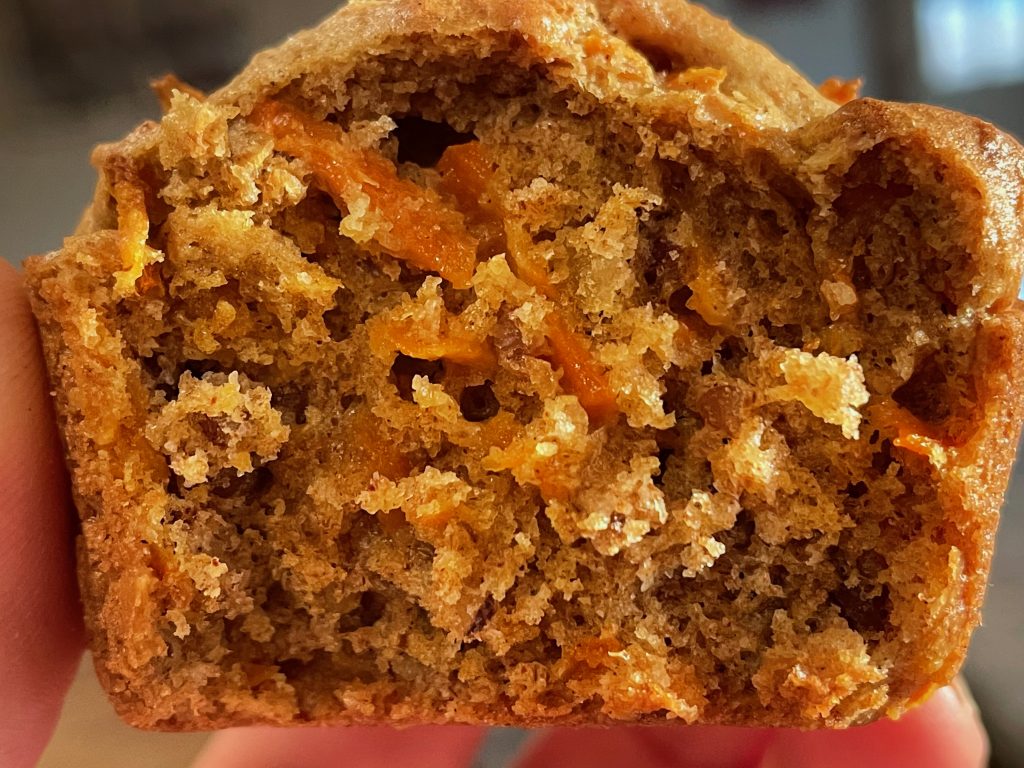
Okay! I’ve been eyeing making these carrot muffins for a while now and I have to admit that the thought of shredding carrots has kept me away from this recipe. But the ten pound bag of Costco carrots kept my mind coming back to this recipe. This morning, I finally got out the shredder. Honestly, sometimes (well, probably most of the time) I avoid certain recipes or steps because of the thought of doing extra dishes. Dishes are done now and the muffins are out of the oven. And these carrot muffins were worth the extra dishes.

These muffins have a great balance of flavor and spice. However, based on my kid’s responses to them, they may have more of an appeal to an adult palate. Next time, I may try to back off on some of the spices to see if that helps the boys. Maybe.

I made this recipe with discarded sourdough starter. You can’t really taste that the starter is in the muffins – it is mainly there as the liquid. If you don’t have sourdough starter, you can substitute with buttermilk or greek yogurt. Make the substitute on a 1:1 basis.

The batter may seem a little dry – that’s okay.

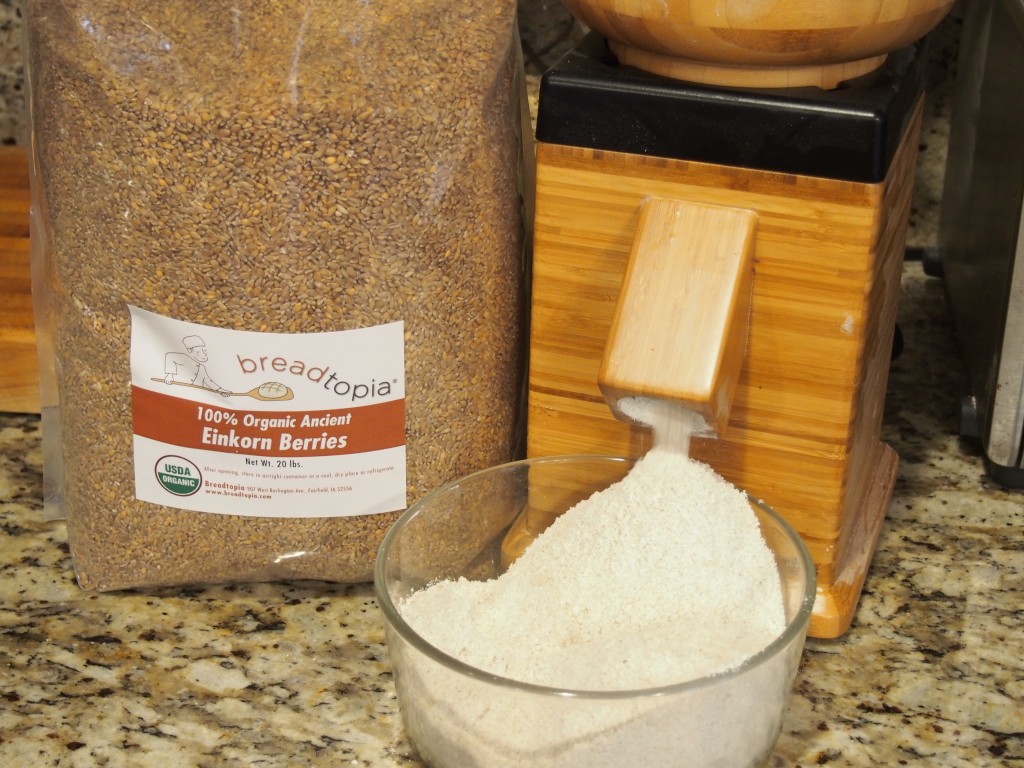
While I have your attention, let’s spend a quick minute talking about flour. You can absolutely make these muffins using regular all-purpose flour; however, upgrading to a good whole grain flour will really enhance the flavor. The key here is good whole grain flour. I mill my own flour, which is at the far end of the flour spectrum as far as freshness, quality and taste. But you can also find good whole grain flours from local mills, farmers markets or even on-line. If you are at the grocery store, brands like Bob’s Red Mill or King Arthur Flour are easy to find and provide a quality product. If you are near to me, feel free to reach out and ask me for a sample of flour. I think you’ll be surprised at what a difference fresh whole grain flours can make in your baking.

The crumble topping on the muffin is completely optional. I honestly put it on because I was hoping it would hide the carrot from my discerning teenager – it didn’t work. The topping did add a little extra sweetness to the muffin. Per my usual approach, I kept the sugar pretty low in the muffins. In my world, if I want a cupcake, then I’m going to eat a cupcake, not a cupcake disguised as a muffin. But… if you like your muffins a little sweeter, you can either add a bit more sugar to the recipe or you can include the topping. Own it and feel free to make this recipe work for you.

Carrot Muffins – No crumble topping (left) and with crumble (right)

(Sourdough) Carrot Muffins

Serving Size:
12-15 muffins
Time:
35 min
Difficulty:
easy

Dry Ingredients

  • 2 cups (240 g) whole wheat or AP flour (freshly ground soft white or spelt works well here)
  • 1 1/2 t baking powder
  • 1/2 t baking soda
  • 1/2 t salt
  • 1 1/2 t cinnamon
  • 1/2 t nutmeg
  • 1/4 t ginger
  • 1/4 t allspice

Wet Ingredients

  • 2 large eggs
  • 1/3 cup sunflower or olive oil
  • 3/4 cup brown sugar
  • 1 cup sourdough starter (can substitute with buttermilk or Greek yogurt)

Fold-In Ingredients

  • 1 1/2 cups (160 g) grated carrot (about 3-4 carrots)
  • 1/2 cup of finely chopped walnuts (optional)
  • 1/2 cup of raisins (optional)

Crumble (optional)

  • 1/4 cup brown sugar
  • 1 1/2 T whole wheat or all-purpose flour
  • 1/3 cup rolled oats
  • 1/4 t cinnamon
  • 2 T butter, room temperature

Directions

  1. Preheat oven to 425 F with the rack in the upper third of the oven. Spray or line 12-15 muffin tins.
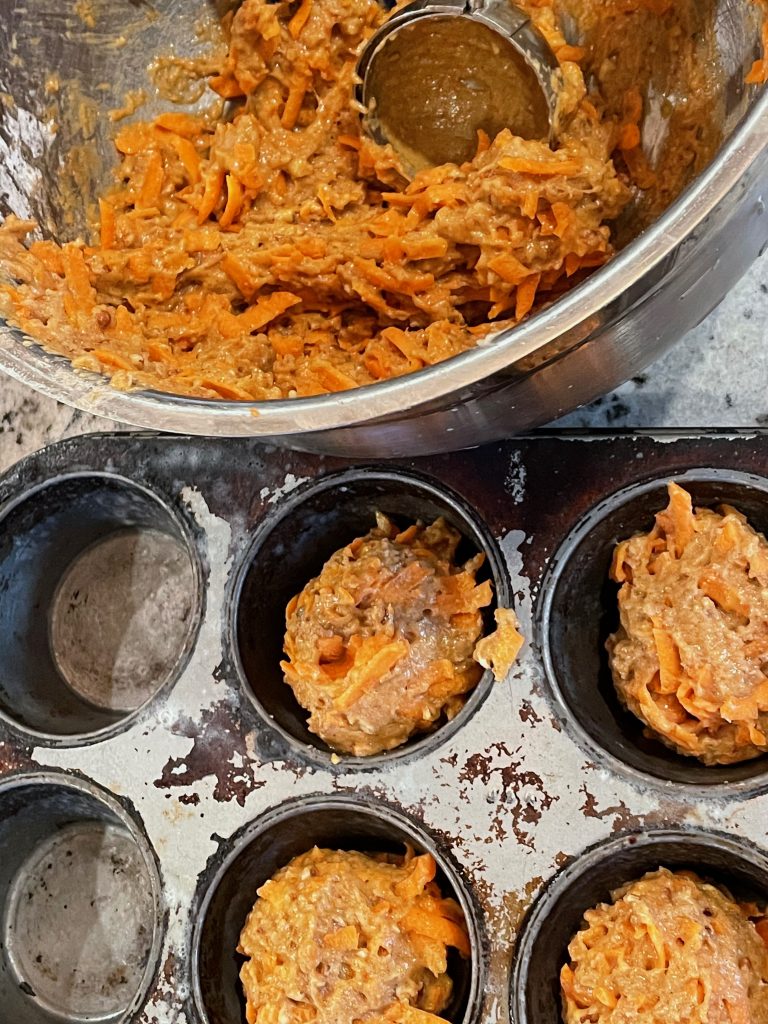
  2. Prepare your shredded carrots. Peel the carrots and shred using a box grater or your food processor. If you have a little extra carrot (up to 200 grams or 2 cups), just use them in the recipe.
  3. Prepare the crumble topping, if you are using it. Combine the crumble ingredients in a small bowl. Using your fingers, massage the butter into the dry ingredients until it is nice and crumbly. Set the topping aside.
  4. Combine the dry ingredients in a large bowl. Whisk.
  5. Combine the wet ingredients in a separate bowl and stir until they are mixed evenly.
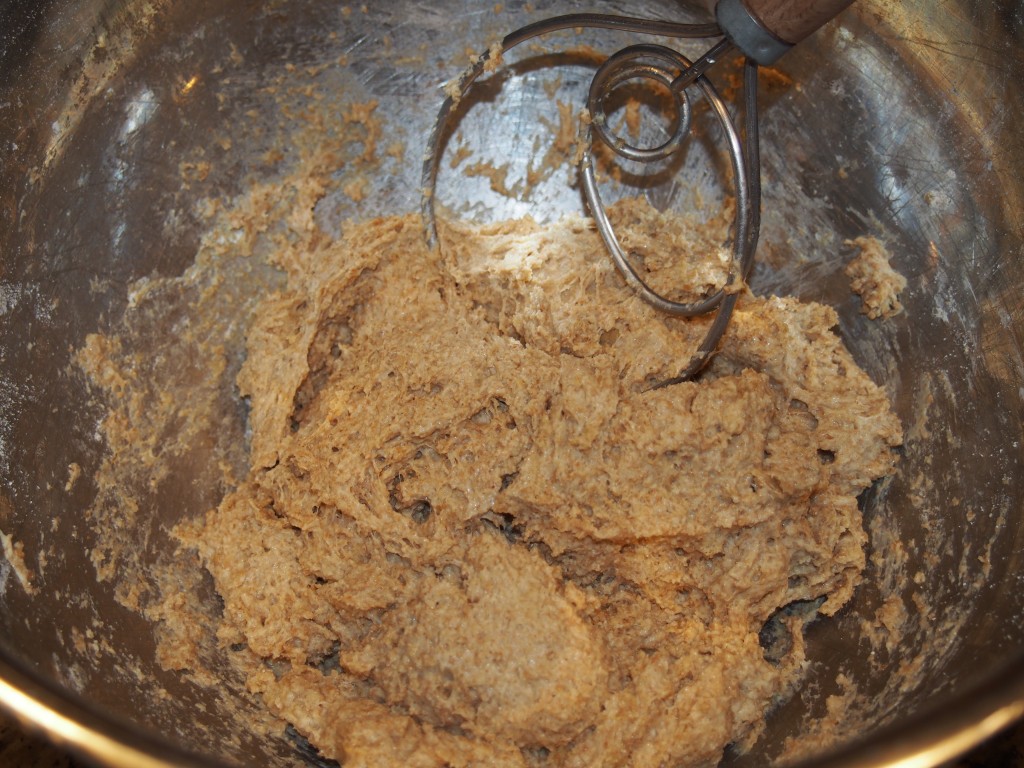
  6. Add the wet ingredients to the dry ingredients and fold in until the flour is almost entirely dissolved. Don’t overmix, just gently stir. Add the carrots and nuts or raisins, if you are using. Gently fold the mixture until the carrots are distributed throughout. If you made the batter with sourdough starter, the batter will seem pretty dry.
  7. Scoop the batter into the prepared muffin tin and fill tins about 3/4 full. Top with a tablespoon of the crumble topping, if using.
  8. Bake at 425 for 5 minutes. Turn down the heat on the oven to 350 F (don’t open the door) and cook for 15 minutes longer until the muffins are lightly browned and cooked throughout.
  9. Turn the muffins out onto a cooling rack and enjoy.
A quick shot of my grater attachment on my mixer – it really makes quick work out of a couple carrots and does not add many dishes. I’m not sure why I think twice about getting it out of the cupboard and hooking it up.

Filed Under: recipes Tagged With: muffins, soft whole wheat, sourdough, whole grains

Whole Wheat Crackers

January 24, 2016 by andrea Leave a Comment

Whole Grain Crackers

I feel I should start this recipe description with a warning – these crackers are addictive! Now we can move on.

Crackers are one of the few foods that we still buy in packaged form. The man loves Wheat Thins and even though I rarely buy them for him, I will occasionally find boxes in the pantry after I’ve sent him to the store for other things. And to be honest, Wheat Thins are not all that bad as far as processed foods go – there are not many ingredients and I can pronounce all of them.

But I have this desire to be able to bake things myself instead of having to buy them. If you need a box of crackers at the last minute, it often seems like it should be easier and quicker to whip some up instead of heading out to the store. And crackers really don’t seem like they should be that hard. And they aren’t – but I have had a difficult time finding a good recipe. I’ve tried several different recipes over the last year or so and I basically gave up looking because nothing was as good, quick or easy as the boxed ones. But I was recently inspired to try some new recipes and this time I’m pretty sure I hit the cracker jack pot.

The recipe itself is super simple – basic ingredients that you’ll probably have on hand.

You can play with the flours you use in these crackers

You can play with the flours you use in these crackers

If you know me, then you can probably guess that I’ve been making these crackers with freshly ground whole grain wheat flour. I’ve been playing with different heritage wheat varieties such as Einkorn, and I’ve also played with subbing some buckwheat flour for the wheat flour. The buckwheat made the crackers a little chewier that the all wheat version. If you aren’t milling your own flour and don’t have any on hand, this recipe will also work with a good store bought whole wheat or white flour.

Your dough should be sticky.

Your dough should be sticky.

When you mix up the dough, it should be sticky. Just be generous in flouring your dough as you roll it out.

I like a few seeds on my crackers. For my favorite seed mix, I combine equal amounts of caraway seeds, garlic powder, onion powder, poppy seeds, and sesame seeds in a little jar and then sprinkle away. This mix is one I use on bagels and dinner rolls. You could really use any seed, herb or finely ground nuts as the topping – have fun with it. To get the seeds to stick, I rolled the dough out just a tiny bit thicker than I want it at the end. Then I sprinkle the seeds on and finish rolling the dough out. This way you won’t have seeds everywhere in your kitchen except where you want them.

Using your rolling pin, lightly roll the seeds onto the crackers.

Using your rolling pin, lightly roll the seeds onto the crackers.

Whole Wheat Crackers
Author: Andrea
Prep time: 30 mins
Cook time: 15 mins
Total time: 45 mins
These simple crackers are amazingly tasty. Roll them really thin for a super crispy treat or a little thicker if you like your crackers a little chewy.
Ingredients
  • 3 cups of whole grain wheat flour
  • 2 t sugar
  • 2 t salt
  • 4 T olive oil
  • 1 cup water
  • topping, optional
Instructions
  1. Preheat oven to 450 and place the rack in the lower 1/3 of the oven.
  2. Combine flour, sugar and salt in a large bowl.
  3. Stir oil and water into dry ingredients. The dough will be soft and slightly sticky.
  4. Divide the dough into halves. Cover one half with a clean towel.
  5. Pat the other half into a rectangle and place onto a floured surface.
  6. Roll the dough out into a rectangle about 1/8″ thickness or thinner. Add flour as necessary to control stickiness.
  7. Sprinkle the topping evenly over the dough and gently roll the topping into the dough.
  8. Using a sharp knife or a pizza cutter, cut the dough into 1-inch x 2-inch crackers – or whatever shape you fancy.
  9. Poke each cracker with a fork and line up onto an oiled cookie sheet. Place the crackers as close as possible, they won’t spread.
  10. Bake 12-15 minutes, one sheet at a time. Check at 12 minutes for desired doneness. If some crackers bake quicker than others (because they are thinner or in the center of the pan) you can pull them off and bake the remainder a few minutes longer.
  11. Repeat with remaining dough.
3.5.3208


Filed Under: recipes Tagged With: cracker, whole grains, whole wheat, whole wheat cracker, whole wheat flour

The Best Granola

October 24, 2015 by andrea Leave a Comment

The name really says it all, but I’m just going to say it again – this is the BEST granola. But seriously, it has taken me a long time to find a granola recipe that is perfect for our family’s taste buds.

This makes a big batch, so use a big bowl!

This makes a big batch, so use a big bowl!

This recipe makes a huge batch of granola – so if you have a smaller family, you may want to half the recipe. You can also just eat it all. Or use some of it instead of oatmeal when you make cookies next. And of course, you can always bag it up and give it to neighbors and friends.

I’ve also listed all of the ingredients by both volume and weight. Honestly, who wants to measure out 10 cups of oatmeal? So, if you have a scale, this is the time to use it. Just plop your empty bowl on the scale, zero it out, and then start adding and weighing ingredients as you go.

Careful of little hands when you are stirring

This recipe is pretty low on the sugar as far as granolas go. That is probably reason enough to make your own. The granolas you find at the grocery store or farmer’s markets all have tons of sugar in them. It’s why they are so darn good. But that sugar is definitely not good. So, while we need some sugar in the recipe, I’ve tried to keep it as low as possible while still ending up with something that people want to eat.

When you get ready to put the granola in the oven, spread it out on two pans. I like to use parchment paper on the pans – it helps with clean up and you can use the parchment to move the cooled granola into it’s final storage container. After you bake the granola, try to leave it on the trays to cool in the oven – turn the oven off and leave the door shut. The granola will crisp up and form little chunks as it cools. If you bake the granola in the afternoon, you can go ahead and let it cool in the oven overnight.

OLYMPUS DIGITAL CAMERA

Spread the granola out on trays to bake.

The Best Granola
Author: Andrea
Prep time: 10 mins
Cook time: 90 mins
Total time: 1 hour 40 mins
Serves: 14 cups
Ingredients
  • 10 cups (2 lbs) old fashioned rolled oats
  • 3/4 cup (3.75 oz) sesame seeds
  • 1/2 cup (2.5 oz) sunflower seeds
  • 1/2 cup (2.5 oz) hemp seeds, optional
  • 3 cups (9 oz) any combination of chopped almonds, hazelnuts, and pecans
  • 1 cup (2.5 oz) shredded, unsweetened coconut
  • 1/2 t salt
  • 2 T cinnamon
  • 3/4 cup (6 oz) coconut oil, melted
  • 1 cup (12 oz) honey
  • 1 1/2 T Vanilla extract
  • 1 1/2 t almond extract
Instructions
  1. Heat oven to 250 degrees. Line two jellyroll pans with parchment paper.
  2. Combine oats through cinnamon in a large bowl.
  3. Combine remaining ingredients in a small bowl.
  4. Pour wet ingredients over dry ingredients and stir to combine.
  5. Divide granola onto prepared pans.
  6. Bake in preheated oven for a total of 80-90 minutes. Every 30 minutes, stir granola and rotate pans in the oven.
  7. Once the granola is nice and toasty brown, turn off the oven and let cool in the oven, 6-8 hours. As it cools it will get crispy and form small chunks.
3.3.3077


Filed Under: recipes Tagged With: breakfast, granola, oats, whole grains

Posts

  • Clatter in the Kitchen
  • recipes
  • Uncategorized

Recent Comments

  • andrea on Whole Wheat Bread (small batch)
  • andrea on Sourdough Beer Pizza Crust
  • andrea on Recipe for Holiday Jam
  • andrea on (Sourdough Optional) Carrot Muffins
  • andrea on Lentil and Ham Bone Soup

Recent Comments

  • andrea on Whole Wheat Bread (small batch)
  • andrea on Sourdough Beer Pizza Crust
  • andrea on Recipe for Holiday Jam
  • andrea on (Sourdough Optional) Carrot Muffins
  • andrea on Lentil and Ham Bone Soup

Posts

  • Clatter in the Kitchen
  • recipes
  • Uncategorized
  • Facebook

Copyright © 2025 · Foodie Child Theme by Shay Bocks · Built on the Genesis Framework · Powered by WordPress