My Kitchen Clatter

Real Food - Real Life

  • About Me
  • Classes
    • Upcoming Classes
    • Baking Classes
    • Pressure Cooking Classes
    • Fermentation Classes
    • Canning Classes
    • Kombucha Classes
  • Equipment
    • Nutrimill Plus Grain Mill
    • Nutrimill Classic Grain Mill
    • Nutrimill Harvest Grain Mill
    • Bosch Universal Mixer
    • Ankarsrum Original Assistant
    • Filter Pro Dehydrator
  • Grains & Supplies
  • Recipes
  • Clatter in the Kitchen

Whole Wheat Bread – Single Loaf

February 6, 2020 by andrea 1 Comment

This is my go-to daily sandwich bread recipe. I normally make it in a large batch so I only have to bake bread once a week, but I know that approach isn’t necessary for everyone. Over the years of baking this bread, my technique has slowly morphed into the recipe that follows. If you’ve taken a class with me in the past, you may notice a few small differences between this recipe and the one you learned in class, but the essentials are the same. Likewise, I suspect that many of you have modified that first recipe to make it fit your kitchen and needs. The search for perfect bread is a long one, but this loaf comes pretty darn close, in my book.

Whole Wheat Bread – Single Loaf
Recipe Type: bread
Author: Andrea
Prep time: 90 mins
Cook time: 30 mins
Total time: 2 hours
Serves: 1 loaf
This recipe is my basic go-to sandwich bread in a single loaf recipe size. Search my site for a 2-loaf recipe and a 6-loaf recipe. The flavor and taste of this bread depend greatly on the quality of the whole wheat flour – use freshly ground if you can find it.
Ingredients
  • 1 cup of warm water (baby bath temperature)
  • 2 T oil (I like coconut oil or olive oil)
  • 2 T sugar (I use honey)
  • .5 cups of high protein white flour (such as King Arthur flour – red bag)
  • 2.5 cups of freshly milled whole wheat flour – divided (If you can’t find freshly ground, use 1 cup of bagged whole wheat flour)
  • 2 t instant yeast
  • 2 t salt (fine texture – if you only have course salt, dissolve it into a small bit of the water before adding it to the dough)
Instructions
  1. With the dough hook in your mixer, combine the warm water, honey and oil in the base of your mixer. Add 2 cups of the whole wheat flour and stir until combined. Let rest for 10-30 minutes. This will help strengthen the protein and gluten in the whole wheat flour.
  2. Add the instant yeast to the mixer bowl and pulse to combine.
  3. Add the white flour and the salt to the mixer. Turn the mixer to low speed and let combine. Add enough of the remaining whole wheat flour to the dough until it clears the sides of the bowl and forms a ball. You may not need all of the whole wheat flour. Turn the mixer to low-medium speed and allow it to knead for 6-8 minutes until the dough is soft and pliable.
  4. Roll the dough it a little olive oil (or other cooking oil) and allow to rise in a large, covered bowl in a warm spot for about 45 minutes until it is just doubled in size. You should be able to poke the dough and it will feel soft and you’re finger will leave a slight indent.
  5. Oil your bread pan. Whole wheat breads do best in smaller pans – this loaf should fit nicely in a 4″x6.5″ pan, and weigh about 1 pound 6 ounces uncooked.
  6. Gently deflate the dough and shape it for your loaf pan. Shape by gently patting into a rectangle slightly wider than your pan. Roll the dough along the long length and gently pinch and seal the seam. Tuck the edges under towards the seam and place the loaf, seam side down, into your oiled bread pan.
  7. Oil the top of the loaf. Cover with a kitchen towel and allow to rise in a warm spot for about 30-45 minutes until the top of the dough is about 1 inch above the edge of the pan.
  8. While the dough is rising, preheat your oven to 400 degrees.
  9. When the dough has risen, gently move the pan into the oven and reduce the oven temp to 350. Cook for 30 minutes, until it is golden and sounds hollow when tapped on the outside.
3.5.3251


Filed Under: recipes Tagged With: bread, whole wheat

Recipe for Holiday Jam

November 2, 2019 by andrea 12 Comments

First off, if anyone can come up with a better name than Holiday Jam, please let me know. At any rate, this is a little bit strawberry, a little bit cranberry, some spice, some sweet, and some tang. It pretty much has it all.

The original recipe that I based this on was a Ball Recipe that called for 5 lbs of sugar and powdered pectin. At that level of sugar, I’m not sure how you even taste anything else. I’ve cut the recipe in half to make it a small batch, and I’ve cut the sugar way down and taken out the powdered pectin. I don’t like the taste of powdered pectin and it isn’t necessary anyway, because cranberries are so high in natural pectin.

I’m pretty darn happy with the end result on this jam. It would be great as a hostess gift over the holidays. We are planning to use it over cream cheese or goat cheese on a cheese plate. I think it would also be great on turkey sandwiches. Honestly, this one, I’ve just been eating straight up on crackers. I hope you enjoy it as much as I am!

Holiday Jam
Recipe Type: Preserves
Author: Andrea
This is a bright jam that combines strawberries and cranberries. It is perfect for canning in small jars for holiday gift giving. It goes well over cream cheese or goat cheese, on sandwiches, or crackers.
Ingredients
  • 4 cups frozen strawberries, slightly thawed
  • 2 cups fresh cranberries
  • 1 orange, peeled and seeded
  • zest of one orange (from above), finely shredded or chopped
  • 1/2 t cinnamon
  • 1/2 t fresh ginger
  • 1/4 t nutmeg
  • 1/8 t cloves
  • 3 cups of granulated sugar
Instructions
  1. Prepare a boiling water bath and 5 half-pint (8 oz) jars or 10 4-oz jelly jars. A boiling water bath can be done in any stock pot that allows for water to cover the jars by at least 1-inch. A tall stock pot is fine to use, just place a towel or rack in the bottom so the jars don’t sit directly on the heat source. If your stock pot doesn’t fit all of your jelly jars (it may not if you are doing 4-oz jars), only jar up the ones that will fit in the pot, keeping the rest of the jam warm on the stove while the first batch of jars processes. Once the first jars are done processing, jar the remaining jam and process in a second batch. Alternately, you can just jar any extra jam to eat right away or freeze.
  2. Wash and prepare lids and rings, according to the package directions.
  3. Place strawberries, cranberries and peeled orange in food processor and pulse to medium to finely chopped, but not pureed. It will break down some as it cooks, so it is better to go with larger pieces than too small.
  4. Combine the fruit mixture in a large skillet or dutch oven. The skillet allows for more moisture loss over the surface, which reduces cooking time and maintains the fresh fruit flavor. Stir the fruit over medium-high heat until they are combined, about 2 minutes.
  5. Add the spices and sugar.
  6. Stirring regularly over high heat, bring the fruit to a boil and cook until it bubbles and looks quite thick.
  7. This will take about 15-20 minutes. It’s done when you pull a spatula through the jam and it doesn’t immediately run back into the cleared space. You can also check the temperature with a candy thermometer – it’s done when it hits 220 F.
  8. When the jam is done cooking, remove the pot from heat and allow to rest 5 minutes, stirring occasionally. Skim any foam off the surface and reserve. Ladle the de-foamed jam into the prepared jars leaving 1/4 inch headspace. Wipe the rims with a wet paper towel, remove air bubbles, if necessary.
  9. Process in a boiling water bath for 10 minutes.
  10. After the processing time is complete, remove the jars from the water bath and place on a towel on the counter to cool. Allow to cool, untouched, for 24 hours and then check seals.
  11. If you don’t want to process this recipe (or if you have a jar that doesn’t seal) – just jar the jams up to step 8 and refrigerate for up to 3 weeks. It will also freeze well.
3.5.3251

Filed Under: recipes Tagged With: holiday, jam, preserves, recipe

Easy Homemade Fruit Leather

July 8, 2019 by andrea Leave a Comment

Fruit leathers are homemade fruit rolls and they are very popular in our house. I love them because they are a great way to use up leftover fruit, don’t contain any added sugar, and the kids gobble them up.

You’ll need a couple special kitchen tools for this recipe. The first is a blender. I use my immersion blender to keep the clean up simple, but any good blender will do.

This batch of fruit includes blueberries and mangos.

The second tool is a dehydrator. A decent dehydrator runs about $100 and can be used for other preservation projects. If you don’t have a dehydrator, you can try to do these on a very low oven – they will take about 18 hours in an oven. You can also dry them in the hot sun – it will take about 1 to 2 days to dry in the sun.

Fruit leathers ready to go in the dehydrator.

For the diabetics out there, make these without added sugar and they should contain the amount of fruit allowed for a fruit exchange.

This recipe is written for 2 cups of fruit, but it can be multiplied to accommodate as much fruit and drying space as you have.

Enjoy!

Easy Homemade Fruit Leathers
Recipe Type: snack
Author: Andrea
Prep time: 10 mins
Cook time: 4 hours
Total time: 4 hours 10 mins
Serves: 13″ x 15″ leather
These homemade fruit roll-ups are a great way to use up extra fruit that isn’t getting eaten quick enough. They are also an awesome low-sugar snack.
Ingredients
  • 2 cups of any combination of ripe or slightly overripe fruit – blueberries, strawberries, raspberries, banana, kiwi, mango
  • 1/4 cup of applesauce (optional, to help thicken the fruit)
  • 2 t of lemon juice or 1/8 t ascorbic acid for light colored fruit to prevent darkening (optional)
  • 1-2 T of honey, to taste (optional)
Instructions
  1. Prepare dehydrator trays by lining them with parchment paper over the surface of the tray. I cut out the center hole on my paper to help it fit better. Edges of the parchment paper can be folded up at the edge of the tray. Depending on the size of your dehydrator trays, you will need one or two trays for 2 cups of fruit.
  2. Wash fruit or berries in cool water. Remove peel, seeds, and stems.
  3. Using a blender or immersion blender, puree the fruit.
  4. The pureed fruit should be slightly thick so that it doesn’t run apart when poured onto the dehydrator trays. If it seems too runny, add a little applesauce to thicken it up. The applesauce will also help decrease tartness and make the leather smoother and more pliable. If the fruit seems to thick, add liquid, such as orange or apple juice, to thicken.
  5. Taste and add honey, if needed. I rarely add any honey at all.
  6. Pour the pureed fruit mixture onto the prepared tray. Avoid the edges of the tray. Spread it out to about 1/8 inch thick. Thicker spreads will take longer to dehydrate. Spread into any shape you like. I usually do about 2″ x 8″ rectangles. Larger shapes can be cut smaller later, but will take longer to dry.
  7. Dry the leather at 140 degrees F. The leather will dry from the edges to the center.
  8. After about 4 hours, test for dryness by touching the center of the leather – your finger should not leave an indent.
  9. While warm, you can peel from the parchment and roll. Allow to cool and rewrap in plastic. I usually let mine cool flat and then bag it and freeze.
  10. The leather usually will get eaten pretty quickly. But it will last about a month at room temp or it can be frozen up to a year.
Notes
This recipe can be multiplied based on how much fruit and dehydrating space you have.
3.5.3251


Filed Under: recipes Tagged With: cheap, dehydrator, easy, fruit

Blueberry Lime Jam

July 6, 2019 by andrea Leave a Comment

Blueberries are a very versatile fruit for jam and it is easy to create a simple classic blueberry jam. But if you want to add a little interest to your jam, you can add basil, ginger, or lime. With this recipe, we are going to add lime juice and zest. I find this jam is great on toast or spread on goat cheese with crackers. It’s also great in oatmeal, on ice cream, on vanilla pudding… you get the idea.

All of that being said, if you don’t want to mix it up – just swap out the lime juice with lemon juice and eliminate the lime zest.

This is a small batch of jam and I cook it in a large sauté pan. This allows for more surface area on the jam, which helps it set up quickly. This means that your jam will taste more like fresh blueberries than cooked blueberries.

This is the beginning of the cooking process – the jam has not thickened and is a little foamy.

This blueberry jam relies on the natural pectin levels in blueberries for thickening the jam. If you have some slightly underripe blueberries, they will help with the set of the final jam as they have a higher pectin level that the full on totally blue blueberries. Because there is not added pectin in this recipe, you’ll want to check that the jam reaches 220 F to make sure it sets. You can also go by eye – it’s done when a spoon pulled along the bottom of the pan leaves a clear zone.

The jam has set and a spoon pulled along the bottom leaves a path on the bottom of the pan.

Because this is a small batch of jam – you can use any large stock pot to water process the jars of jam. You just need to make sure that the water depth in the pan is high enough to cover the tops of your jars by at least an inch. Place a trivet or a towel on the bottom of the pot so the jars aren’t directly on the heat source. You’ll also want to make sure that the jars have enough space in your pan so that they don’t touch and water can move around all sides of the jars.

Five jars fit nicely in a large stock pot and a sixth could fit into the center.

Here is the recipe. Enjoy!

Blueberry Lime Jam
Recipe Type: preserving
Author: Andrea
Prep time: 20 mins
Cook time: 20 mins
Total time: 40 mins
Serves: 20-24 oz
This blueberry jam relies on natural pectin for thickening – the lime brightens the blueberry taste and makes for an interesting, yet classic, jam. Without traditional pectin, this jam is lower in sugar and actually tastes of the blueberries.
Ingredients
  • 4 cups blueberries, with some slightly underripe, if possible
  • 1 cup sugar
  • 2 T bottled lime juice
  • zest from one lime
Instructions
  1. Prepare a boiling water bath and 3 half-pint (8 oz) jars or 6 4-oz jars. A boiling water bath can be done in any stock pot that allows for water to cover the jars by at least 1-inch.
  2. Wash and prepare lids and rings, according to the package directions.
  3. Combine the blueberries and a splash pf water in a large skillet. The skillet allows for more moisture loss over the surface, which reduces cooking time and maintains the fresh blueberry flavor. Stir and crush the berries over high or medium-high heat until they begin to break down.
  4. Add the sugar, lemon juice and zest.
  5. Stirring regularly, bring the fruit to a boil and cook until it bubbles and looks quite thick.
  6. This will take about 10-12 minutes. It’s done when you pull a spatula through the jam and it doesn’t immediately run back into the cleared space. You can also check the temperature with a candy thermometer – it’s done when it hits 220 F.
  7. When the jam is done cooking, remove the pot from heat and allow to rest 5 minutes, stirring occasionally. Skim any foam off the surface. Ladle into the prepared jars leaving 1/4 inch headspace. Wipe the rims, remove air bubbles, if necessary, and process in a boiling water bath for 10 minutes.
  8. If you don’t want to process this recipe (or if you have a jar that doesn’t seal), you can jar the jams and refrigerate for up to 3 weeks. It will also freeze well.
3.5.3251


Filed Under: recipes Tagged With: blueberry, blueberry jam, jam, low sugar, preserving

Lentil Soup in the Pressure Cooker

May 24, 2019 by andrea Leave a Comment

This is a super straightforward recipe for lentil soup. Pair it with some crusty bread and you’ve got a comfort food perfect for cool evenings. I’ve also been known to make a batch during warmer weather, since the leftovers make a super easy and healthy lunch.

If you want to mix the flavors up a bit, you can swap out the thyme and Italian seasoning with cumin and smoked paprika. Turmeric, red pepper flakes and curry powder also make a nice spice combination.

I used green lentils in this recipe – Trader Joe’s carries them. If you only have yellow or red lentils, that’s fine also – just change the cooking time to 8 minutes.

I will note – the lentils are a good source of protein and fiber. Lots of good things going on with lentils, but if you miss the meat, feel free to add in some cooked chicken or sausage at the end. Pop the lid back on for a few minutes (no heat) to let everything get warm.

Enjoy!

Lentil Soup in the Pressure Cooker
Author: Andrea
Prep time: 15 mins
Cook time: 12 mins
Total time: 27 mins
Ingredients
  • 1 T olive oil
  • 1 medium onion, chopped
  • 2 large carrots, chopped
  • 2 celery stalks, chopped
  • 2 tsp dried thyme
  • 1 t Italian seasoning
  • 1/2 t freshly ground black pepper
  • 3 cloves of garlic, minced
  • 1 1/2 cup of green lentils
  • 1 (14.5 oz) can diced tomatoes
  • 1 (14.5 oz) can diced tomatoes, fire roasted
  • 4 cups low-sodium chicken or vegetable broth
  • 1/2 t sea salt, or to taste
  • freshly grated parmesan, for serving
Instructions
  1. Preheat the base of an electric pressure cooker on the brown or sauté setting.
  2. In the preheated base, add olive oil and allow to heat for a minute. Add onion, carrots, celery and sauté until onions are translucent and a little soft – not brown.
  3. Add thyme, Italian seasoning, and pepper and stir into onion mixture. Add garlic and sauté another minute.
  4. Add green lentils, tomatoes, and broth. Stir.
  5. Close and lock lid on the pressure cooker. Check that the valve is set to sealing and turn keep warm setting off. Set to cook at high pressure for 12 minutes.
  6. When the cooking time is up, release the pressure using the quick release method.
3.5.3251


Filed Under: recipes Tagged With: healthy, lentils, quick, recipe

Sweet Potatoes with Black Eyed Peas – Electric Pressure Cooker

May 24, 2019 by andrea Leave a Comment

In this recipe, we will be cooking two separate dishes at once in the pressure cooker. The black eyed peas cook on the bottom of the pot while the the sweet potatoes cook above the peas in a steamer basket. The liquid from the peas is enough to cook the sweet potatoes and everything is done cooking at the same time. Brilliant!

Serve the peas on top of the sweet potatoes and top with a bit of greek yogurt. If you want to make this vegan, swap the yogurt out with balsamic vinegar.

A couple notes on the ingredients –

  • The black eyed peas are high in fiber making them heart healthy. They are also low calorie and low fat. Use dried black eyed peas in this recipe – you can find them in the supermarket with the rice and other dried beans. You’ll soak them 8 hours or overnight for this recipe. Soak some extra black eyed peas and freeze them for future recipes – 1 cup of dried beans will equal 2 cups of soaked beans and is equal to one 14-16 ounce can of black eyed peas.
  • Harissa is a fiery and garlicky North African hot chili pepper paste. I found a small jar of it at Trader Joe’s, so it’s becoming pretty easy to find in regular supermarkets. It pairs well with the coriander, caraway, and cumin seeds called for in the recipe.
  • If you don’t have harissa, coriander, caraway, or cumin seeds in your pantry, feel free to eliminate any that you are missing. You can substitute in a chopped jalapeño pepper for the harissa. Powdered versions of the spices will work in a pinch, also – just skip step 2 and add the powdered spices at the end of step 3 with the garlic.
Sweet Potatoes with Black Eyed Peas – Electric Pressure Cooker
Recipe Type: Pressure Cooker
Author: Andrea
Prep time: 35 mins
Cook time: 12 mins
Total time: 47 mins
Serves: 4
Ingredients
  • 3-4 medium sweet potatoes, sliced in half length-wise
  • 6-8 T plain whole milk yogurt, or more to taste
  • 1/2 t coriander seeds
  • 1/2 t caraway seeds
  • 1 t cumin seeds
  • 1 T extra virgin olive oil
  • 1 medium onion, chopped
  • 4 large garlic cloves, chopped
  • 1 cup dried black eyed peas, rinsed and sorted
  • 1 T tomato paste
  • 1 1/2 cups water
  • 1 T harissa, or more to taste
  • 1/2 t sea salt
  • 2 cups of baby spinach
Instructions
  1. Place the sweet potatoes in a steamer basket with cut side up, side to side. If you need to layer the potatoes, do the second layer at an angle to the first layer. Set aside.
  2. Pre-heat the pressure cooker using the brown or sauté setting.
  3. Add the spices and toast for about 30 seconds in the pressure cooker until you can smell the spice.
  4. Add olive oil to the pan and let heat up a few seconds. Add the onion and sauté until soft. Add the garlic gloves and sauté another 30-60 seconds.
  5. Add the black-eyed peas, tomato paste, and water. This is the point of no return for spicy food eaters – if everyone likes spicy food, you can add the harissa now. If you have someone who doesn’t like spicy, wait and add the harissa with the salt.
  6. Stir the black eyed peas. Lower the steamer basket on top of the pea mixture.
  7. Close and lock the lid of the pressure cooker. Make sure the valve is set to sealing. Cook at high pressure for 12 minutes. Turn off the keep-warm setting.
  8. When the cooking time is over, do a natural release for 10 minutes and then release the remaining pressure with a quick release.
  9. Remove the steamer basket and sweet potatoes.
  10. Stir the spinach and salt (and harissa, if not added yet) into the black eyed peas.
  11. Serve the black eyed peas on top of the sweet potatoes with yogurt on the top.
3.5.3251


Filed Under: recipes Tagged With: black eyed pea, fiber, healthy, one pot meal, pressure cooker, recipe, sweet potato

Marmalade French Toast for the Instant Pot

January 27, 2019 by andrea Leave a Comment

Once again, I got carried away with my preserving. This time it was with lemon and pink grapefruit marmalade. And while it is delicious, the recipe is HUGE and I ended up with 14 half pints of marmalade.

Just a quick note on this marmalade recipe, it is from a book called The Blue Chair Jam Cookbook by Rachel Saunders. This book has some great tips on making jams and jellies without added pectin, and I have really enjoyed reading through it for inspiration.

Some Recipe Notes

This recipe is based on a recipe for croissants a l’orange that my husband and I had on our 
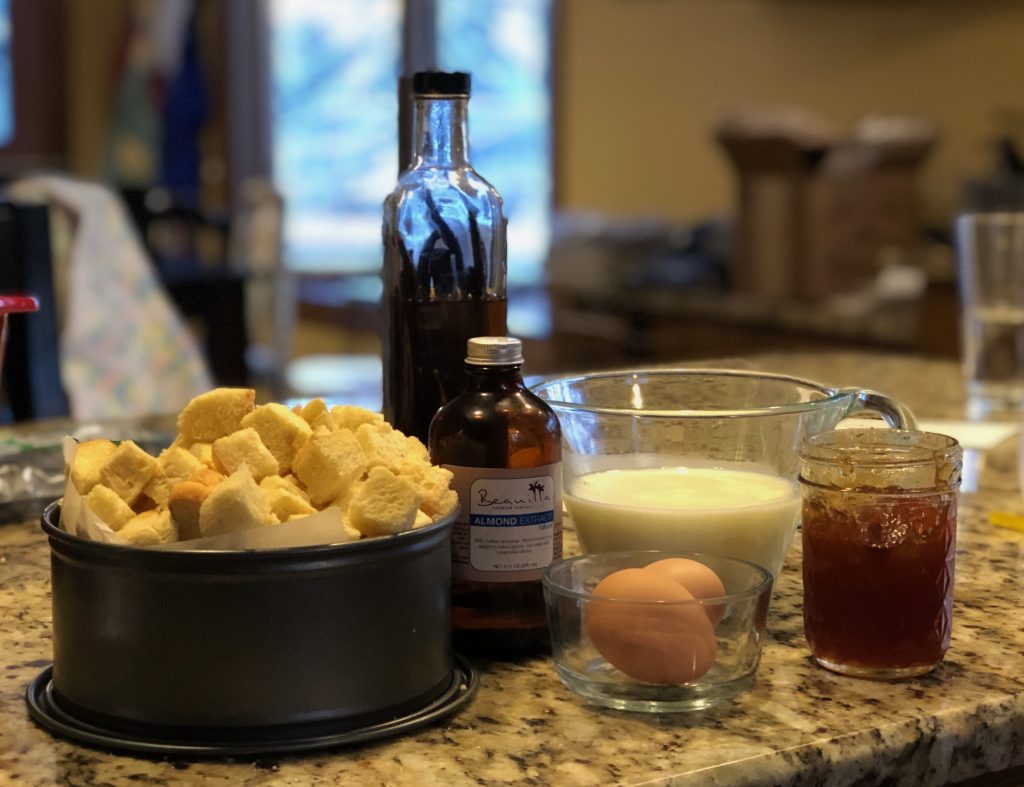
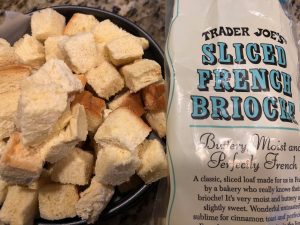
honeymoon. It’s been twenty years, and I still make that recipe and remember the bed and breakfast we stayed at in New England. I don’t make the recipe too often, however, because croissants aren’t a standard on my shopping list. This version of the recipe uses brioche bread, which I’ve found at Trader Joe’s. I cut the slices into cubes and then freeze whatever I don’t use in the bread bag for the next time. One loaf makes about three of this recipe.

Sometimes, it is fun to step a recipe up a notch. In this case, I’d recommend adding chocolate chips or chopped dark chocolate to the bread and egg mixture.

If you’d like additional tips on making bread puddings or French toast in the pressure cooker, see my recipe for Cinnamon French Toast for the Instant Pot.

Marmalade French Toast for the Instant Pot
Author: Andrea
Prep time: 15 mins
Cook time: 15 mins
Total time: 30 mins
Serves: 6
Ingredients
  • 4-5 cups of cubed brioche bread
  • 1 cup of milk
  • 2 eggs, lightly beaten
  • 1 t vanilla
  • 1/2 t almond flavoring
  • 1/4 cup of marmalade
  • 2 T brown sugar
  • 1/2 cup of chocolate chips or dark chocolate chunks (optional)
  • 2 T butter, melted (optional)
Instructions
  1. Add 1 cup of water to the pressure cooker and place a trivet in the pot.
  2. Make a tin foil sling if your trivet does not have a handle to remove your dish.
  3. Line a 7-inch cheesecake pan with parchment paper to prevent the milk mixture from leaking out. If you don’t have a cheesecake pan, you can use a pyrex dish that fits into your pressure cooker.
  4. Spray the cheesecake pan or dish with cooking spray.
  5. Fill your baking dish with the cubed bread and mound the cubes over the top of the dish. This is how much bread you need for the recipe. Any extra can be frozen for another time.
  6. In a large bowl, combine the milk, eggs, vanilla, almond flavoring, marmalade, brown sugar, and chocolate chips (if using). Whisk lightly to combine and break up the marmalade.
  7. Toss the bread cubes into the egg and milk mixture.
  8. Pour the bread cubes into your prepared pan.
  9. Cover the pan with a paper towel and a piece of tin foil to keep out the moisture.
  10. Make sure the cooker is set to seal and cook on high pressure for 15 minutes. Turn the keep warm setting off.
  11. After the cooking time is completed, allow the pressure to naturally release for 5 minutes and then manually release the remaining pressure.
  12. The French toast is ready to eat at this point, but if you’d like to crisp up the top, pour the melted butter on top and place under the broiler of your oven for a few minutes until the top is lightly browned.
3.5.3251


Filed Under: recipes Tagged With: breakfast, orange, preserves, pressure cooker

Cauliflower & Quinoa Pilaf for the Instant Pot

January 16, 2019 by andrea Leave a Comment

For starters, today I want to give a shout out to all those bloggers who are able to take Instagram worthy food photos. It is all I can do to grab the cell phone and snap a photo of my creations while my kids are screaming for dinner in the background. I’m trying to keep it real here – with quinoa on the lip of the pressure cooker, no fancy backdrops, and whatever.

Anyway… on to the recipe. I started with a pilaf recipe from The Instant Pot Bible by Bruce Weinstein, and then adapted it to what I had on hand in the house. The final recipe is much simpler than the original. And isn’t that what cooking is all about?

The original recipe caught my eye because it contained quinoa, which is super healthy and super quick to cook, especially under pressure. One of the things my family does during dinner is talk about the nutritional benefits of the foods we are eating. I find quinoa especially interesting since it is one of the few plant based proteins that contains all nine of the essential amino acids that are commonly found in meats. It is also a great source of manganese, phosphorus and fiber.

A couple quick recipe notes:

  • Be sure to rinse your quinoa before cooking it. You may be able to save yourself this step if your quinoa is pre-rinsed – check the bag to find out.
  • I used homemade vegetable broth. It is so much tastier than the stuff I find at the store and worth the extra trouble, in my opinion. One of these days, I will try to post a recipe for vegetable broth on this site, but in the meantime, a good pressure cooker book should get you started. Or try this recipe over at Hip Pressure Cooking for Vegetable Broth.
  • To make this recipe super easy and quick, I used frozen, riced cauliflower. If you have fresh cauliflower, break it into small pieces, and increase the cooking time to 6 minutes.


Cauliflower & Quinoa Pilaf
Recipe Type: side dish, pressure cooker, vegetable
Author: Andrea
Prep time: 10 mins
Cook time: 1 min
Total time: 11 mins
Serves: 4-6
Ingredients
  • 2 T butter
  • 1 cup of chopped onion (can substitute with shallots or leeks)
  • 1 t chopped garlic
  • 1 t cumin seeds
  • 1/2 t dried ginger powder
  • 1 cup of rinsed quinoa
  • 1, 16 oz package of fresh or frozen cauliflower rice
  • 2 cups of vegetable stock
Instructions
  1. Preheat the base of your pressure cooker using the sauté setting.
  2. Sauté the onion in the butter for 2-3 minutes until it is soft, but not browned.
  3. Add the garlic, cumin seeds and ginger powder and sauté briefly (about 10-30 seconds) until you can smell the spices.
  4. Turn off the heat on the pressure cooker.
  5. Add the quinoa, cauliflower and stock. Stir to combine.
  6. Lock on the lid of the pressure cooker and set the cook time for 1 minute on high pressure. Double check that the pressure valve is closed. Turn off the “keep warm” setting, if your machine has one.
  7. Once the cooking has completed, release the pressure using a quick release method.
  8. Fluff the pilaf and serve.
3.5.3251


Filed Under: recipes Tagged With: cauliflower, easy, grains, Instant Pot, pressure cooker, quick, side dish, vegetarian

Instant Pot Egg Casserole with Mushrooms and Peppers

November 29, 2018 by andrea Leave a Comment

This is a great way to serve eggs and whatever leftover veggies you have in the fridge. Feel free to substitute the veggies out for anything you have sitting around. You can do the same for the cheese. Have fun with it!

Because of the moisture in the pressure cooker, the top may look underdone when the casserole is actually cooked, so be sure to check the center for doneness with a sharp knife. If it is very runny, put it back in the pressure cooker to cook 5 more minutes. If it is just a little wet in the center, it will finish cooking while it rests. If it is somewhere in between very runny and a little wet, leave the casserole in the cooker with the lid on for five more minutes.


Instant Pot Egg Casserole
Recipe Type: Breakfast
Author: Andrea
Prep time: 15 mins
Cook time: 25 mins
Total time: 40 mins
Serves: 4-6
This is a lovely take on an egg casserole. Can creamy describe eggs?
Ingredients
  • 9 eggs
  • 6 T whole milk, 2% milk, half-and-half, or heavy cream
  • 1/2 t salt
  • 1/2 t black pepper
  • 2 T butter or olive oil
  • 1/2 cup onion
  • 1/2 cup sliced mushrooms
  • 1/2 cup finely chopped bell pepper
  • 1/2 cup shredded cheddar or Swiss cheese
Instructions
  1. Butter the inside of a 2-quart high-sided, road souffle dish. Make an aluminum foil sling and set the baking dish in the middle of it.
  2. Whisk the eggs, milk, salt and pepper in a large bowl until smooth and uniform, about 2 minutes.
  3. Turn the pressure cooker to sauté function. Add the 2 T butter. When the butter is melted, add the onion, mushrooms, and pepper and sauté for 3-5 minutes until the vegetables are soft.
  4. Scrape the vegetables out of the pressure cooker insert into the eggs and milk mixture. Add the cheese and scrape the entire mixture into the prepared souffle dish.
  5. Cover the souffle dish tightly with tin foil.
  6. Add 1 1/2 cups of water to the pressure cooker. Set a trivet in the bottom of the pot. Use the sling to lower the souffle dish into the pressure cooker. Fold down the sling’s ends to fit into the pot. Lock the lid onto the pot.
  7. Cook on high pressure for 25 minutes with the keep warm setting off.
  8. Use the quick release method to bring the pot’s pressure back to normal. Unlatch the lid and open the cooker. Use the sling to remove the dish to a wire rack. Remove the tin foil and cool the casserole for 5 minutes.
  9. Run a flat edge knife along the edge of the casserole. Set a plate on top of the casserole and invert the dish onto the plate so the casserole is released. Cut to serve.
3.5.3251


Filed Under: recipes Tagged With: breakfast, brunch, eggs, Instant Pot, pressure cooker, vegetarian

Gingerbread Cheesecake in the InstantPot

November 15, 2018 by andrea Leave a Comment

It’s just before Thanksgiving and I’ve been assigned to bring dessert to a friend’s house this weekend. Whoopee! Cheesecake, anyone? Yes, please. I’m not in the mood for more pumpkin, and I was imagining something eggnog or rum flavored. But when I didn’t have eggnog around the house, I landed on gingerbread.

The recipe that inspired me for this cheesecake was originally from This Old Gal’s blog, and here is the link to her Holiday Spice Peppernuts Cheesecake. She has lots of amazing tips on her website about making cheesecakes in the pressure cooker. I’ll touch on my favorites in this post, but if you are inspired to start using your pressure cooker for cheesecakes, be sure to check out her blog.

For my crust, I crushed up my favorite molasses cookies and added some butter. If you don’t have molasses cookies sitting around, try gingerbread cookies  or the standard graham crackers. Just add 2 T of sugar and 1 teaspoon of cinnamon to the crushed graham crackers.

Gingerbread Cheesecake in the InstantPot
Recipe Type: Cheesecake
Author: Andrea
Prep time: 30 mins
Cook time: 45 mins
Total time: 1 hour 15 mins
Serves: 12
This is a holiday flavored cheesecake that will amaze everyone!
Ingredients
  • For Crust:
  • 1 1/2 cup of crushed molasses or gingerbread cookies
  • 2 T butter, melted
  • For Cheesecake:
  • 16 ounces of cream cheese, room temperature
  • 1/2 cup sugar
  • 2 T flour
  • 1/4 cup of blackstrap molasses
  • 1/2 t ground cloves
  • 1 t cinnamon
  • 1 t vanilla
  • 1/4 cup of whipping cream or heavy cream
  • 3 eggs
Instructions
  1. Line the bottom of a 7-inch springform pan with parchment paper.
  2. For crust, combine cookie crumbs and melted butter. Press into the bottom of a 7-inch springform (cheesecake) pan and slightly up the sides of the pan.
  3. Place pan into the freezer while you are making the cheesecake batter.
  4. Prepare the pressure cooker by placing a steamer rack on the bottom and add 1 1/2 cups water to the cooker. Prepare a sling for the cheesecake.
  5. For cheesecake batter, in your food processor, add the cream cheese and process until it is light and fluffy. Scrape the sides down as needed.
  6. Add the remaining ingredients through the whipping cream to the cream cheese and combine.
  7. Add the eggs one by one and pulse only enough to combine. Do not overtax at this point or the cake will end up with a fluffy texture.
  8. Pour the batter into the cake pan with the prepared crust.
  9. Wrap the bottom of the pan with tin foil, place a paper towel over the top of the cake and cover loosely with tin foil. Use the foil sling to lower the cheesecake into the pressure cooker.
  10. Set the time for 45 minutes on high pressure.
  11. After the cooking time is complete, allow the pressure cooker to natural release for 15 minutes. Then release remaining pressure and remove the cake using the foil sling.
  12. Remove the tin foil and paper towel covering the cake. Allow to rest at room temperature for one hour. Then move the cake to the fridge. Refrigerate for at least 12 hours or overnight. The cakes flavor will improve as it chills.
3.5.3251


Filed Under: recipes Tagged With: cheesecake, Christmas, gingerbread, holiday, InstantPot, recipe

  • « Previous Page
  • 1
  • 2
  • 3
  • 4
  • 5
  • 6
  • …
  • 8
  • Next Page »

Posts

  • Clatter in the Kitchen
  • recipes
  • Uncategorized

Recent Comments

  • andrea on Whole Wheat Bread (small batch)
  • andrea on Sourdough Beer Pizza Crust
  • andrea on Recipe for Holiday Jam
  • andrea on (Sourdough Optional) Carrot Muffins
  • andrea on Lentil and Ham Bone Soup

Recent Comments

  • andrea on Whole Wheat Bread (small batch)
  • andrea on Sourdough Beer Pizza Crust
  • andrea on Recipe for Holiday Jam
  • andrea on (Sourdough Optional) Carrot Muffins
  • andrea on Lentil and Ham Bone Soup

Posts

  • Clatter in the Kitchen
  • recipes
  • Uncategorized
  • Facebook

Copyright © 2025 · Foodie Child Theme by Shay Bocks · Built on the Genesis Framework · Powered by WordPress