My Kitchen Clatter

Real Food - Real Life

  • About Me
  • Classes
    • Upcoming Classes
    • Baking Classes
    • Pressure Cooking Classes
    • Fermentation Classes
    • Canning Classes
    • Kombucha Classes
  • Equipment
    • Nutrimill Plus Grain Mill
    • Nutrimill Classic Grain Mill
    • Nutrimill Harvest Grain Mill
    • Bosch Universal Mixer
    • Ankarsrum Original Assistant
    • Filter Pro Dehydrator
  • Grains & Supplies
  • Recipes
  • Clatter in the Kitchen

Crock Pot Apple Butter

October 8, 2015 by andrea Leave a Comment

OLYMPUS DIGITAL CAMERA

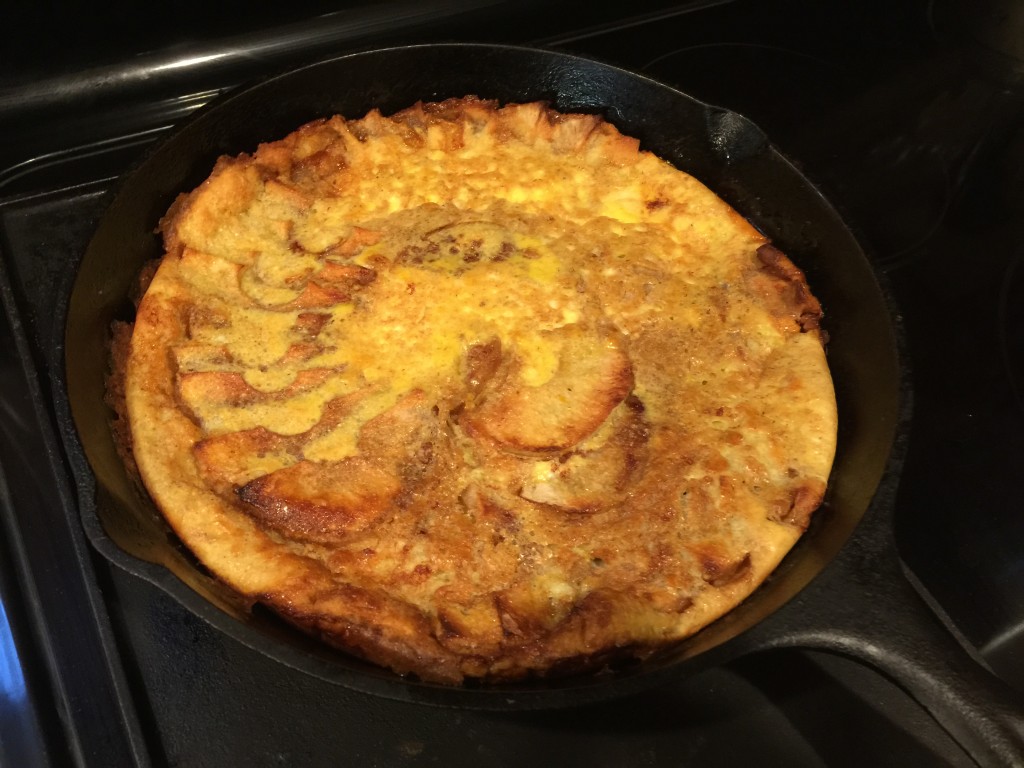
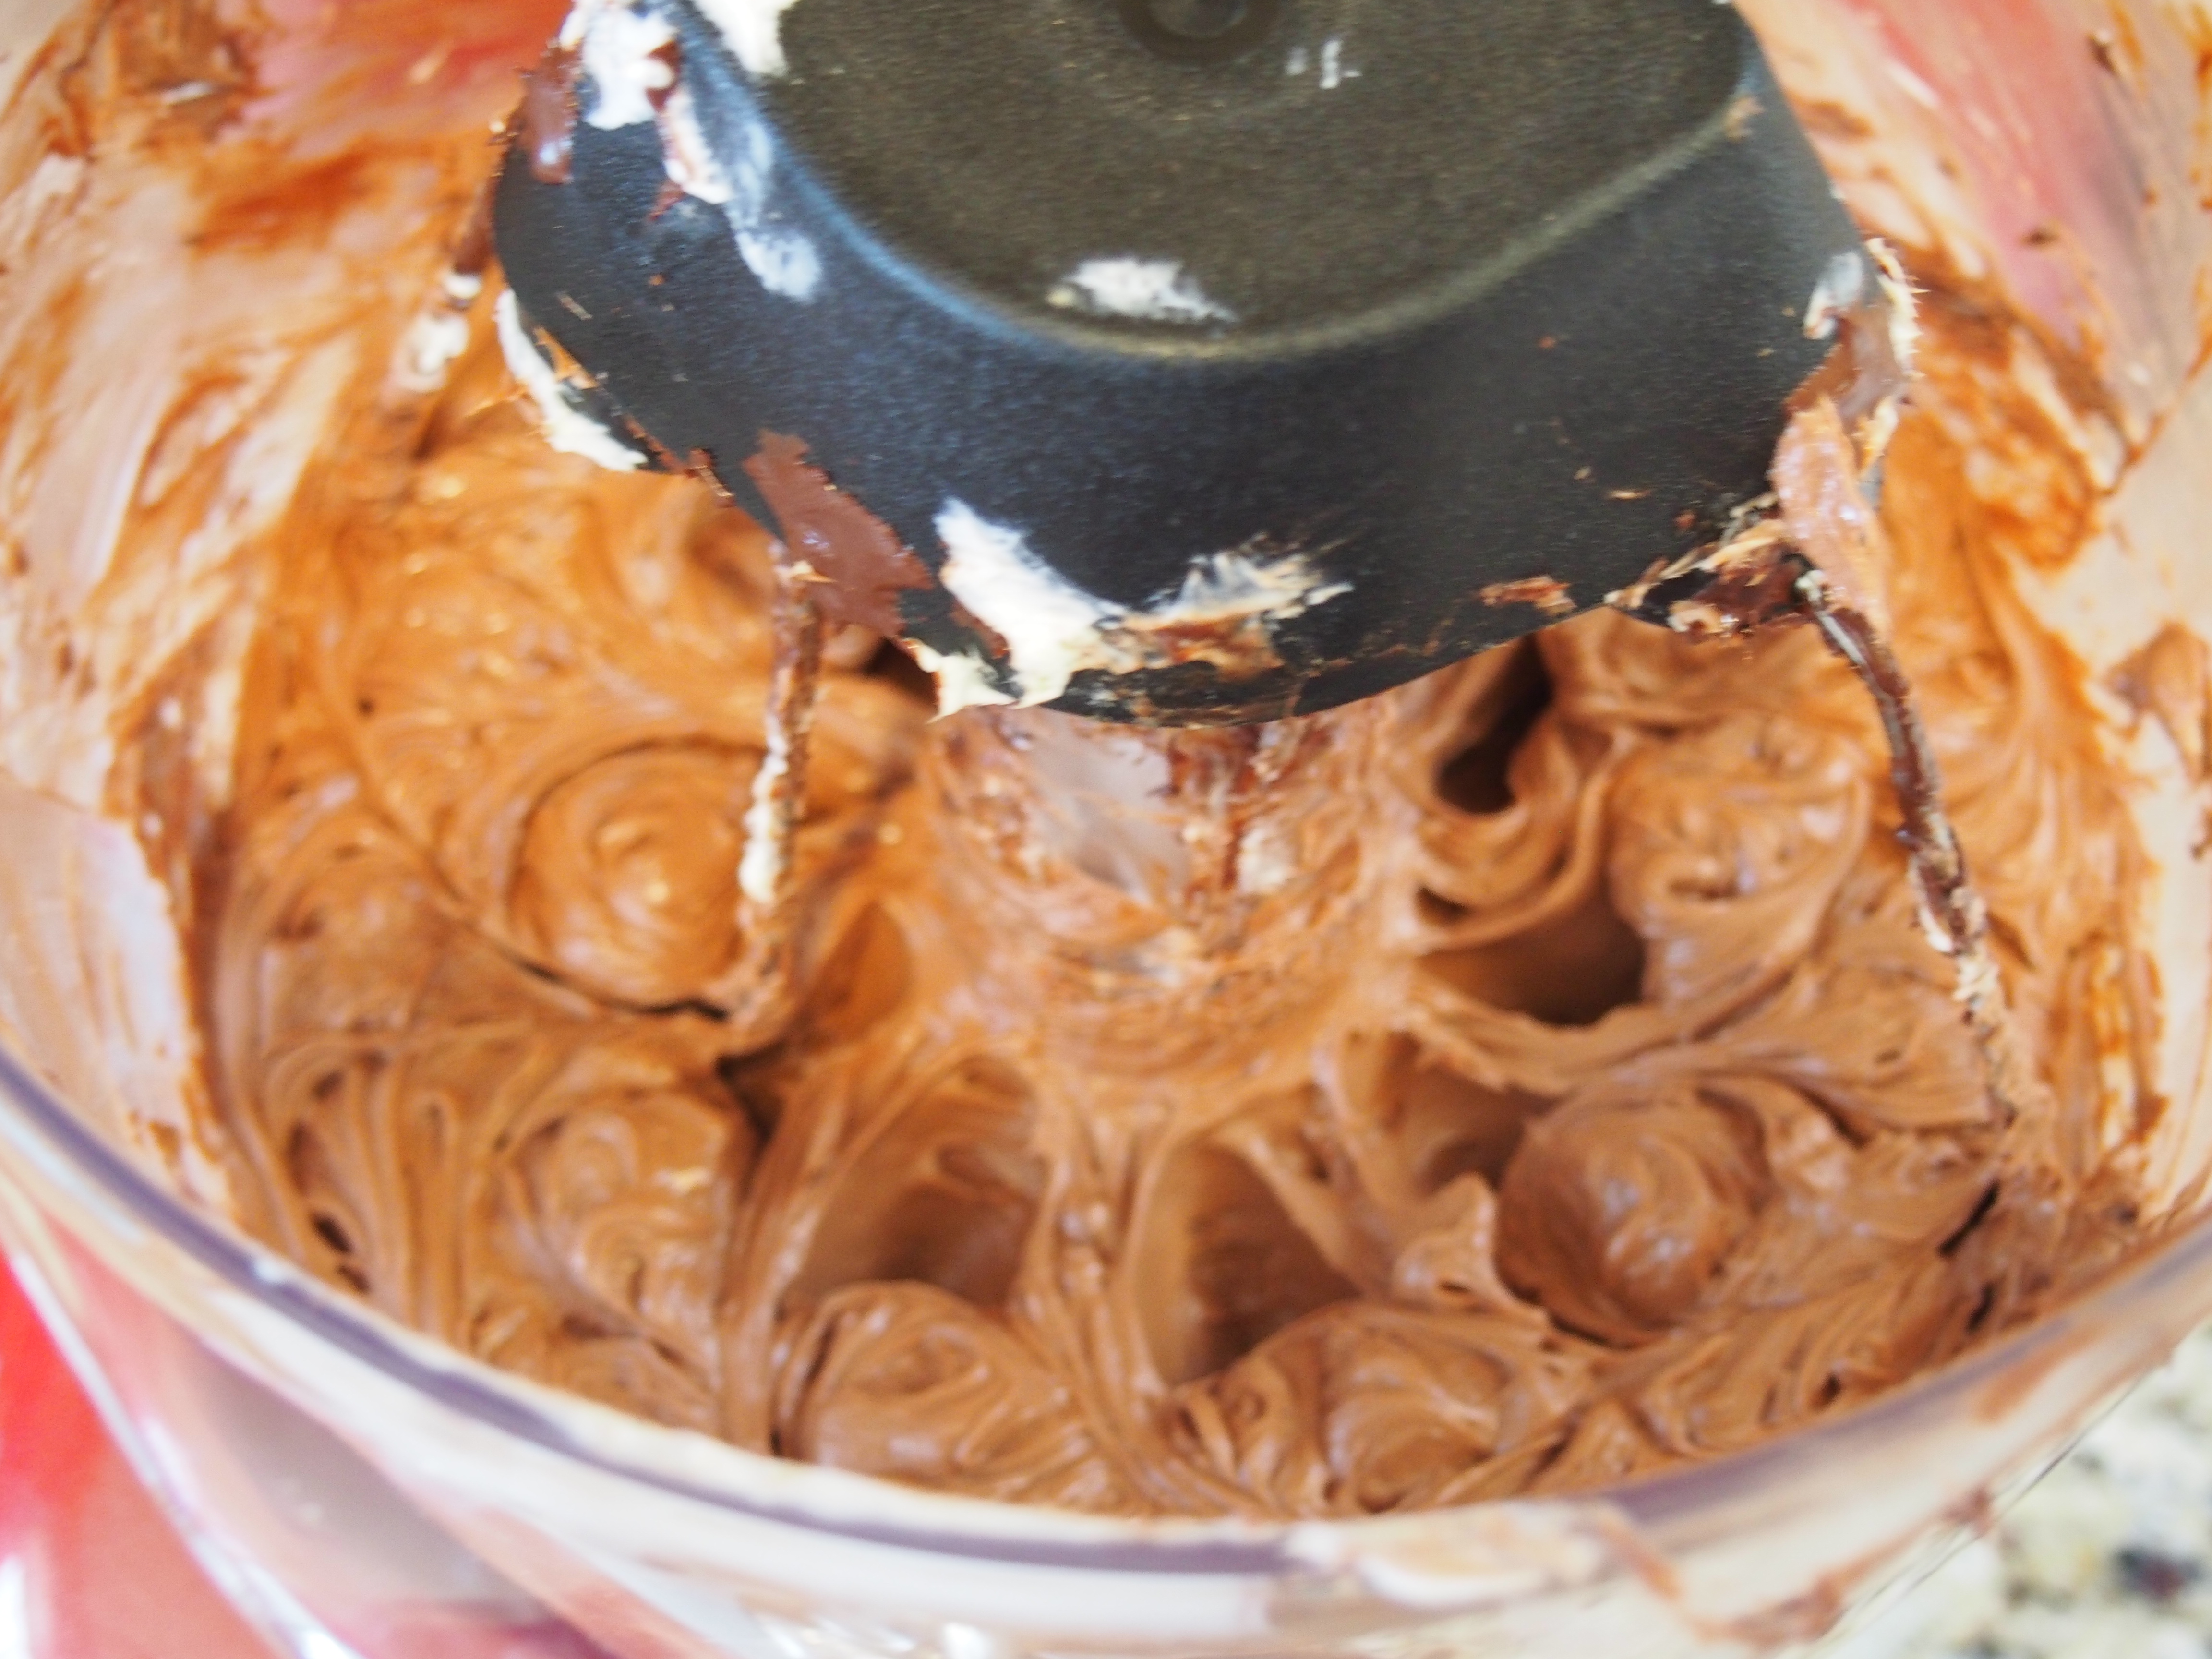
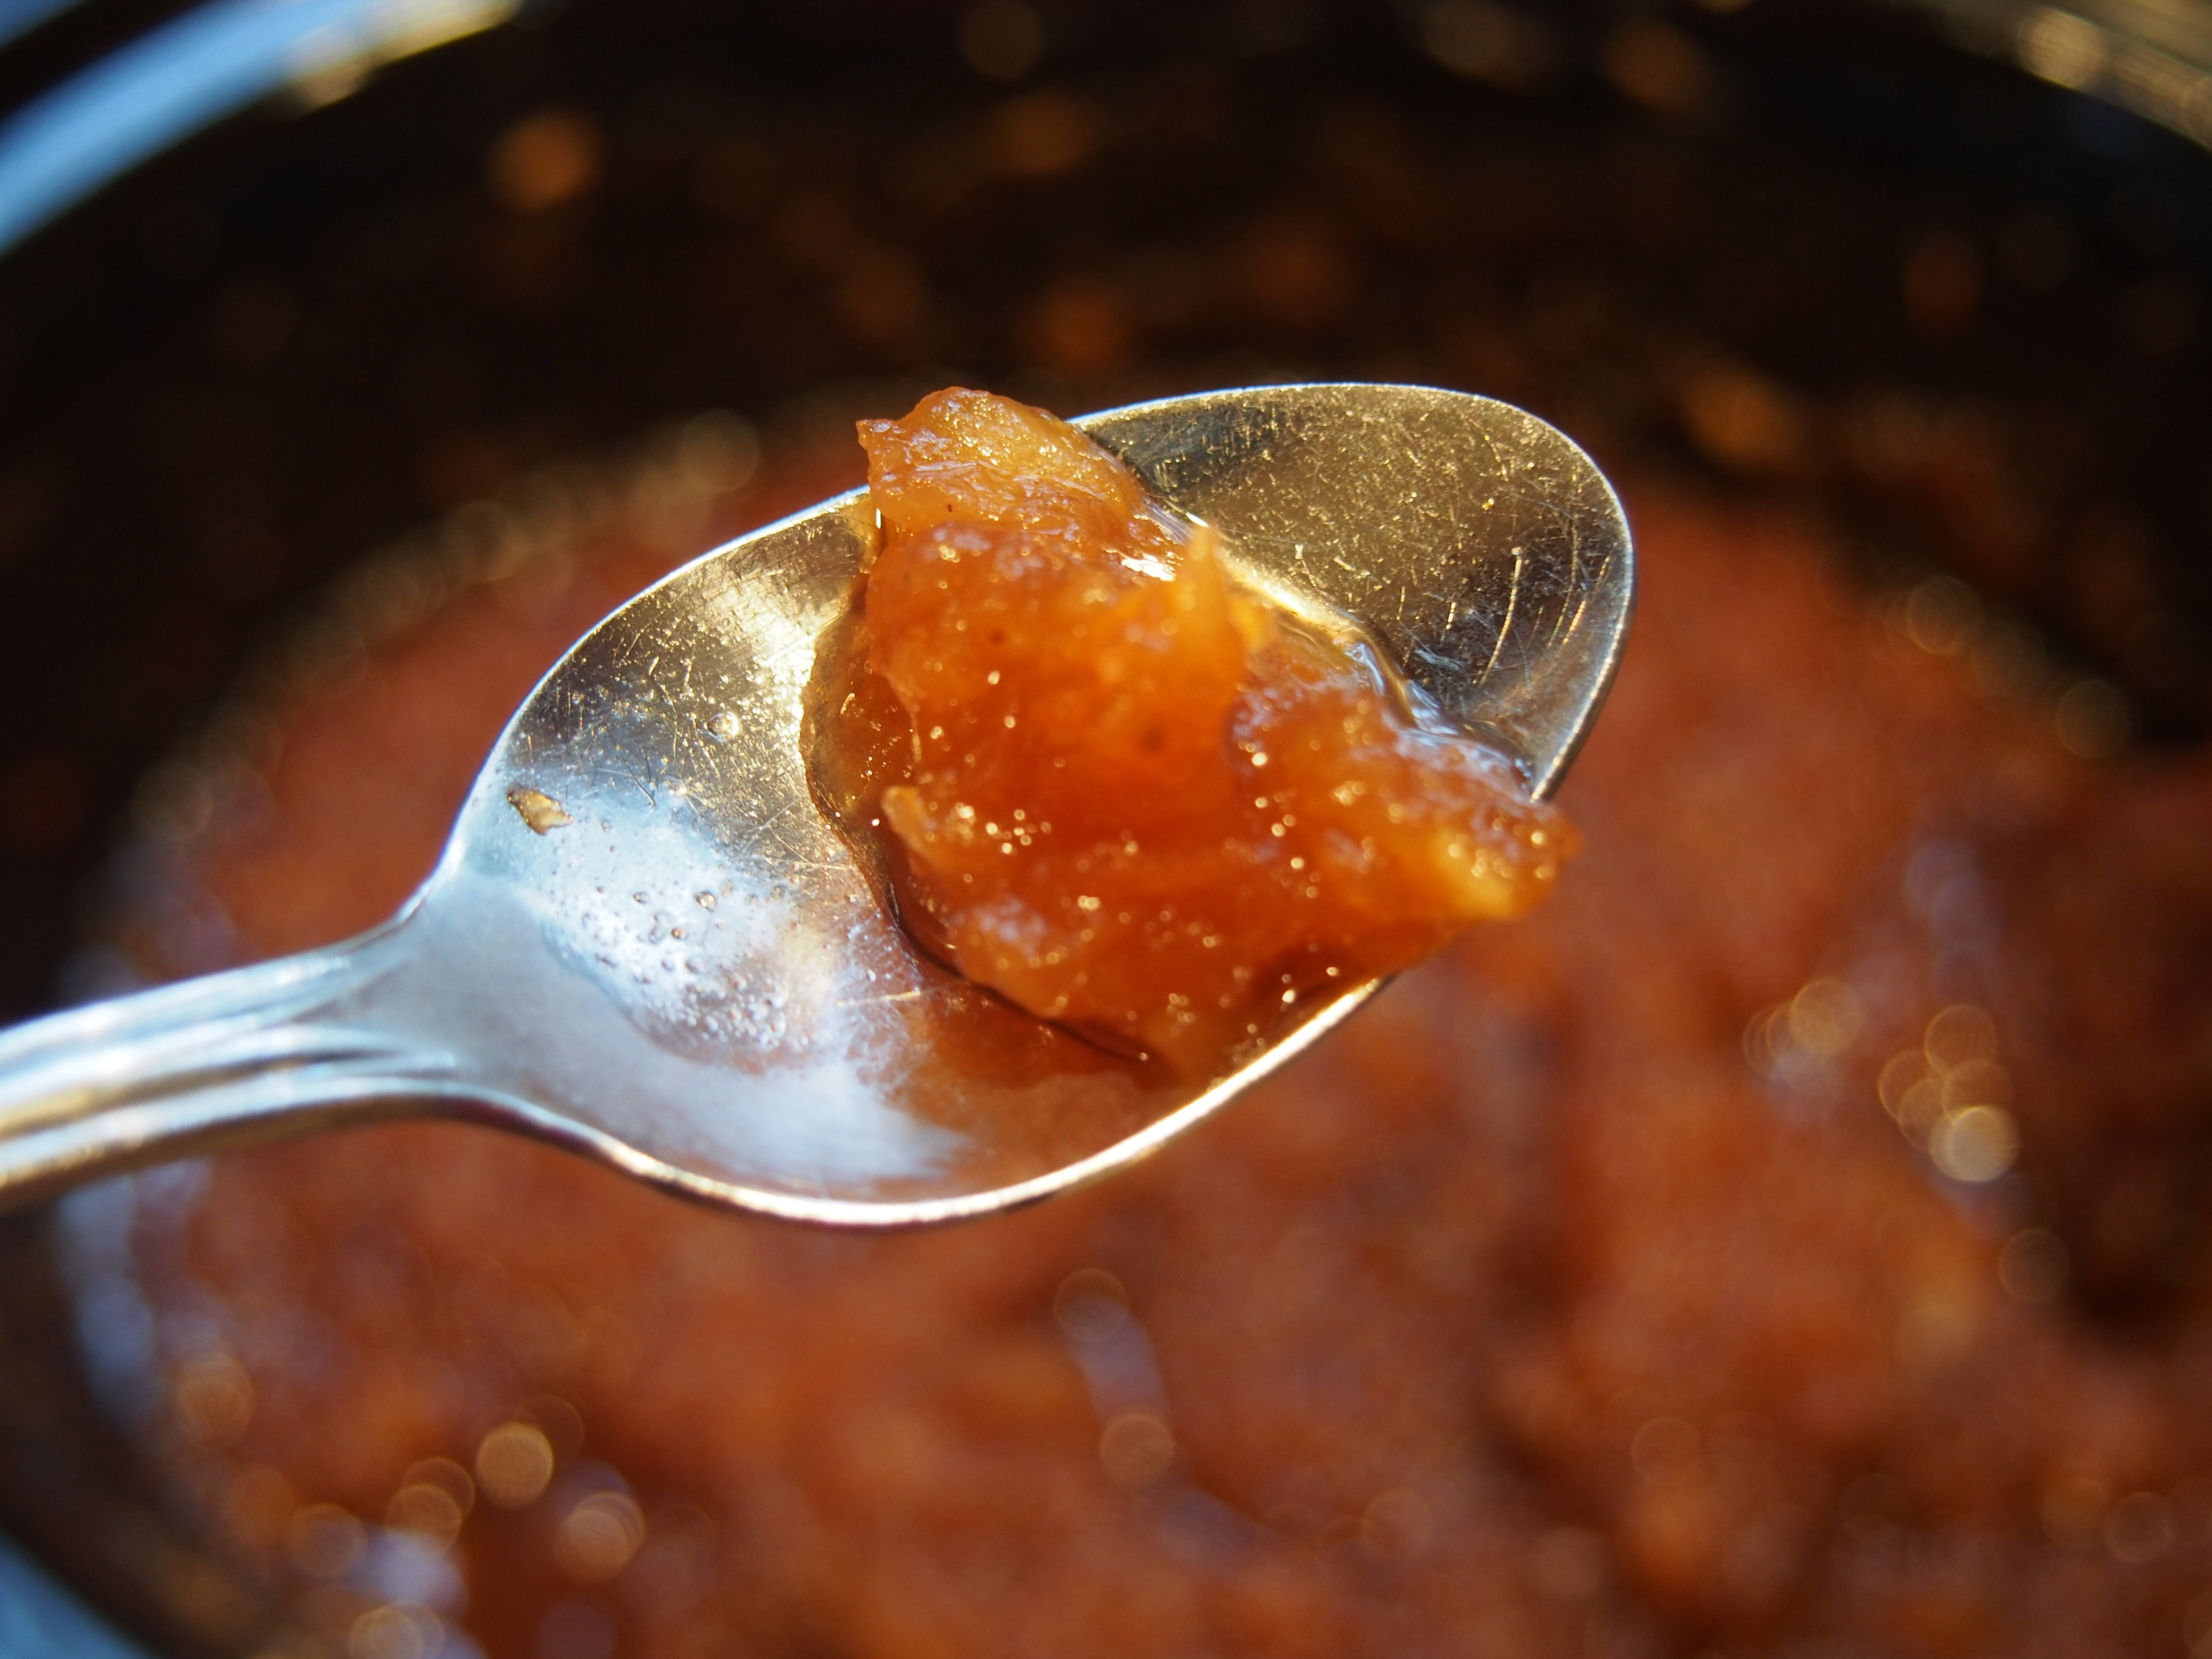
You know apple butter is ready when no liquid pools around the edges.

In recent years, I have avoided making apple butter. My last memory of it involved thinking, “Boy, this just tastes like spiced applesauce.” So I didn’t bother with it for a couple of years. And then this year, a friend asked me to make her some and I had an overload of apples. So, I figured I may as well give it another shot. Worst case scenario, I was planning to make my girlfriend take the entire batch of apple butter.

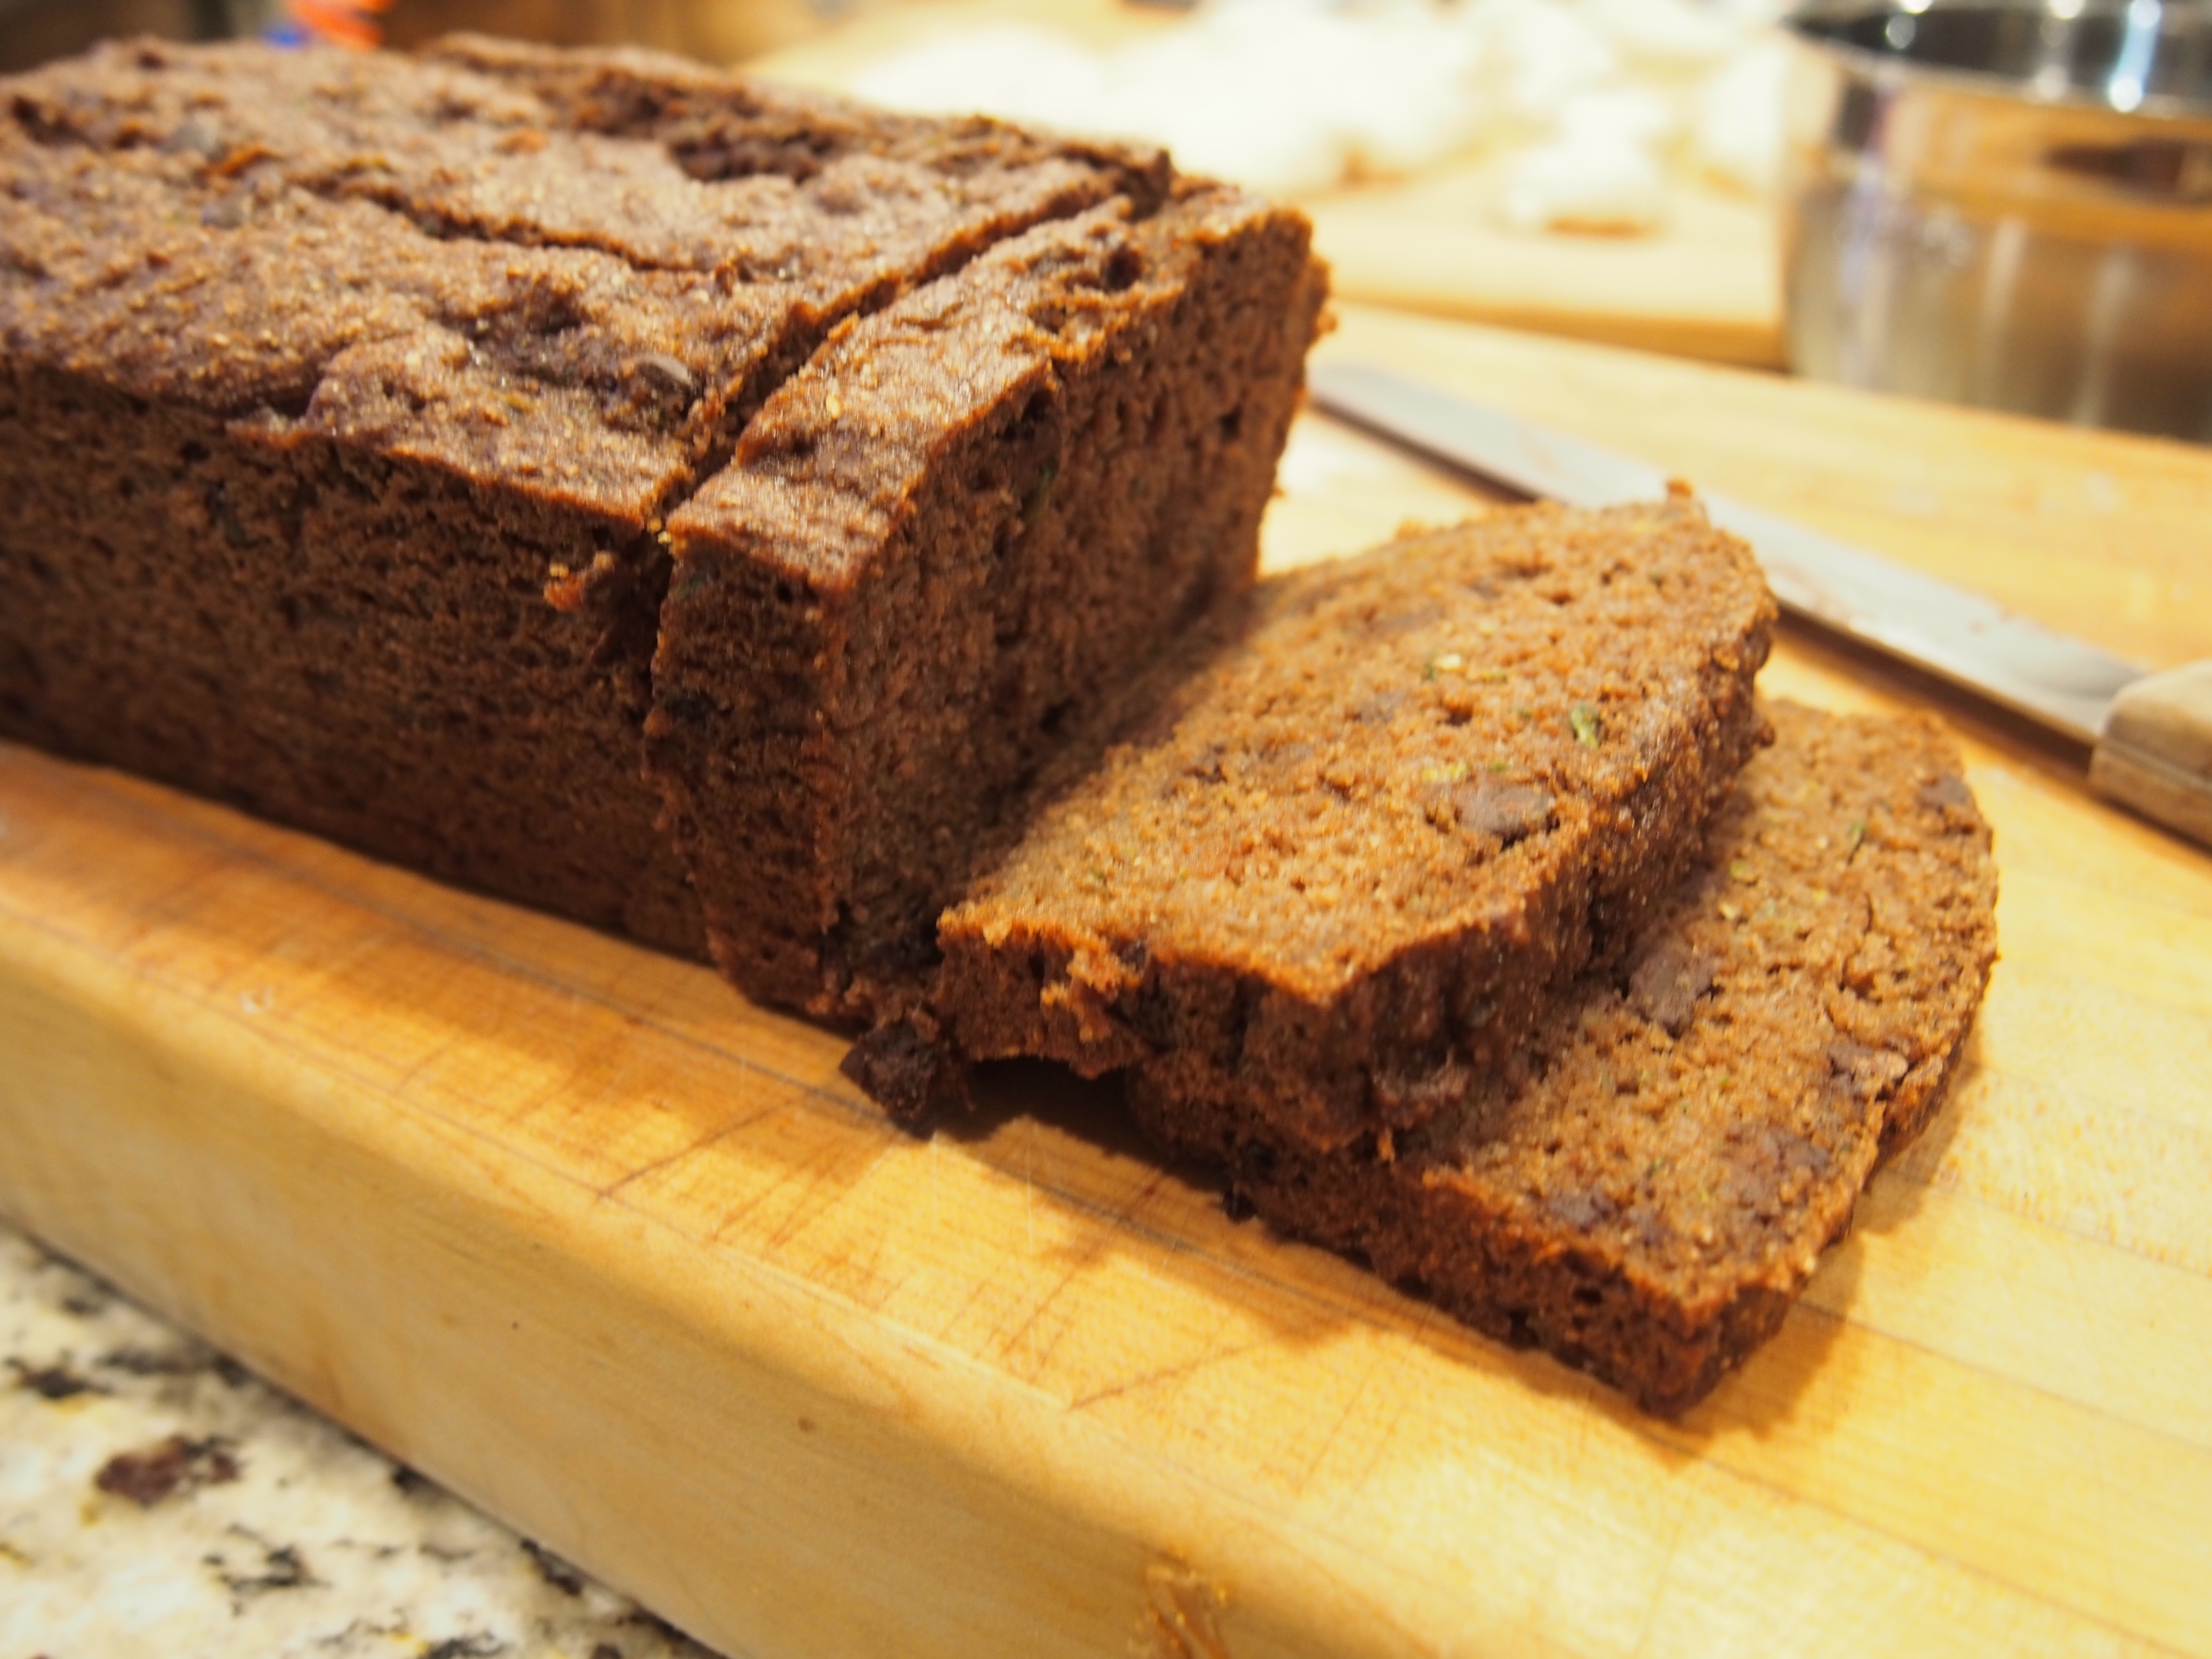
Apple butter is really great on homemade toasted bread or added to plain yogurt or oatmeal. I also love it on my whole grain waffles with toasted pecans and a little whipped cream. A friend told me just today about making cinnamon rolls with apple butter as the filling. I’m going to give that one a shot in the very near future, because it sounds like the perfect fall treat.

So this time around, I did a few things differently. First, I did not puree the butter like a lot of recipes call to do. Instead, I chopped the peeled apples up at the beginning using a food processor – almost to a chunky applesauce consistency, but not quite. If you don’t have a food processor, you can just put the quartered apples into the crock pot and use an immersion blender on them once they are soft and mushy. Or just run it through a blender or food mill and you’ll end up with a smoother consistency.

I also played with the liquid on this recipe. Instead of using water as the liquid, I made one batch using apple cider and a second batch using hard apple cider. Honestly – they really didn’t taste much different. I was honestly hoping that the trendy hard apple cider version would be amazingly better than the old fashioned version, but not so much. But either one of them provides a little more flavor than using plain old water.

OLYMPUS DIGITAL CAMERA

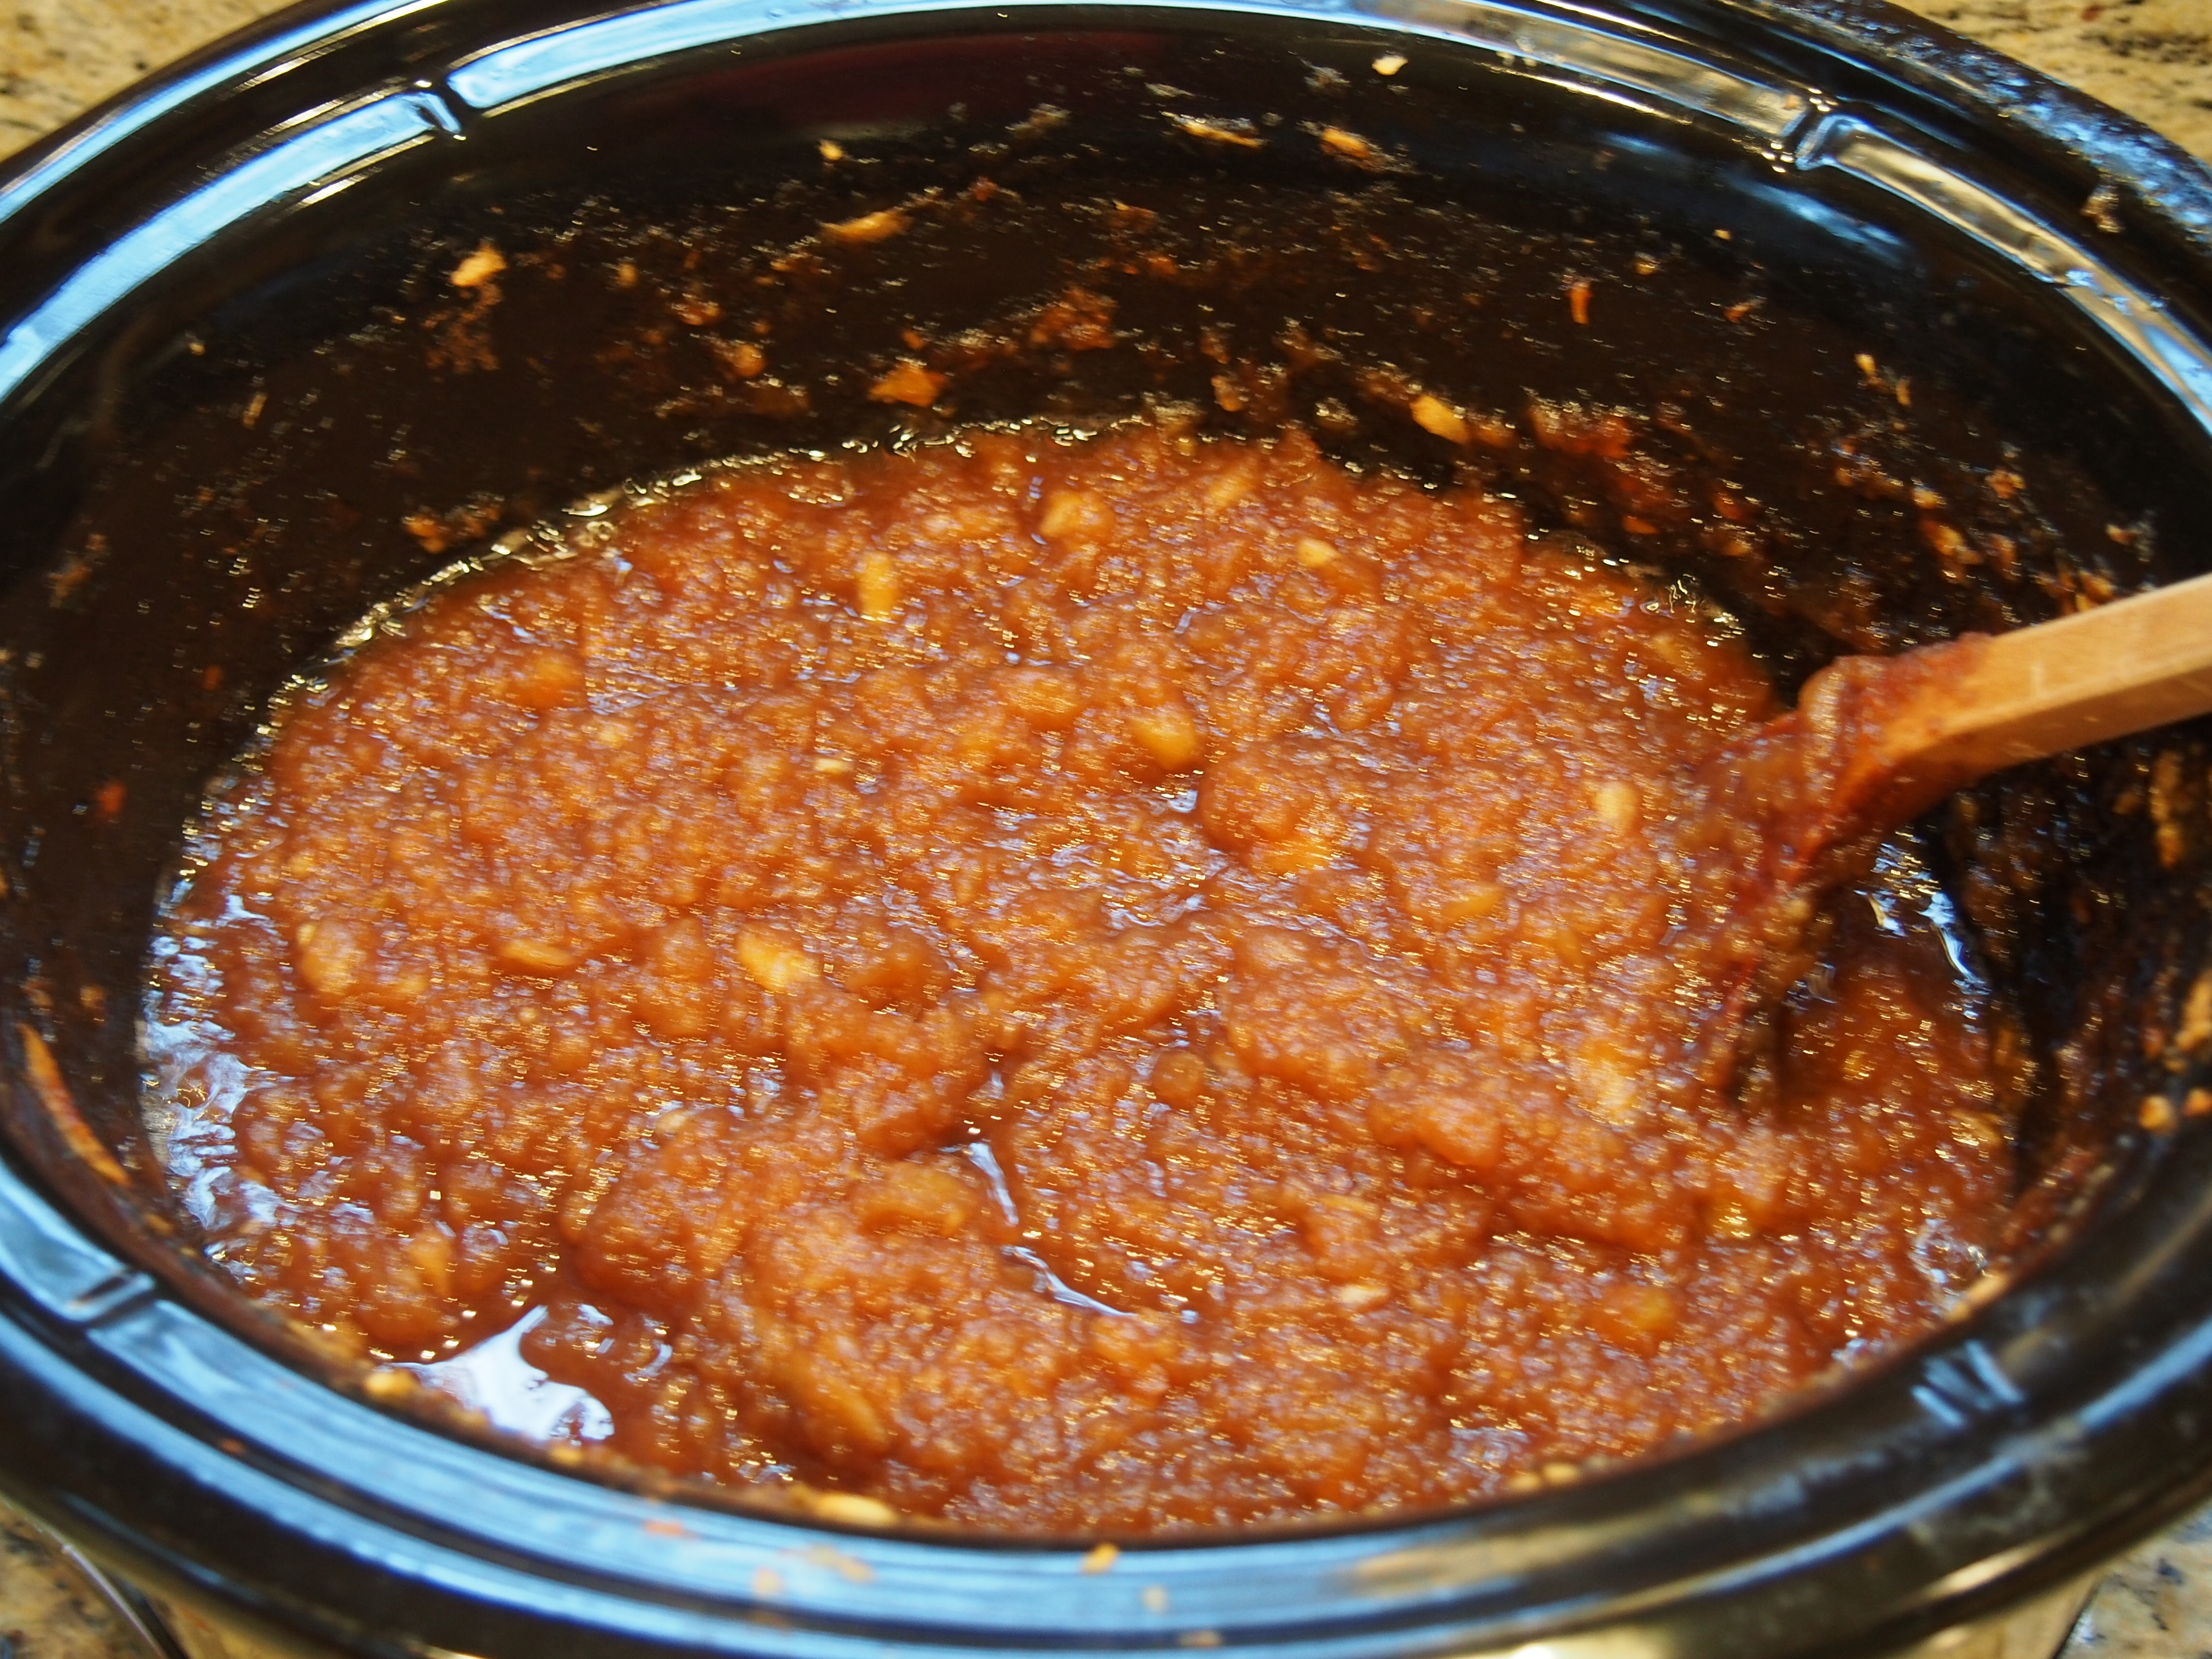
Crock Pot Apple Butter = almost done.

I did this recipe in the crock pot. I really love this approach. It’s pretty hands off. You can stir it periodically, but really, you just let it do it’s job until the end when you jar and can it. The main trick with the crock pot approach is to leave your wooden spoon on the edge of the crock with the lid on so that the lid is cracked open for most of the cooking time.

You’ll know that the apple butter is done when the liquid is mostly gone. You should take a little bit and put it on a spoon or plate – let it cool a couple minutes and check to see if any liquid pools at the edges of the butter. Once there is no liquid, then the butter is done.

Enjoy!


Crock Pot Apple Butter
Author: Andrea
Prep time: 40 mins
Cook time: 12 hours
Total time: 12 hours 40 mins
Serves: 8 half pints
Because this cooks low and slow, this is a great recipe to start at night and finish the next morning. Your home will smell wonderful while you sleep.
Ingredients
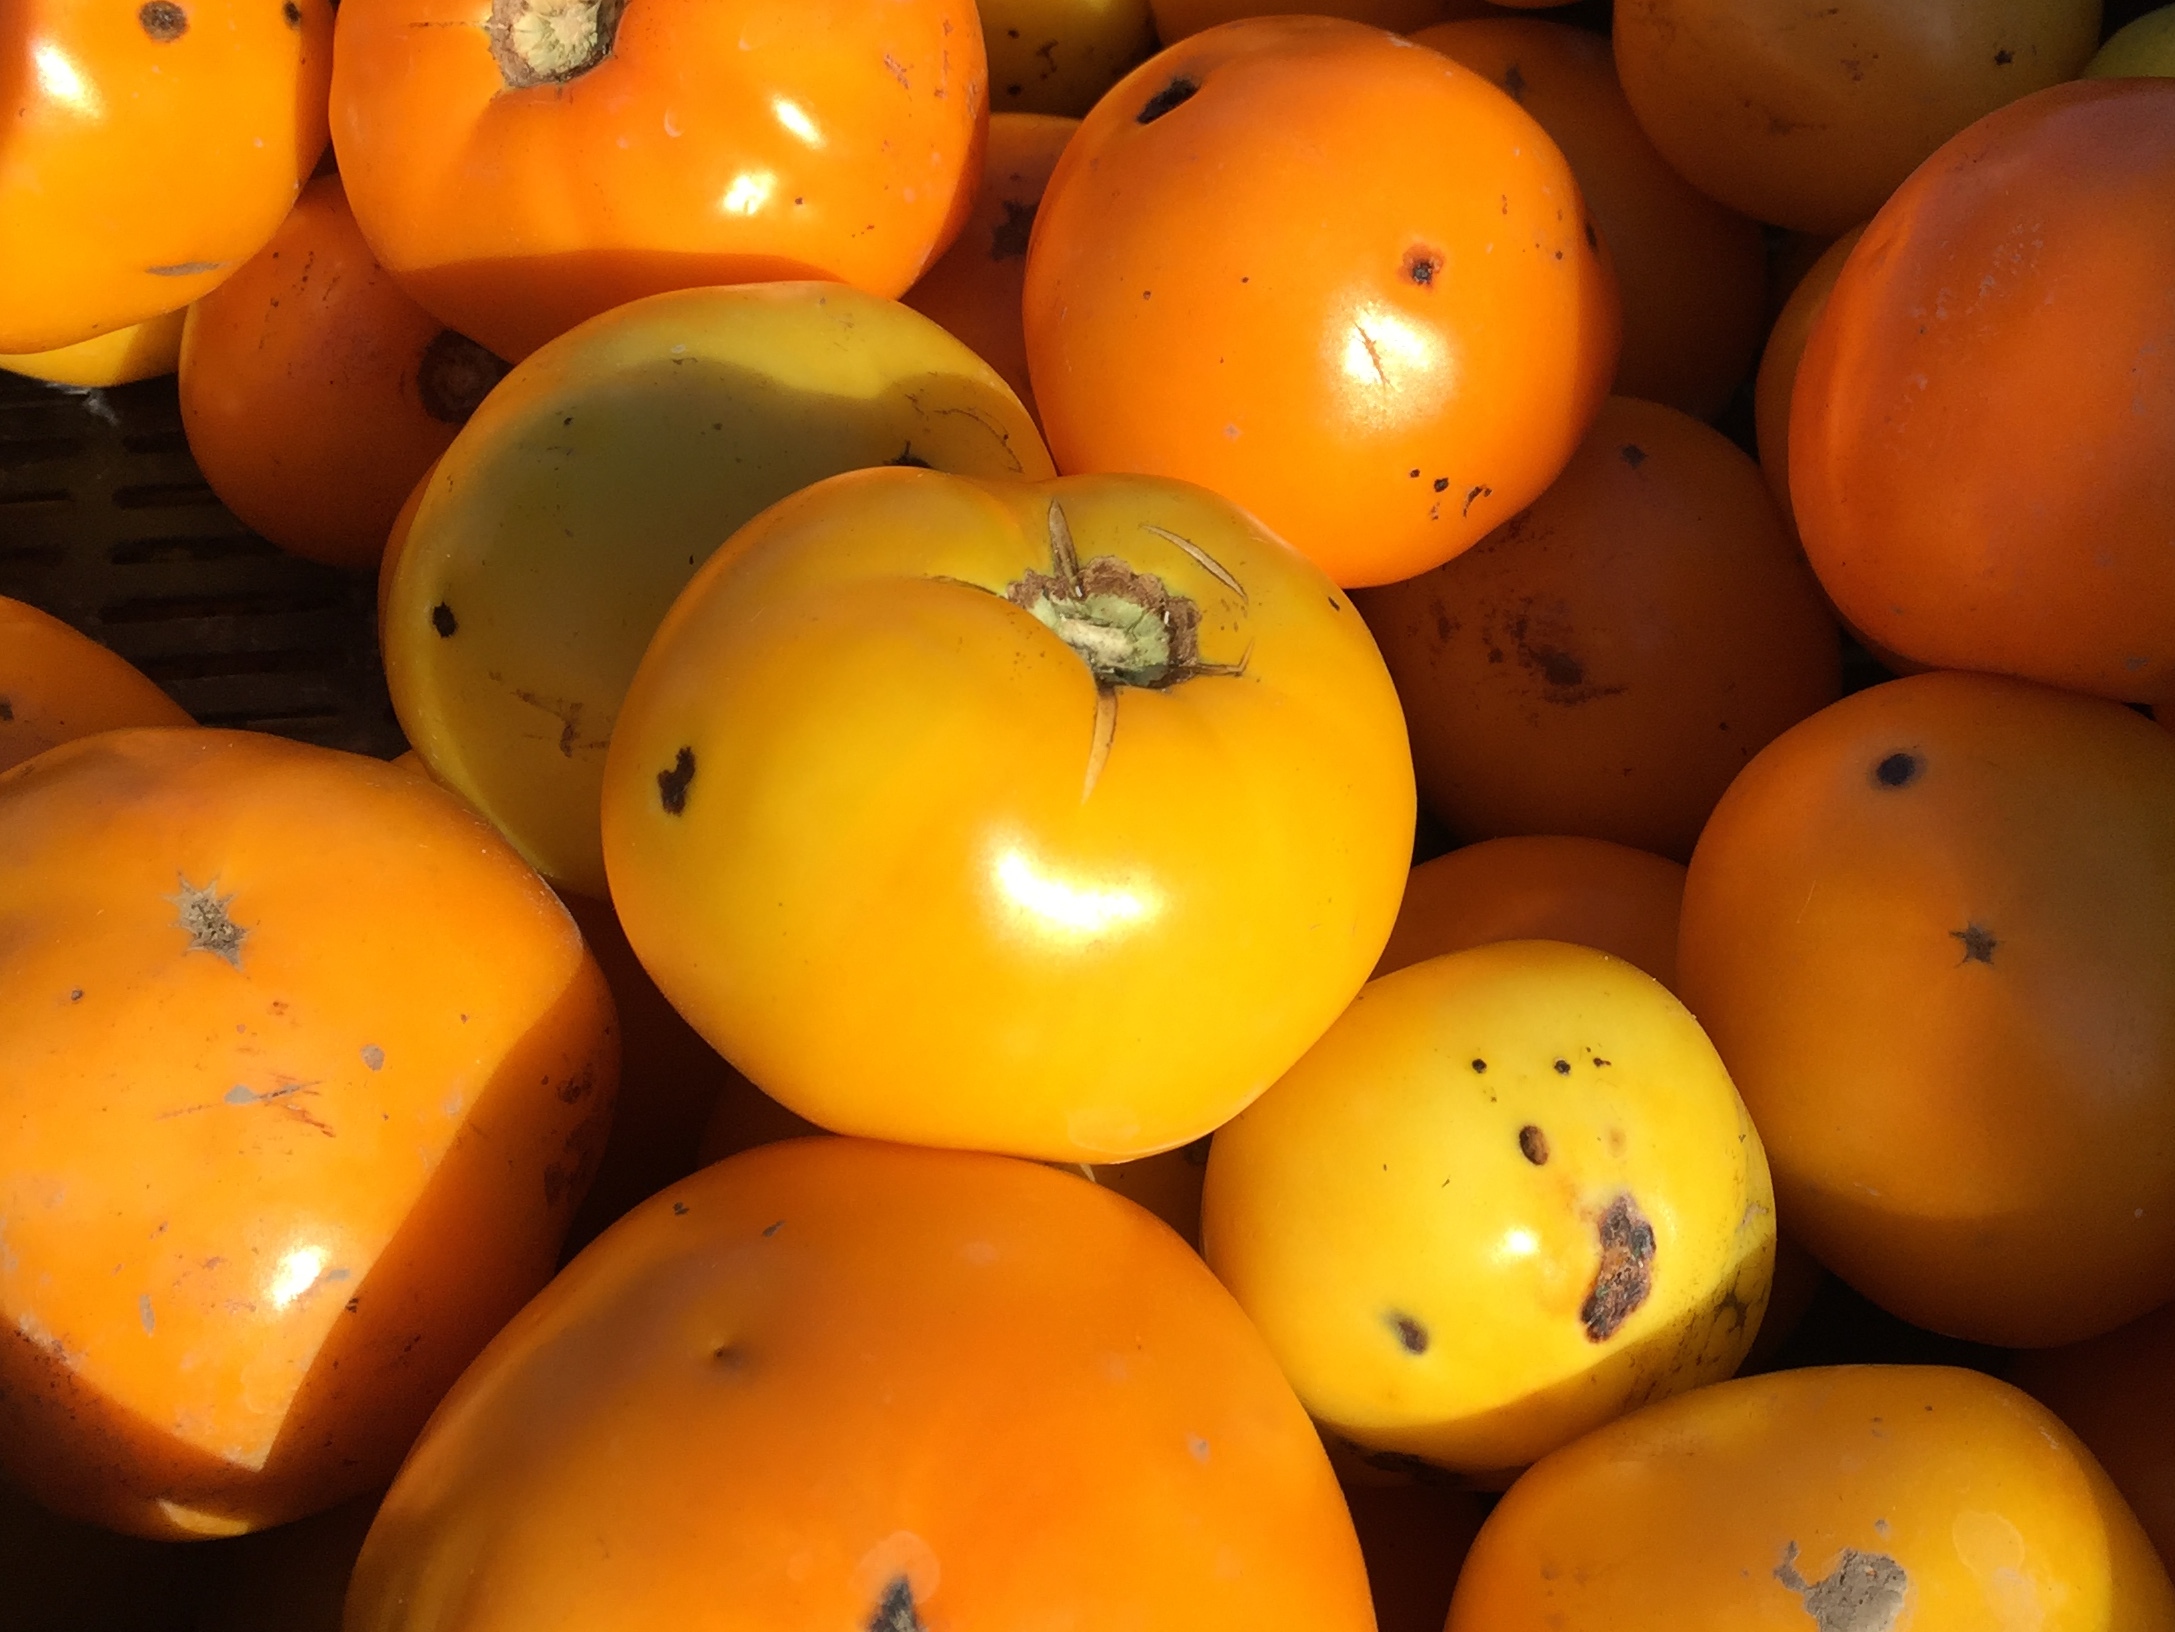
  • 5 pounds of peeled, cored and quartered apples
  • 2 cups of apple cider, either hard or not
  • 3 cups of sugar – white or brown is fine
  • 2 teaspoons cinnamon
  • 1/2 teaspoons ground cloves
Instructions
  1. Using a food processor, chop the apples into small pieces, almost pureed
  2. Add all ingredients to the crock pot and stir.
  3. Cover crock pot and cook on high for one hour.
  4. Turn crock pot to low and crack the lid with a wooden spoon to keep the lid slightly open. Cook on low for 8-11 hours. Stir occasionally, more towards the end.
  5. Once the butter has thickened, test it for consistency. Place a small mound on a spoon and let it cool for a couple minutes. If, after two minutes, no liquid has escaped the edges, the butter is done.
  6. The butter can be frozen in jars – leave enough space for expansion. Or it can be processed in a boiling water bath – leave 1/4 inch headspace and process for 10 minutes.
3.3.3077


Filed Under: recipes Tagged With: apple, apple butter, canning, preserves

Apple Pancake

September 26, 2015 by andrea Leave a Comment

I usually just throw the apples in the pan - none of this fancy arranging!

I usually just throw the apples in the pan – none of this fancy arranging!

This apple pancake is one of our favorite fall breakfasts. My boys and six and eight enjoy making the pancake themselves. Get one of those fancy apple peelers and let them at it. I do the work with the hot cast iron skillet, but they like this pancake so much that they are willing (and able) to most of the work themselves. It’s fun to have the little ones happy in the kitchen.

Apple Pancake
Author: Andrea
Prep time: 20 mins
Cook time: 30 mins
Total time: 50 mins
Serves: 6
Ingredients
  • 4 eggs
  • 1/2 cup whole wheat flour
  • 1/2 t baking powder
  • 1 T sugar
  • 1 pinch salt
  • 1 cup milk
  • 2 T butter, melted
  • 1/2 t ground nutmeg
  • 1/4 cup white sugar
  • 1 t ground cinnamon
  • 1/4 t ground nutmeg
  • 1/4 cup unsalted butter
  • 3 large tart apples, peeled, cored and sliced
Instructions
  1. Place 12-inch cast iron skillet in oven and pre-heat oven to 400 degrees
  2. While oven is preheating, combine eggs through 1/2 t nutmeg in a medium bowl. This mixture can be made the night before and kept in fridge, ready to go for the morning.
  3. Combine 1/4 cup sugar, cinnamon, and 1/4 t nutmeg in a small bowl.
  4. When oven and skillet are hot, put 1/4 cup butter in skillet and put skillet back in oven until butter is melted, about 3 minutes. Remove skillet.
  5. Sprinkle about half of the sugar cinnamon mixture over the bottom of the skillet. Remember skillet is HOT! Layer apples on top of the sugar and then sprinkle with remaining sugar cinnamon mixture. Put pan back in oven to bake apples for 10 minutes.
  6. Pour batter over the top of the apples and finish cooking until top is golden brown and apples are cooked, about 20-25 minutes.
3.5.3208


Filed Under: recipes Tagged With: apple, breakfast, pancake

Spicy Yellow Tomato Jam

August 29, 2015 by andrea 7 Comments

Yellow Tomatos

I find that people often give me a second look when I talk about tomato jam. Not many people have heard of it, but it is definitely a jam worth the effort. I think of it as a grown up jam – I don’t share it with the kids – it’s too good for them. They won’t fully appreciate it, so I save the strawberry and raspberries for them. I’ve had more than a few people ask for the recipe, so here you go!

When picking your tomatoes, I recommend you find a nice flavorful heirloom variety from the farmer’s market or your own garden. Don’t even bother with the watery tasteless store bought imitations from the grocery store. My absolute favorite tomatoes to use are yellow and orange varieties. I find them fun to work with and they typically have a less acidic, more mellow, sweeter flavor.

The time it takes for this recipe will vary greatly depending on several factors – your tomatoes’ water content, the size of your simmering pot, whether it’s a full moon. Get the idea? Allow lots of time for this one. I’ve let some batches simmer for four or more hours until they got nice and thick like I wanted. Whatever you do, don’t try to double this recipe. You will be simmering forever. Trust me on this.

As far as ideas for using this jam – once you taste it, you’ll come up with endless ideas on your own. But here are some starters. Try it on cream cheese or goat cheese with crackers. It is wonderful with scrambled eggs – like a fancy katsup. It also makes a great sandwich spread with ham or turkey.

Okay! Now get simmering!

Spicy Yellow Tomato Jam
Author: Andrea
Prep time: 15 mins
Cook time: 4 hours
Total time: 4 hours 15 mins
Serves: 4 pints
Ingredients
  • 5 lbs tomatoes
  • 3 cups sugar or 2 1/2 cups of honey
  • 1/2 cup lime juice
  • 1 T freshly grated ginger
  • 1 T cinnamon
  • 1/2 t ground cloves
  • 1 T salt
  • 1-2 T red pepper flakes – adjust to your taste
Instructions
  1. Core and finely chop the tomatoes. Save yourself some time and use the food processor. I don’t skin them or deseed them – if you chop the tomatoes fine enough you won’t notice the skins, plus they help thicken the jam.
  2. Add all ingredients to a large stainless steel pot and bring to a simmer over medium heat. Reduce heat to low and keep a simmer. Simmer for 2-4 hours until the jam is thick. The jam should separate when you stir the bottom of the pan with a wooden spoon.
  3. Fill hot pint or half pint jars with jam, allowing 1/4 inch head space.
  4. Wipe jar rims and place hot lids on jars.
  5. Process in a water bath canner with water at least one inch over tops of jars for 20 minutes.
  6. Remove jars from canner and allow to cool completely (at least 12 hours) before checking seals.
  7. Makes 2-4 pints (4-8 half pints) – depending on tomato type.
3.2.2929


Filed Under: recipes Tagged With: canning, jam, preserving, tomatoes

Chocolate Chip Pumpkin Muffins

August 21, 2015 by andrea Leave a Comment

I’ve been meaning to post this recipe for chocolate chip pumpkin muffins for a long time. I originally started with a recipe from Cooking Light and have marked it up over the years to make it my own. I’m constantly amazed by how healthy cooking often focuses on eliminating fat, but it doesn’t always focus much on the sugar content. This is slowly changing, but my original recipe from 2006 had over half of the sugar that I call for in my recipe.

And with regards to the flour – I know you’ve heard it before, but I’m going to say it again. If you are using store bought flour instead of freshly milled flour, your results will turn out totally different from mine. The freshly milled flour works very similar to white flour – it may have a little more texture, but it will still create a fluffy beautiful muffin. My experience with store bought whole wheat flour is it results in a dense, dried out muffin. So if you are stuck with store bought flour, then you may want to mix in some white flour to get a better muffin. The difference with whole wheat is the taste. It really does taste better than white flour – I know it’s hard to believe that flour can taste good, but it’s true in my world.

Chocolate Chip Pumpkin Muffins
Author: Andrea
Prep time: 15 mins
Cook time: 18 mins
Total time: 33 mins
Serves: 18
Ingredients
  • 1 1/2 cups whole wheat flour (6.7 ounces)
  • 1 t baking powder
  • 1 t baking soda
  • 1 t cinnamon
  • 1/4 t cloves
  • 1/4 t nutmeg
  • 1/4 t salt
  • 1 cup chocolate chips
  • 1/2 cup b[packed brown sugar
  • 1 cup pureed pumpkin (canned or homemade)
  • 1/3 cup buttermilk, sour milk, whey, or milk kiefer
  • 3 T coconut oil or butter, melted
  • 1 T molasses
  • 1 t vanilla extract
  • 1 large egg
Instructions
  1. Preheat oven to 400
  2. Combine dry ingredients – flour through salt – in a medium bowl. Whisk together. Add chocolate chips and make a well in the center of the bowl.
  3. Combine remaining ingredients and combine with a whisk.
  4. Add the egg and sugar mixture to the flour and stir with a wooden spoon or dough whisk until just combined.
  5. Scoop batter into muffin tins – should make about 18 muffins.
  6. Bake for 18 minutes or until a toothpick comes out clean.
  7. Remove the muffins immediately and cool on a wire rack.
3.3.3077


Filed Under: recipes Tagged With: chocolate, chocolate chips, muffin, pumpkin

Chocolate Chip Zucchini Bread

August 6, 2015 by andrea Leave a Comment

OLYMPUS DIGITAL CAMERA

CHOCOLATE CHIP ZUCCHINI BREAD

It’s that time of the year again – zucchinis are coming out of my ears. I’m constantly dropping off the extra at friends’ and neighbor’s houses. I’m known as the zucchini fairy in several circles. Late in the season, I start leaving the zucchinis without ringing the doorbells, because I’m pretty sure that everybody else is done with zucchini also.


One Day's Worth of Zucchini Picking

One Day’s Worth of Zucchini Picking

This is a great recipe for zucchini bread. I really like it because it is not overloaded with fat or sugar. Of course, using whole wheat flour makes it even healthier. But it tastes so good, that you wouldn’t even know that it’s a little bit healthy. It also freezes really well. I often make a triple batch and freeze the extra loaves – just wrap them in some tin foil, freeze, and use within a couple months.

A couple tips to make your bread even better. You can peel the zucchini to get rid of the green skin. Also – if your zucchini is a big guy, you can quarter it and slice out the seeds. To shred the squash, use the larger shredder disk on your food processor or shredder attachment on your mixer.

Chocolate Chip Zucchini Bread
Author: Andrea
Prep time: 15 mins
Cook time: 60 mins
Total time: 1 hour 15 mins
Serves: 16
If you don’t like little bits of green in your zucchini bread, just peel the zucchini before you shred it.
Ingredients
  • 1/2 cup sugar
  • 3 tablespoons olive oil, melted butter or coconut oil
  • 2 large eggs
  • 1 cup applesauce
  • 2 cups whole wheat flour – I use freshly milled flour
  • 2 T unsweetened cocoa
  • 1 1/4 t baking soda
  • 1 t ground cinnamon
  • 1/4 t salt
  • 1 1/2 cups finely shredded zucchini (about one medium)
  • 1/2 cup semisweet chocolate chips
Instructions
  1. Preheat oven to 350 degrees. Oil a large 9×5 inch loaf pan.
  2. Combine sugar, oil, and eggs in a large bowl. Combine with a whisk.
  3. Whisk applesauce into sugar mixture.
  4. Combine flour, cocoa, soda, cinnamon, and salt in a separate bowl and add into sugar mixture. Stir until just combined.
  5. Add zucchini and chocolate chips to batter. Don’t overmix.
  6. Pour batter into prepared bread pan.
  7. Bake 50-60 minutes until toothpick inserted into the center comes out clean.
  8. Let cool a few minutes in the pan and then turn out onto a cooling rack.
3.2.2929


Filed Under: recipes Tagged With: bread, chips, chocolate, recipe, zucchini

Pickled Asparagus

May 11, 2015 by andrea Leave a Comment

Spring is here and with it I have been getting my garden planted. Which means I’m already thinking ahead to when all the beans, tomatoes and other veggies will be ready to eat and put away for next winter. But I need to enjoy the here and now. And the here and now involves asparagus. And if you are lucky, it involves lots and lots of asparagus. So much asparagus that you don’t know what to do with it all.

Okay, so most of us are not that lucky. I’m not even that lucky. But I am blessed with a really great farmers market and parents with a great asparagus patch. And when you are looking for something else to do with your asparagus, why not try pickling it? So many veggies and fruits can be pickled – don’t limit yourself to cucumbers. If you’ve ever bought fancy pickles at the fancy grocery store – things like marinated mushrooms or … asparagus, then you should think about whether you can do them at home. Because chances are you can.

These asparagus pickles need to be processed in a water bath canner (boiling water method) so they have a nice tender texture. If you’ve never tried canning before, I always tell people that pickles are a great place to start. You don’t have to worry about a jam setting up to the right consistency. You just need a good recipe and spice mixture and then you can focus on the process of canning. Once you get the canning process down, then move on to jams or jellies.

I don’t go into a ton of details in this recipe about the details of processing in a water bath canner. If you’ve never tried it before, get a good basic book on canning or take a class on canning. I recommend the Ball Blue Book of Preserving as a great starter book and as an added bonus, you can find it at almost any local hardware store when you buy your jars. With respect to classes, if you are local to me, I totally recommend my classes (!!!), but you can also contact your local extension office or library to see if they are offering any.

Okay, back to this recipe – it calls for a tablespoon of “pickling spices”. In this case, I mean any combination of the following whole spices  dill seeds, allspice berries, peppercorns, whole coriander seeds, small pieces of mace or nutmeg, or mustard seed. Just don’t use cloves in this recipe. As you can see, if you don’t already have any or all of these spices in your pantry, it can be a little intimidating to approach a pickling recipe. So start with what you have and then add from there if you want. Most people have peppercorns and then maybe add in some dill seed. That easy. My preferred mix is some allspice berries, coriander, mustard and peppercorns.

You can adjust the amount of seasoning up or down as you wish, but don’t mess with the vinegar and water ratio, since that acidity level is necessary for processing the asparagus.

Pickled Asparagus
Recipe Type: canning
Author: Andrea
Prep time: 20 mins
Cook time: 10 mins
Total time: 30 mins
Serves: 3 pints
This is a nice spring pickle that is great on an appetizer tray or with a light lunch.
Ingredients
  • 3 pounds of asparagus, trimmed to fit into pint jars or 12-ounce jars
  • 2 1/2 cups of apple cider vinegar (white wine or white distilled works also) (5%)
  • 2 1/2 cups of water
  • 2 1/2 t pickling salt
  • 2 T sugar
  • 1 T mixed pickling spices (no cloves)
  • 1/2 t hot pepper flakes (optional)
  • 3 large garlic cloves, peeled
Instructions
  1. Wash asparagus well under running water. Trim asparagus to fit into your canning jars – just a little over 1/2 inch shorter than the jars and set aside.
  2. Combine vinegar, water, salt, sugar, spices, and pepper flakes (optional) in a medium non-reactive saucepan. Bring to a low boil and stir to dissolve the salt and sugar.
  3. While the brine is coming to a boil, place one clove of garlic in the bottom of each canning jar and tightly pack the asparagus vertically into clean, hot jars. Asparagus can be heads up or heads down depending on your preference.
  4. Pour boiling hot brine over the spears, leaving 1/2 inch headspace. Remove air bubbles and adjust headspace if needed.
  5. Wipe rims of jars with a dampened clean paper towel.
  6. Adjust lids.
  7. Process 10 minutes in a boiling water bath.
  8. Store the cooled jars in a cool, dry, dark place for at least 3 weeks before eating the asparagus. After opening a jar, store it in the fridge.
3.2.2929


Filed Under: recipes

Sourdough Beer Pizza Crust

April 18, 2015 by andrea 6 Comments

Sourdough Beer Pizza Crust

Sourdough Beer Pizza Crust

Pizza is one of the best yeast breads for beginning bread maker. Since pizza crusts can be thin, thick, crispy or chewy, there is a lot of error in making pizza dough. So, if you’re just starting out with yeast breads, pizza is a good place to start.

This recipe calls for durum wheat flour. If you’ve never tried durum or semolina flour, it has a courser texture than most flours. It will give your crust a little extra bite or chewiness.  But don’t skip this recipe just because  you don’t have durum flour, substitute it with whole wheat flour and you’ll still end up with a great pizza crust.

This recipe is a little unique by callinpizza ingredientsg for beer as the liquid. But here’s the thing, you can’t really taste the beer in the final pizza crust. So use the cheap beer in the recipe and save the good stuff for drinking. That being said, I do try to use the good olive oil when I’m baking.


Sourdough Beer Pizza Crust
Recipe Type: bread
Author: Andrea
Prep time: 10 mins
Cook time: 12 mins
Total time: 22 mins
Serves: 2-4 pizzas
If you don’t have durum wheat flour, just substitute it with whole wheat flour.
Ingredients
  • 1 cup sourdough starter, fed or unfed
  • 1 1/2 cups of room temperature beer
  • 2 t instant yeast
  • 1 t baking powder
  • 1 1/2 t salt
  • 2 T olive oil
  • 2 1/2 cups (11 oz) of whole wheat flour, I use freshly milled flour
  • 1 1/2 cups (6.7 oz) of durum wheat flour, I use freshly milled flour
Instructions
  1. Combine the sourdough starter and beer in the bowl of a stand mixer or mixing bowl. Stir until starter is dissolved.
  2. Add yeast, baking powder, salt and olive oil to the beer mixture.
  3. Add flours to remaining ingredients to make a slightly sticky dough. Adjust the flour or add water to make a nice, sticky consistency.
  4. Knead dough until it is smooth, but still a little sticky. Add as little extra flour during the kneading as possible so that the dough stays sticky. Using a stand mixer will help with the kneading.
  5. Let dough rest 2-4 hours on the countertop.
  6. When ready to bake, preheat oven to 450 degrees for about 30 minutes. If you have a baking stone, preheat it in the oven.
  7. Divide dough into 2 to 4 round and shape each round into a pizza. I shape mine onto parchment paper.
  8. Use a wooden peel to slide each dough one at a time onto the pizza stone. If you don’t have a pizza stone, bake the dough on a cookie sheet. Bake for 5 minutes until just crisp. Remove from the oven.
  9. Add pizza toppings to the dough and bake another 7 minutes until cheese is melted.
3.2.2929


Filed Under: recipes Tagged With: fresh flour, pizza, sourdough, whole wheat

Lentil and Ham Bone Soup

April 7, 2015 by andrea 2 Comments

When I buy my Easter or Christmas ham, I always buy a bone-in ham.  The bone makes the most wonderful soups.  I always think of ham bone soups as a free meal, because it makes a second meal out of inexpensive ingredients.  In this recipe, I used lentils as the soup base. You could do this recipe with beans or split peas, but lentils were what I had around when I made this up.

Lentl SoupThis is not a pretty soup, but it does taste good.  When I served it to my boys for dinner tonight, we had quite the discussion about needing to taste it before we decide that we don’t like it.  And what do you know? All three liked it and two even asked for seconds. Amazing. That sort of thing never happens around here. Really. Never.

Then as I was taking a photo of the soup, my eight year old asked me if anyone ever reads my website.  I had to admit that I’m pretty sure no one reads my site.  But, if you’ve made it this far, then you’ve proven me wrong! Yeah! I hope you enjoy this soup as much as we did.

This recipe makes a big batch. Once its cooled, I freeze half of it for another day. Serve with crusty bread and a salad and you have a easy, healthy meal.

Lentil and Ham Bone Soup
Recipe Type: soup
Author: Andrea
Prep time: 10 mins
Cook time: 10 mins
Total time: 20 mins
Serves: 10
This is a perfect way to use up that leftover ham bone, but if you don’t have a ham bone, you can use a cup of cubed ham, a smoked pork chop or just leave it out. You can also switch out the lentils with soaked, dried beans or split peas.
Ingredients
  • 1 large onion, chopped
  • 1 T olive oil
  • 1 cup of chopped carrots, about 4 carrots
  • 1 cup of chopped celery, about 4 stalks
  • 3 cups of whole green lentils
  • 3 cloves of garlic, chopped
  • 1 ham bone with meat
  • 1 t oregano
  • 1 bay leaf
  • 8 cups of vegetable or chicken broth or water, or combination
  • salt and pepper to taste
Instructions
  1. In a 6-quart or larger pressure cooker, heat the oil and saute the onion until soft.
  2. Add remaining ingredients and stir.
  3. Place lid on pressure cooker and bring to high pressure over high heat. Lower heat and pressure cook for 10 minutes. If using an electric pressure cooker, program for 10 minutes on high pressure.
  4. Allow pressure to release naturally.
  5. Remove ham bone and bay leaf from the soup.
  6. When bone is cool enough to handle, use a knife to remove any remaining ham pieces and return them to the soup.
  7. Serve with crusty bread and a salad.
3.2.2929


Filed Under: recipes Tagged With: ham bone, lentil soup, pressure cooking

Chocolate Cheesecake

April 6, 2015 by andrea Leave a Comment

I love a good dessert. Especially one that involves chocolate. Don’t even get me started on dessert involving fruit – they don’t count as dessert in my book. At any rate, this dessert is one of my favorite. I’ve recently been making this one at my pressure cooking classes. One of the things that often gets overlooked with pressure cooking is dessert. And cheesecakes are especially fabulous in the pressure cooker. If you’ve ever made a cheesecake the traditional way, you’ve probably baked your cake in a water bath. There are no water baths in pressure cooking, but your cheesecake will never have a crack in it or dry out when it’s pressure cooked.

So let’s get started.  The first trick of a great cheesecake is making a great crust.  Not hard. Just important. I used graham cracker crumbs in this recipe. If you want to step up the chocolate factor, you can use chocolate cookies instead – use a crispy cookie.

Graham Cracker CrumbsTo get a good a crust, you need a fine cracker crumb.  The best trick I’ve found for this is to use the grater blade on your mixer or food processor. If you don’t have a grater blade, you can crumble the graham crackers into a plastic Ziploc baggie and roll it with a rolling pin until the crumbs are evenly crushed.

crust mixed


I like to add a little sugar and cinnamon to the crumbs and then mix with some melted butter.  By they way, I love the dough whisk shown in the photo. It’s a really nice cross between a spoon and a whisk.


Graham Cracker CrustOnce you have the crust mixed together, just pat it into your cheesecake pan. I use a 7-inch round, 3-inch deep, springform pan for this recipe. The smaller diameter springform is not a standard size pan, but a larger diameter won’t fit into most pressure cookers.  You don’t need a springform pan for this recipe.  Just use any bowl or dish that fits in your cooker and holds the batter. I’ve made this recipe with a 7-inch size Pyrex dish and it worked perfectly.

graham cracker crustWrap the bottom of the springform pan in aluminum foil to keep the steam off the crust.  This is important.  Let me say it again – wrap the pan tightly with aluminum foil.  You won’t need to do this if you are using a different sort of container. After making the crust, I like to pop it into the freezer while I’m making the cheesecake batter.  I like to think this helps make a crispier crust, but I’m honestly not sure it really makes a difference.

cheesecake ingredients

Now it’s time to start on the fun part – the cheesecake batter.  It’s important that the cream cheese and the eggs are at room temperature, which takes a couple of hours. If you forget to take them out early, set the cream cheese and eggs in warm water while you make the crust.


melted chocolate chips


To melt the chocolate chips, I zap them in the microwave at 30% heat.  Stir every minute.  It will take two or three minutes.  And the chips won’t seem entirely melted, but keep stirring until they all melt together.


cheesecake Whip up the cream cheese using your stand mixer. The cream cheese should be at room temp so you can get it nice and smooth and fluffy.  Yes, fluffy.


OLYMPUS DIGITAL CAMERA


Then add your chocolate and other ingredients to the cream cheese.  Mix just till combined.  Don’t overmix at this point.


Cheesecake
Pour the batter into the prepared pan.  The pan to the right is too full.  The cake will puff up slightly when baking, and get stuck on the tin foil wrapping if it’s this full.  So, take a little batter out, put it into a ramekin and bake it later for 15 minutes under pressure.  No one ever has to know that the cook had an extra little treat.


Cheesecake wrapped

Wrap the pan up completely so no steam can get at the cake.  To get the cake in and out of the pressure cooker, fold two long pieces of tin foil into fourths to make a little carrier to lift the cake.

pressure cooking cheesecake


Add two cups of water to your pressure cooker and put the cake on a trivet to keep it out of the  water. Bring the cooker to high pressure for 50 minutes. Let the pressure release naturally and then remove the cake, uncover and chill before serving. If any moisture collects on the top of the cake, just blot it up with a paper towel.

Chocolate Cheesecake
Recipe Type: Dessert
Author: Andrea
Prep time: 20 mins
Cook time: 50 mins
Total time: 1 hour 10 mins
Serves: 10
This is one of my all time favorite desserts in the pressure cooker. Enjoy!
Ingredients
  • Crust:
  • 1 cup of crushed graham crackers (about 6 full sized crackers)
  • 2 T sugar
  • 1 t cinnamon
  • 4 T melted butter
  • Filling:
  • 12 ounces cream cheese, room temperature
  • 1 cup of chocolate chips, melted
  • 2 eggs, room temperature
  • 1/3 cup of sugar
  • 1/4 cup of cream
  • 1 T vanilla
Instructions
  1. For the crust, prepare a 7-inch springform pan or equivalent size pan by lining with parchment paper. If you aren’t using a springform pan, you can line the entire pan so the cheesecake can be removed from the pan, or you can just cut and serve it out of the pan.
  2. Combine all of the crust ingredients and press into the prepared pan. The crust does not need to go up the entire side of the pan, just an inch or so is fine.
  3. Place the crust into the freezer while making the filling.
  4. To make the filling, cream the cream cheese until smooth and fluffy. It’ll take 3-4 minutes on high in a stand mixer.
  5. Add the remaining ingredients and mix until just combined.
  6. Pour the filling into the prepared crust. Don’t overfill.
  7. Wrap the cheesecake tightly with tin foil.
  8. Add two cups of water to a 6 quart or larger pressure cooker.
  9. Place a trivet or stand into the cooker and carefully lower cheesecake onto the trivet. Make sure the cheesecake is not sitting in the water.
  10. Bring the pressure cooker to high pressure and cook for 50 minutes.
  11. Let pressure release naturally.
  12. Unwrap cake and chill overnight or until ready to serve.
3.2.2929


Filed Under: recipes Tagged With: cheesecake, chocolate, pressure cooker

Blueberry Muffins

February 24, 2015 by andrea Leave a Comment

I love muffins!  They have a little sweetness to them like a cookie, but it is easy to sneak in some healthy ingredients without compromising what you expect a muffin to look or taste like.  I don’t like it when someone tries to make a “healthy” cookie and you end up with something that doesn’t remotely resemble a cookie – but you can make a muffin little healthier and still have a muffin.

When I start with a new muffin recipe, I typically cut back the sugar by 1/3 to 1/2 of what the original recipe calls for.  I also like to add in yogurt and maybe some fruit.  This recipe for blueberry muffins covers all of those approaches and results in a great muffin.

I made this muffin at a recent class on Cookies & Quick Breads and I love bringing them the kid’s playdates.  I think the nutmeg and almond flavoring make it a little extra special.  Give it a try – you wouldn’t know that it is made with whole wheat flour.

Blueberry Muffins
Author: Andrea
Prep time: 10 mins
Cook time: 20 mins
Total time: 30 mins
Serves: 18 muffins
If you’d like, you can substitute 3/4 cup honey for the sugar. I’ve also made these with fresh blueberries and they are awesome.
Ingredients
  • 3 cups whole wheat flour, preferably freshly milled (13 oz)
  • 1 teaspoon baking soda
  • 2 teaspoons baking powder
  • 1/2 teaspoon salt
  • 1/4 teaspoon nutmeg (freshly ground)
  • 1 cup sugar
  • 1 egg
  • 1/2 cup coconut oil, melted (can substitute butter, if you’d like)
  • 1 cup plain, unflavored yogurt (if using Greek yogurt, use 1/2 cup of yogurt and 1/2 cup of milk)
  • 1/2 t almond extract
  • 1 1/2 cups of frozen blueberries
Instructions
  1. Preheat oven to 375 degrees.
  2. In a bowl, whisk together dry ingredients (whole wheat flour through salt).
  3. In a separate bowl, whisk together sugar through almond extract.
  4. Add wet ingredients and coconut oil to the dry ingredients and stir just til combined. Using a rubber spatula to make sure the dry ingredients on the bottom are stirred in.
  5. Add blueberries and stir just til combined.
  6. Spray muffin tin pans and scoop the batter into the muffin tins.
  7. Bake 20 minutes until lightly browned and cooked through.
3.5.3208


Filed Under: recipes Tagged With: blueberry, class, muffin, whole wheat flour

  • « Previous Page
  • 1
  • …
  • 5
  • 6
  • 7
  • 8
  • Next Page »

Posts

  • Clatter in the Kitchen
  • recipes
  • Uncategorized

Recent Comments

  • andrea on Whole Wheat Bread (small batch)
  • andrea on Sourdough Beer Pizza Crust
  • andrea on Recipe for Holiday Jam
  • andrea on (Sourdough Optional) Carrot Muffins
  • andrea on Lentil and Ham Bone Soup

Recent Comments

  • andrea on Whole Wheat Bread (small batch)
  • andrea on Sourdough Beer Pizza Crust
  • andrea on Recipe for Holiday Jam
  • andrea on (Sourdough Optional) Carrot Muffins
  • andrea on Lentil and Ham Bone Soup

Posts

  • Clatter in the Kitchen
  • recipes
  • Uncategorized
  • Facebook

Copyright © 2025 · Foodie Child Theme by Shay Bocks · Built on the Genesis Framework · Powered by WordPress