My Kitchen Clatter

Real Food - Real Life

  • About Me
  • Classes
    • Upcoming Classes
    • Baking Classes
    • Pressure Cooking Classes
    • Fermentation Classes
    • Canning Classes
    • Kombucha Classes
  • Equipment
    • Nutrimill Plus Grain Mill
    • Nutrimill Classic Grain Mill
    • Nutrimill Harvest Grain Mill
    • Bosch Universal Mixer
    • Ankarsrum Original Assistant
    • Filter Pro Dehydrator
  • Grains & Supplies
  • Recipes
  • Clatter in the Kitchen

February’s Preserving Challenge – Fermenting

March 6, 2019 by andrea Leave a Comment

We are already almost done with month number two of Food In Jar’s Mastery Challenge for 2019. February’s challenge is fermenting, which I have to admit did not feel like it was going to be a huge stretch for me to take on. If you’ve visited my kitchen recently, you may notice that I have jars of kombucha, sourdough starter, and milk kiefer on the counter at any given time.

In order to take this challenge up a notch from my norm, I decided I would post this blog with some links and references for any of my readers who are interested in trying something new. As I go, I’ll add some photos of my creations.

Sourdough

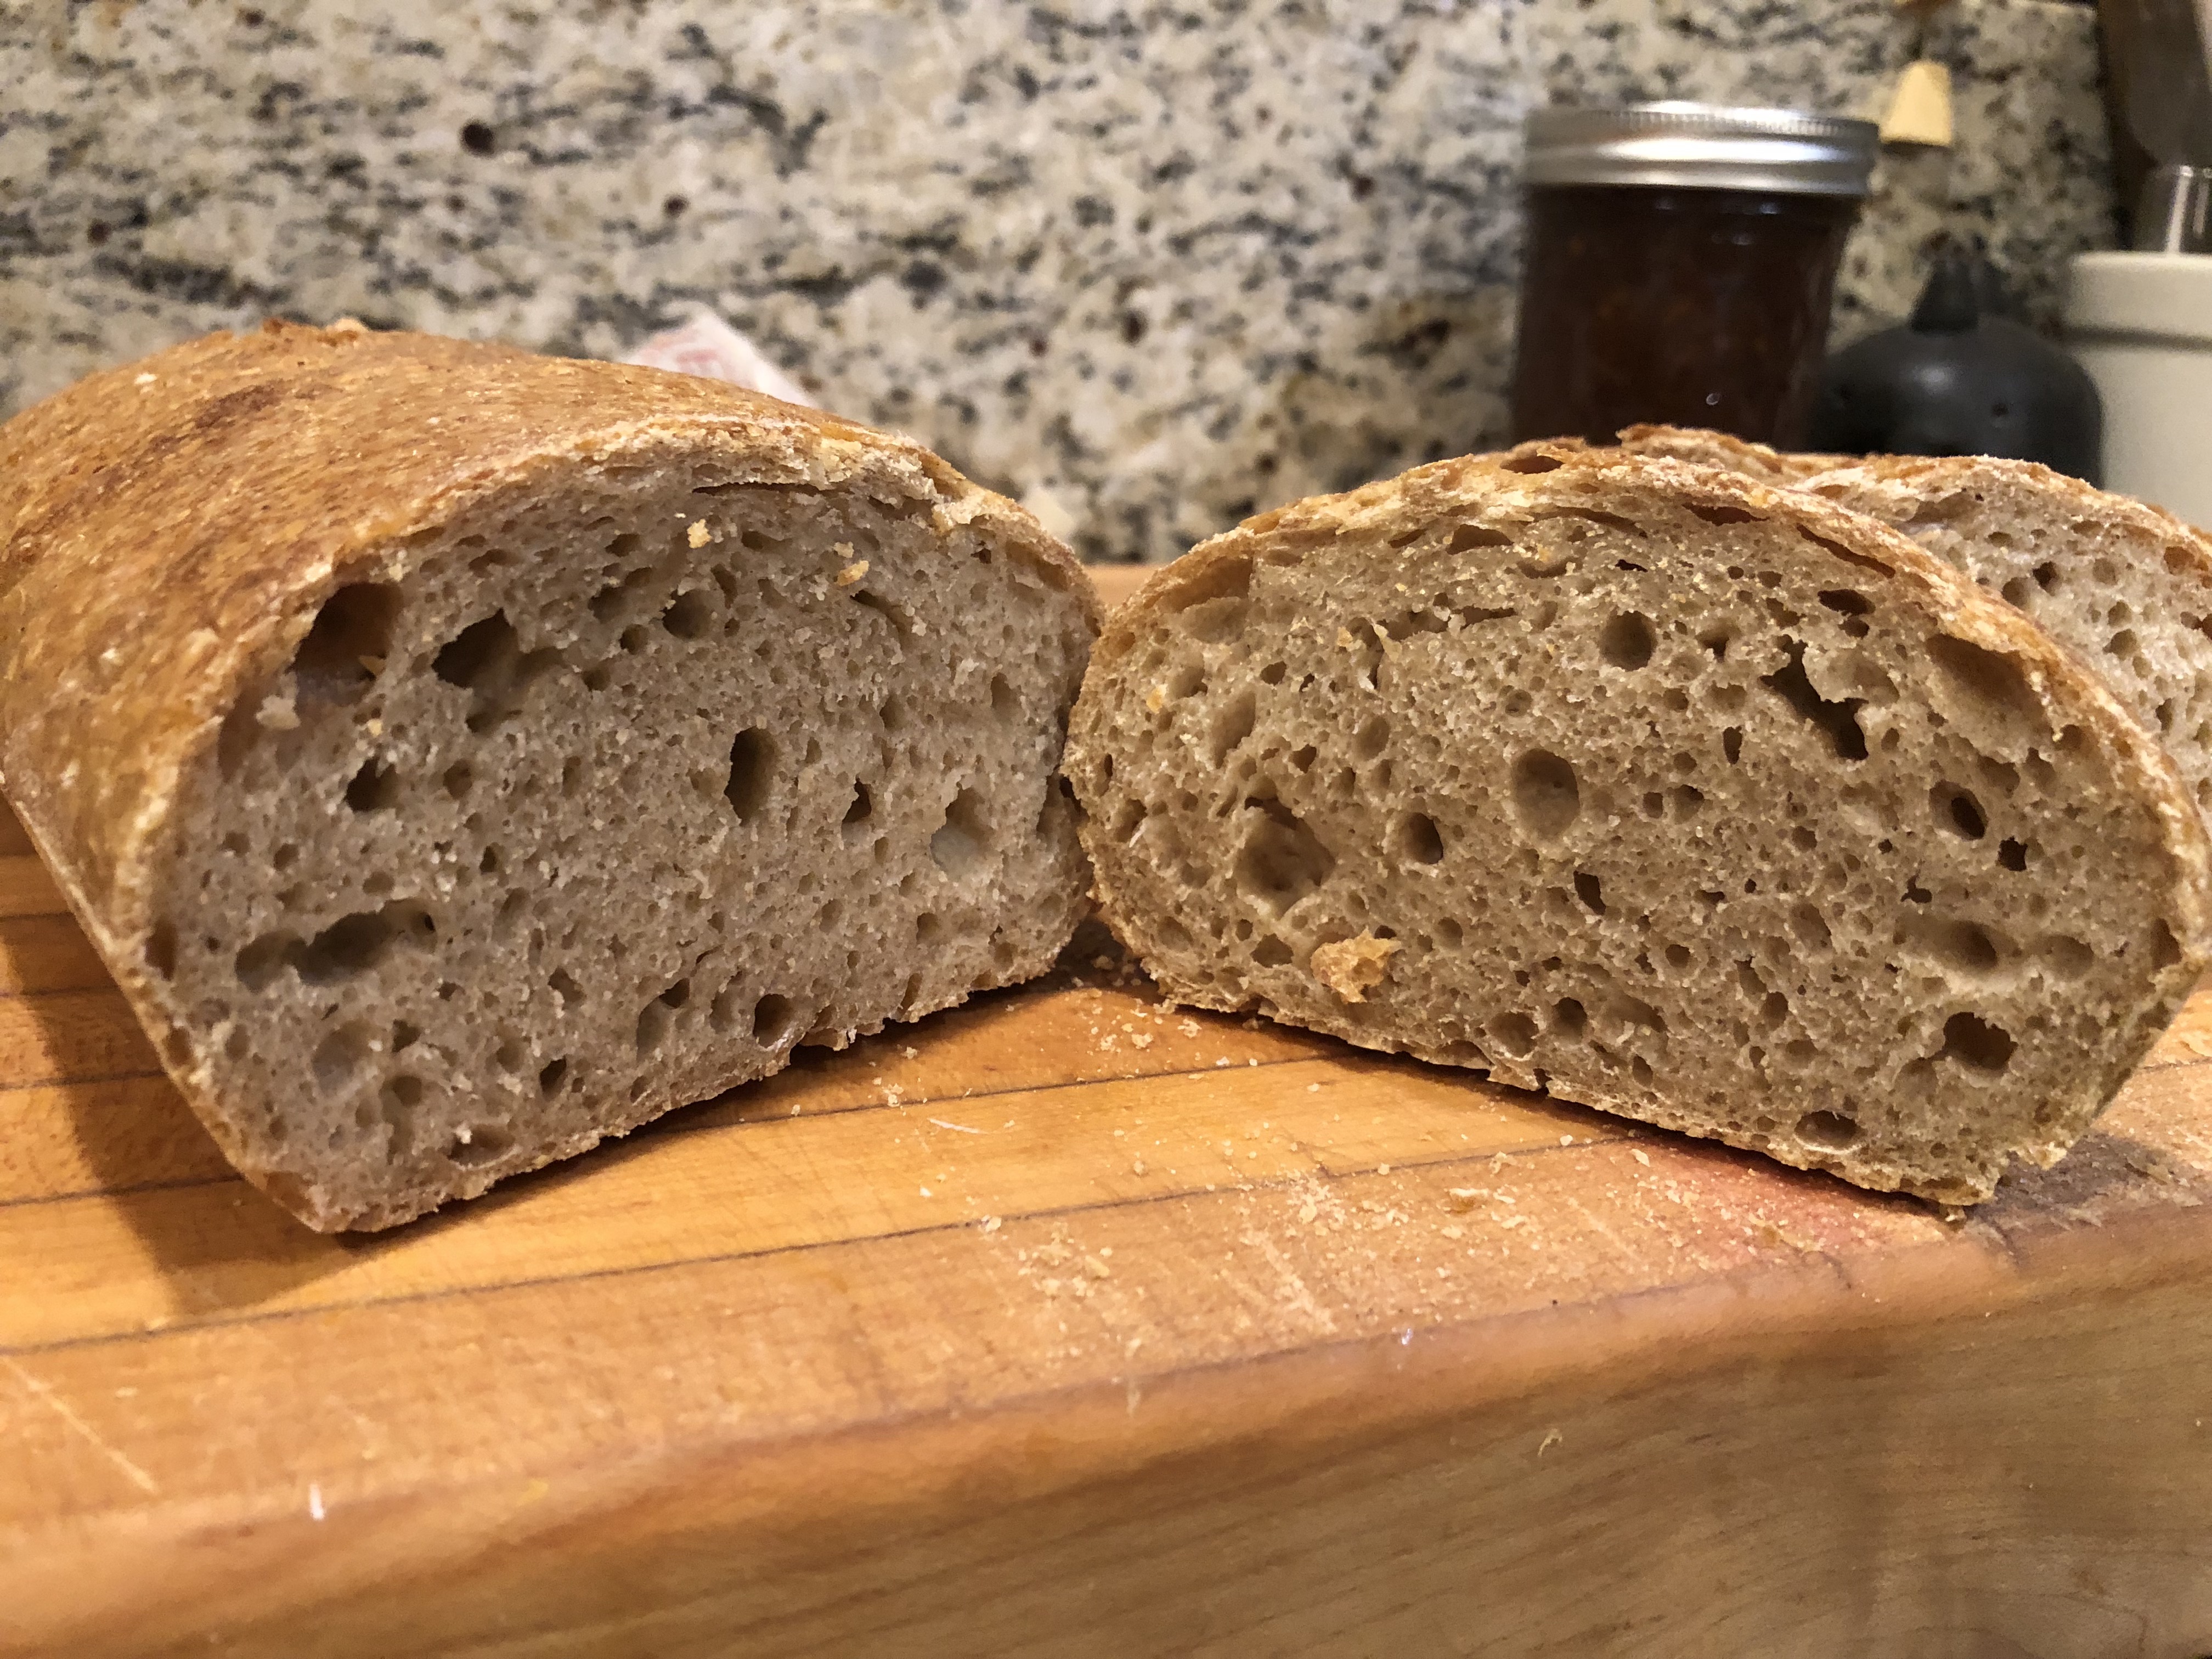
I started the month by baking bread some no-knead sourdough breads. I use Breadtopia’s method, but another very successful teaching resource is King Arthur Flour’s crusty white bread. King Arthur’s method is especially good for those of you using white flour and instant yeast. I baked several loaves over a week-long period and shared the extra loaves with a few lucky friends.

If you are interested in owning a sourdough starter, you have three options. # 1 – find a friend and ask for some of their discard. Option 2 is to purchase starter from a site like King Arthur or Breadtopia. And option 3 is to make your own starter. I personally like the directions given at Breadtopia’s site.

Once you get into sourdough, you’ll have extra starter that you’ll need to use up. Try my Classic Sourdough Waffles (or Pancakes) for a light and fluffy waffle – you mix it up the night before and then it’s pretty much ready to go in the morning. Another personal favorite recipe of mine is my Sourdough English Muffins – it is just so satisfying to make these at home. I keep them in the freezer for morning egg sandwiches.

Kombucha


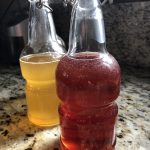
I promised myself that I would take the time this month to teach a few friends to make their own kombucha. These dear friends have been asking to take a kombucha lesson with me, but it’s been more talk than action. We changed that this month and they got started with their own home-brews.

To begin with kombucha, you need some starter liquid and a SCOBY (Symbiotic Culture of Bacteria and Yeast). If you have a friend who brews kombucha, chances are good that they will have a SCOBY that they can share with you to get started. Another way is to order one from an on-line site or to track me down for a class.

If you are looking for more kombucha information, one of my favorite sites for learning about kombucha is Kombucha Camp. I also like a book called The Big Book of Kombucha by Krum and LaGory.

Sauerkraut

Fermented foods are the best. Enough said. I’m done here.

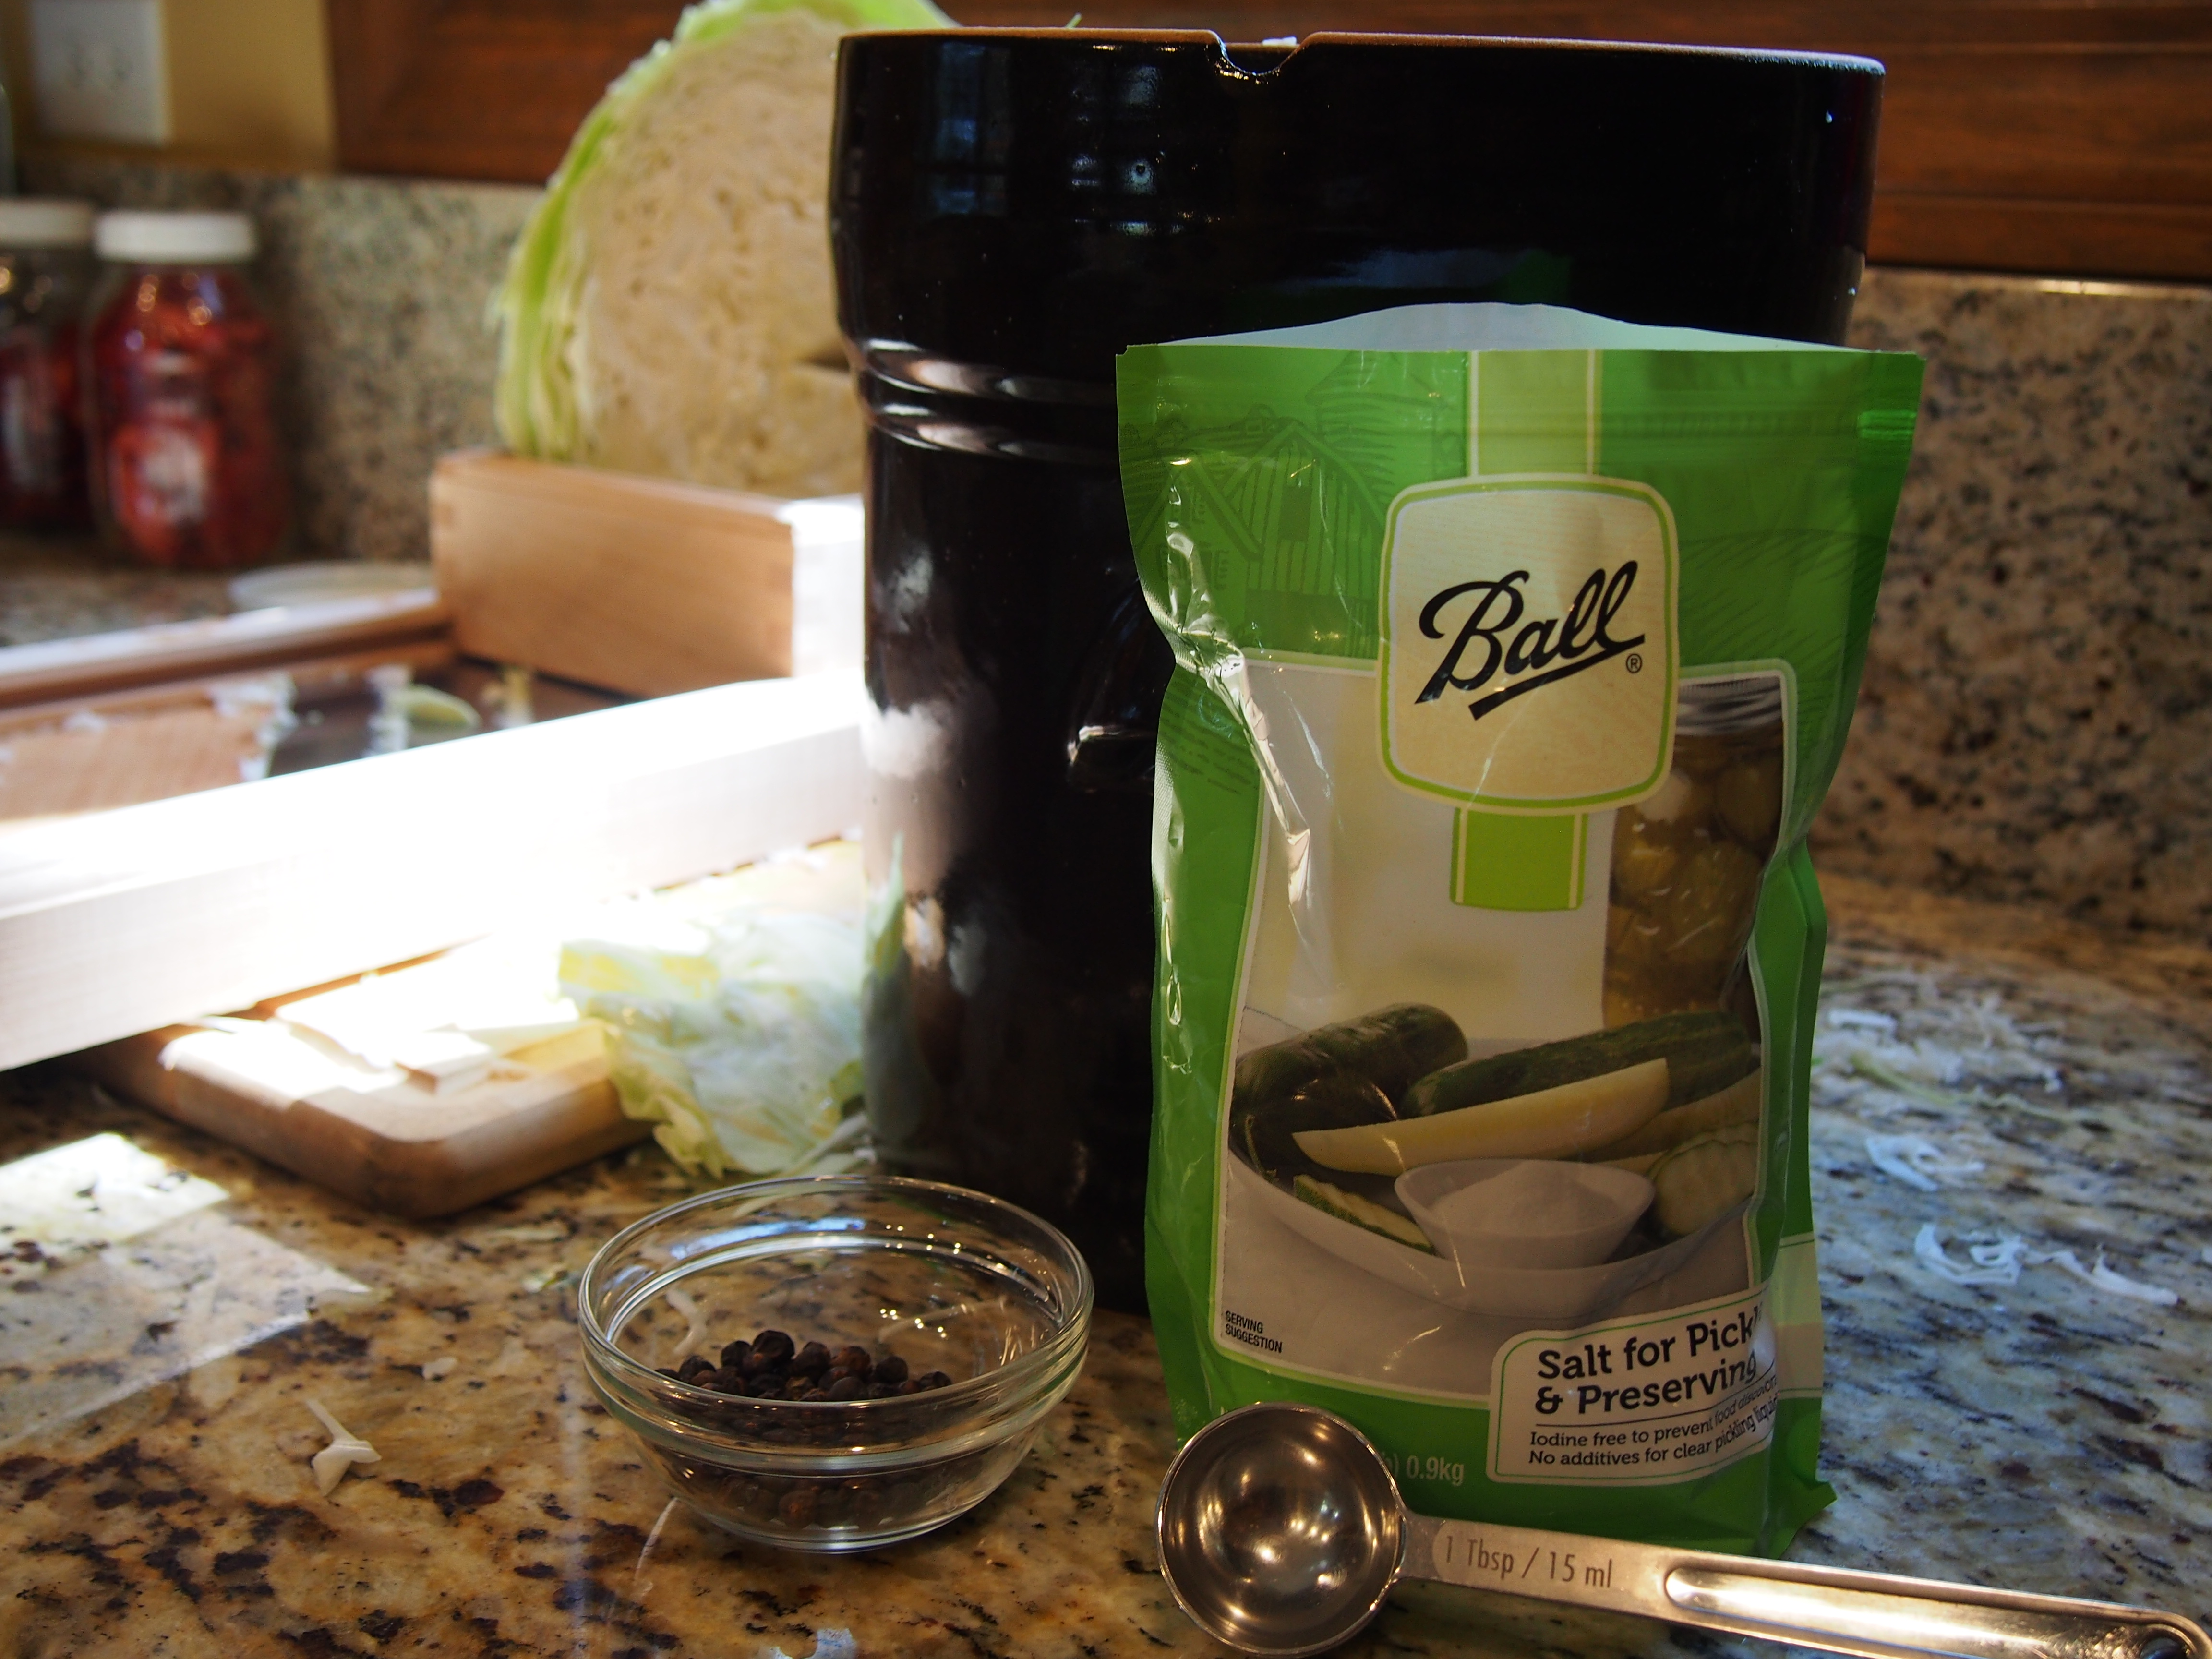
To make sauerkraut, it is as simple as slicing cabbage and adding salt. This is called “lactic-acid fermentation” in the pickling circles and is an amazing way to preserve foods – it’s tasty and healthy due to the probiotic formed as the foods ferment.

I have a bad habit of making a lot of my lacto-fermented foods such as pickles and kraut in the fall when my garden is over producing. But it is totally possibly to make these foods during other seasons. And considering the length of this winter, it may also be a good idea to be making kraut in February as it has high levels of vitamin C in addition to probiotics that help with gut health.

I like to make kraut in small batches in mason jars. Here is one of my favorite technique and recipe for a basic batch of kraut. I also like the Masontop line of small batch tools. You can find Masontop products in stores such as Big R. I also have some Masontop and Kraut Source products in my kitchen store (contact me for more info).


Filed Under: Clatter in the Kitchen Tagged With: kombucha, kraut, sauerkraut, sourdough

Apple Pork Roast

October 18, 2015 by andrea Leave a Comment

This is the perfect fall recipe – apples, sauerkraut and pork all in one pot. Plus it is a super easy recipe. Throw it in the crock pot or pressure cooker, forget about it, and it’s done in time for dinner.

This is my mom’s recipe and typical of any good recipe, it came from her head and hasn’t been written down until just now. I hope I do it justice. I was reminded of this recipe this weekend when I was teaching people how to make sauerkraut. This is a great way to use it in a cooked recipe and you’ll be surprised at how everyone loves it. Even if you don’t think you or the kids like sauerkraut, I’d recommend trying this. The apple and kraut combination give it a little sweet and sour kick.

If you have any comments on it, I’d love to hear them in the comment section.

Apple Pork Roast
Author: Andrea
Prep time: 10 mins
Total time: 10 mins
This is a favorite use of sauerkraut in our family. The apples mellow it out a bit and you’ll be surprised at how much you like sauerkraut after tasting it.
Ingredients
  • 1 pork roast, about 3 pounds
  • 2 cups of sauerkraut, drained and rinsed
  • 1 T caraway seed
  • 2 apples, cut up
  • 4-5 small potatoes, cut into 2-3 inch pieces
  • 2 T brown sugar
Instructions
  1. Crock Pot method – Place the pork roast in the bottom of your crock pot or pressure cooker. Add remaining ingredients and stir to combine. Cook in crock pot on high for 6-8 hours
  2. Pressure Cooker Method – The only difference with pressure cooking the roast is that you need to make sure you have enough liquid in the cooker. You can use the sauerkraut juice, but it may result in a very salty roast. I’d recommend adding 1 cup of light beer, or at least the minimum amount required by your cooker to reach pressure. Cook at high pressure for 40 minutes (stovetop cooker) or 55-60 minutes (electric cooker). When the cooking time is up, allow the pressure to release naturally.
3.3.3077


Filed Under: recipes Tagged With: apples, pork, pressure cooking, roast, sauerkraut

Getting Started with Sauerkraut

October 18, 2015 by andrea Leave a Comment

A Little Background

My first attempts with sauerkraut started several years ago when we started getting our fall CSA baskets from Sue & Gary Gauger at Natural Farm Stand in Richmond, IL. Our fall CSA baskets are always stuffed full to overflowing with beautiful squashes, onions, carrots, and of course – cabbages. Cabbages of every variety – red, green, Napa, Bok Choy, and Savoy. The first year of the CSA, after I tired of coleslaws, stuffed cabbage and cabbage wrapped tacos, I ended up gifting the extra cabbages to any friend who would take a cabbage. While it’s great to share the extra with friends, I really wanted to use the cabbages myself. So, the second year that we got the CSA, I was prepared for the cabbages and had researched making sauerkraut.

I have a German heritage and have memories of sauerkraut on my grandparent’s table, but I had never actually seen or participated in the process of making kraut. And sadly, my grandparents weren’t around any longer to teach me the tricks of kraut. All I knew was that kraut from the grocery store doesn’t taste anything like the real stuff -not even the packages in the refrigerated section.

So, I did a little research on the internet and found some good cookbook references and I that next year I started a couple batches in half gallon Ball jars in my garage. Unfortunately, I was too scared to actually eat the first couple of batches of homemade kraut. The fermenting process was too different, and I honestly didn’t know whether I was doing things correctly. Over time, I’ve done more research and slowly gained confidence in home fermenting. The resulting kraut has been worth the learning experience.

Maybe you have been to my kitchen to learn how to make sauerkraut and maybe this is your first time attempting to make sauerkraut with your extra CSA cabbages. I hope this post will help you get started with home ferments and inspire you to  try some new things in your kitchen.

Things You’ll Need

The only things you’ll need to get started are:

  1. Cabbage – any kind is fine. Fresher is better, because it will have more moisture in it if it’s been picked recently. It’s great if you can get it at the farmer’s market or stand. But cabbage from the grocery store is fine also. Once it is shredded and packed, the cabbage really reduces in size, so don’t be afraid to pick out a really big head of cabbage or use several smaller ones.
  2. Salt – any sort of salt if fine as long as it has no additives – no anti-caking agents. I use either Real Salt or Ball’s canning/pickling salt.
  3. A container to hold your kraut – to get started, you can use a half gallon or larger glass jar. A half gallon jar will hold about a 3 pound head of cabbage. If you can find a small food grade bucket, they work great also. There is no need to invest in a crock or special equipment.
  4. Optional ingredients – you can add spices or veggies to your kraut. Some popular spices include caraway, juniper berries, bay leaves, or hot pepper flakes. Veggies can include carrots, onions, hot peppers, or even apples for a sweeter kraut.
Kraut Ingredients

Kraut Ingredients

Steps to Making Sauerkraut

1. The first step in making kraut is to clean the cabbage. Usually removing the outer layers of leaves is enough to clean it. Wash it also, if necessary. Next cut the cabbage in half down the core and cut out the core of the cabbage.

Cored Cabbage, ready for slicing

Cored Cabbage, ready for slicing

2. The next step is to shred the cabbage. You can slice it with a knife into thin strips (about the thickness of a quarter). This method works well if-especially, if you are only doing a couple of heads of cabbage. I usually do a big batch of kraut when I make it, so I use a kraut board to slice my cabbage. The kraut board allows you to slice the cabbage quickly into very thin, even slices. If you decide to use a kraut board, be sure to wear knife gloves to protect your fingers from the sharp blades – honestly, this isn’t a bad idea even when you are using a knife.


3. After you have one head of cabbage shredded, put it into a big bowl or directly into your fermentation vessel, if it is a larger vessel. Add one tablespoon of salt for each small head of cabbage, or 3 T of salt per 5 pounds of cabbage. Also add any extra spices that you are using. I usually add about 1 teaspoon of caraway seeds or juniper seeds per small head of cabbage or 1T per 5 pounds of cabbage. Mix in the salt and spices using your hands and massage the cabbage a little. Now let the cabbage rest for 10-15 minutes. If you are doing more heads of cabbage, the resting time basically happens while you shred the next head. Now pack the cabbage into your vessel. If your cabbage is very fresh, you will probably already notice water starting to be pulled out of the cabbage and pooling in the bottom of your bowl. When you pack the cabbage, push it down hard to make sure it is really packed in. You can use a special kraut pounder, but I usually use a potato masher or my fist. You want to submerge the cabbage under the brine. If you don’t have enough brine to submerge the cabbage, check it again the next day. If you still don’t have enough brine, then you should add brine to cover the cabbage. You can make your own brine by dissolving 1 1/2  tablespoon of salt into four cups of water.

4. Now weight down your cabbage to help keep it under the brine. When I’m using a glass jar, I fill a plastic bag with brine and use that to keep the cabbage submerged. When I’m using a plastic bucket, I put a small plate over the top of the cabbage and weight it down with a clean rock or another jar filled with brine. Cover the container with a towel or other cloth.

Sauerkraut submerged in brine

Sauerkraut submerged in brine

6. If you’d like to make wine kraut – add 1/2 cup of dry white wine per 5 pounds cabbage to your container on the second day.

5. After 24 hours, remember to check to make sure that the cabbage is covered with brine. If not, add brine to cover the cabbage (see step 3). Check the sauerkraut every couple of days to see if scum is forming on the top of sauerkraut. If you find scum, scrap it off daily and wash the plate and weights. If you want to avoid scum on your kraut, you can use an airlock on your jar. Airlocks are used in beer brewing and can be found at beer brewing supply stores. They really aren’t necessary for sauerkraut, but if the fear of a little scum or mold on your ferments is stopping you from trying home ferments, then it may be worth trying.

6. Store the sauerkraut container somewhere with a consistent temperature. 60 degrees is near perfect, but higher will work also. The time it takes to mature will depend on the fermenting temperature. Start tasting the kraut after about 2 weeks. If it ferments at 70-75 degrees, it will probably be ready at 2-3 weeks. If it ferments at 60-65 degrees, it may take 5-6 weeks to be ready. The final product will be pale golden in color and have a tart, crisp flavor. You can also tell if it is ready by looking for gas bubbles being released from the sauerkraut – once the bubble stop, you know it is done fermenting. But you should really just go by taste, when it tastes good to you, then call it done. I usually end mine at about three weeks when it is fermented in my 68 degree basement.

7. When the sauerkraut is ready, you can store it, tightly covered in the fridge. I’ve kept it in my fridge for several months this way. You can also freeze it in plastic bags, which may preserve the Vitamin C better than canning, and it doesn’t hurt the texture too much. You can and should eat you kraut raw – it is perfect on sausages and pork chops. I also love it cooked with a pork roast or in a sausage soup.

8. If you want to can the sauerkraut, pack it and its juice into pint or quart jars. Leave 1/2 inch headspace and waterbath can for 20 minutes (pints) or 25 minutes (quarts). This storage method does not preserve the good probiotics of your kraut, but it saves on fridge space. Store the jars in a cool, dry, dark place.

Some additional resources

If you want to do more reading on fermentation, here are some of my favorite resources.

The Joy of Pickling by Linda Ziedrich, www.agardnerstable.com

The Art of Fermentation by Sandor Ellix Katz, www.wildfermentation.com

Mountain Feed & Farm Supply, www.mountainfeed.com


Filed Under: Clatter in the Kitchen Tagged With: cabbage, fermentation, sauerkraut

Posts

  • Clatter in the Kitchen
  • recipes
  • Uncategorized

Recent Comments

  • andrea on Whole Wheat Bread (small batch)
  • andrea on Sourdough Beer Pizza Crust
  • andrea on Recipe for Holiday Jam
  • andrea on (Sourdough Optional) Carrot Muffins
  • andrea on Lentil and Ham Bone Soup

Recent Comments

  • andrea on Whole Wheat Bread (small batch)
  • andrea on Sourdough Beer Pizza Crust
  • andrea on Recipe for Holiday Jam
  • andrea on (Sourdough Optional) Carrot Muffins
  • andrea on Lentil and Ham Bone Soup

Posts

  • Clatter in the Kitchen
  • recipes
  • Uncategorized
  • Facebook

Copyright © 2025 · Foodie Child Theme by Shay Bocks · Built on the Genesis Framework · Powered by WordPress